ZZZUXVWLFDFRP
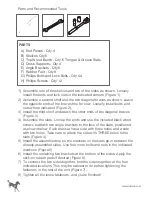
PARTS
A)
End Pieces - Qty
4
B)
Shelves Qty
6
C)
Top Wood Bench - Qty
6
Tongue & Groove Slats
D)
Cross Supports - Qty
4
E)
Angle Brackets - Qty
8
F)
Rubber Feet - Qty
8
G)
Philips
Bolts
and Lock Bolts - Qty
44
H)
Philips Screws
- Qty 12
3DUWVDQG5HFRPPHQGHG7RROV
1)
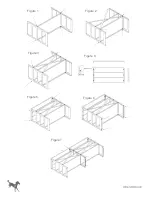
Assemble one of the shelves and two of the sides as shown. Loosely
install the bolts and lock nuts in the indicated corners
(
Figure 1)
.
2)
Assemble a second shelf and the two diagonal braces as shown.
Leave
the opposite ends of the braces free for now. Loosely install
bolts and
nuts where indicated
(Figure 2).
3)
Install the third shelf and attach the other ends of the diagonal braces
(Figure 3)
.
4)
Assemble the slats. Line up the ends and use the included black
wood
screws to attach two angle brackets to the face of the slats,
positioned
as shown below. Each bracket has a side with three holes
and a side
with two holes. Take care to attach the side with THREE
holes to the
slats
(Figure 4).
5)
Install the assembled top so the brackets on the slats go in between
the
already assembled sides. Use four more bolts and nuts in the
indicated
locations
(Figure 5)
6)
Install the remaining two brackets at the bottom of the sides. Apply
the
stick-on rubber pads if desired
(Figure 6).
7)
To connect the two sides together, bolt the sides together at the four
indicated locations. This may be easiest to do before tightening the
fasteners in the rest of the unit
(Figure 7).
8)
Tighten all the loose fasteners, and you're finished!


