R H
• • • • • • • • • • • • • • • • • • • • • • • • • • • • • • • • • • • • • • • • •
I N S T A L L A T I O N I N S T R U C T I O N S
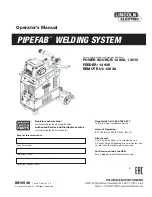
1. Installing Your Door Guide
• Slide the Door into the
open position exposing
the other edge of the
Door Guide.
• Using a drill with a Phillips
bit, install a second 1”
Grabber Screw.
• Use your level to plumb* your Door.
• With the Door in the closed
position, place the Door Guide half
way into the Door mortise (the
groove that runs along the bottom
of a wood Door).
• Double check that your Door is
plumb.*
• Hold the Door Guide firmly in
position. Using a drill with a Phillips
bit, install a 1” Grabber Screw to
secure your Door Guide to the floor.
_____________________
*Plumb - perfectly vertical.
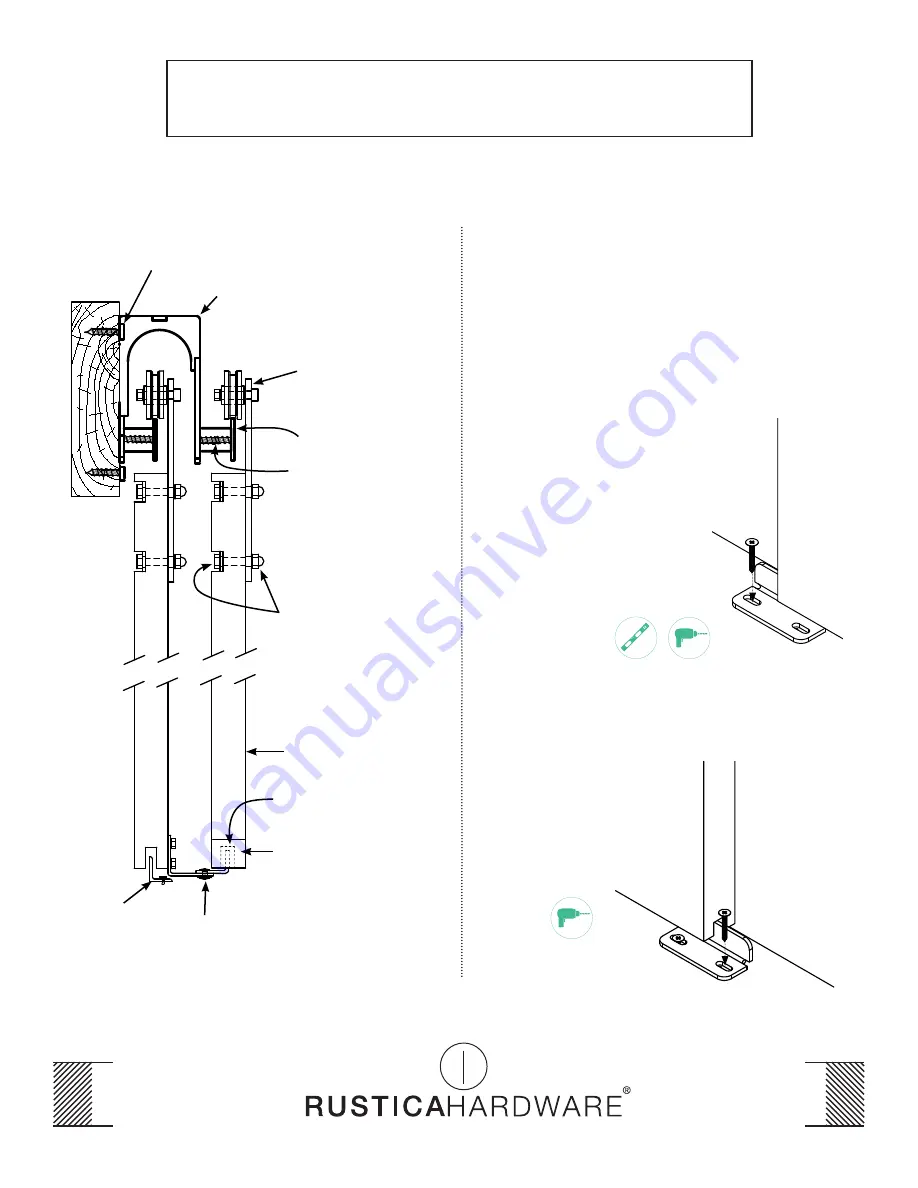
With a Bypass Track System, either a Wall-Mount or a Floor-Mount
Door Guide can be installed on the back Door (the one that is
closest to the wall). An additional Wall-Mount Door Guide can be
installed onto the front of the back door, connecting to the front
Door and acting as a Come Along Guide, see page 11.
Header
Lag Screw
Bypass Bracket
Hanger Assembly
(will vary according
to individual order)
Countersunk Bolt
Door
Door
Guide
Optional Come Along Guide
End Plates
(used to cover
the mortise)
Mortised Groove
Track
Door Section
Header
Lag Bolt
Installing Door Guide
Page 10


