R H
• • • • • • • • • • • • • • • • • • • • • • • • • • • • • • • • • • • • • • • • •
I N S T A L L A T I O N I N S T R U C T I O N S
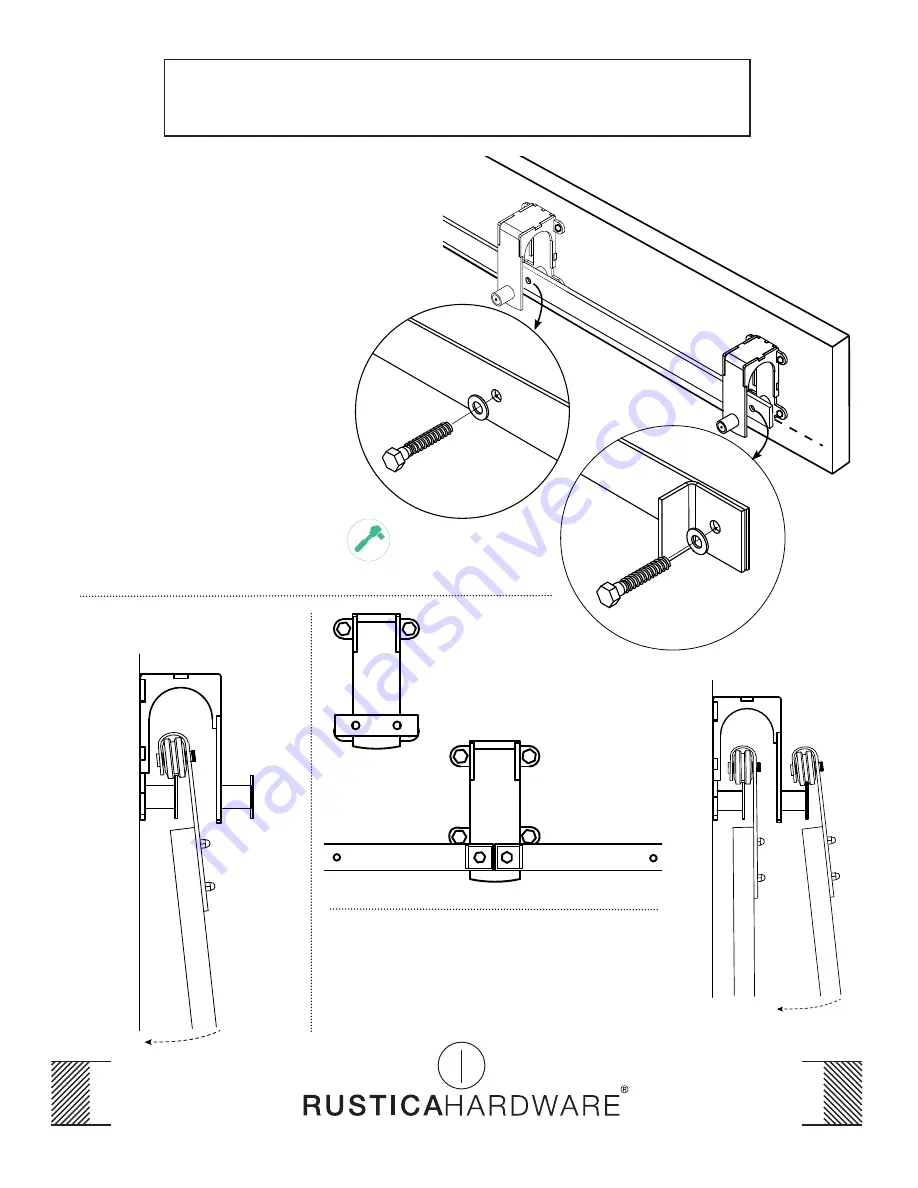
1. Installing Rear Track
Outside (End) Holes
• The outside holes will be installed with a Door Stop.
Install the first outside hole in this order: Track,
Door Stop, Washer, and Lag Bolt.
• Using a ratchet with a 5/8” socket, tighten the
Lag Bolt
most of the way, enough to hold the Track
in place, but allowing the Track to move.
• Swing the other end of your Track up with the end
hole. Install the other end hole as in Step 1.
Inside Holes
• The hardware for the inside holes will be
installed in this order: Track, Washer and
Lag Bolt.
• Using a ratchet with a 5/8” socket, tighten
the Lag Bolt most of the way.
• Install remaining inside holes in the same
order.
• When all holes are installed, go back with a
ratchet with a 5/8” socket and fully tighten,
being careful not to over-tighten to avoid
stripping the header or wall studs.
2. Hanging Your Back Door(s)
Installing Tracks
If more that one length of
Track is being used for longer
installation applications, use
the Bypass Splice Plate Bracket
to join the Tracks together, as
shown here.
Bypass Splice
Plate Bracket
3. Installing Front Track and Door(s)
• Install the Front Track the same way
you installed the Rear Track. Hang
your front door(s) on your front Track.
Page 9


