27
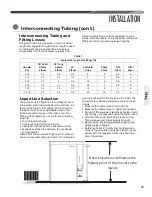
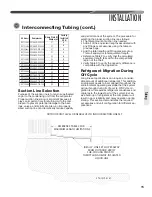
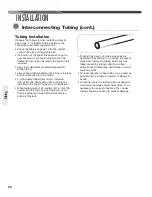
Tubing
• If tubing is to be run underground, it must be run
in a sealed watertight chase.
• Use care in routing tubing and do not kink or
twist. Use a good tubing bender on the vapor
line to prevent kinking.
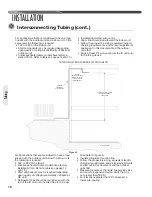
• Route the tubing using temporary hangers; then
straighten the tubing and install permanent
hangers. Line must be adequately supported.
• If the vapor line comes in contact with inside
walls, ceiling, or flooring, the vibration of the
vapor line in the heating mode will result in noise
inside the structure.
• Blow out the liquid and vapor lines with dry
nitrogen before connecting to the outdoor unit
and indoor coil. Any debris in the line set will end
up plugging the expansion device.
Tubing Connections
Indoor coils have only a holding charge of
dry nitrogen. Keep all tube ends sealed until
connections are to be made.
• Use type “L” copper refrigeration tubing. Braze
the connections with the following alloys:
– copper to copper, 5% silver minimum
– copper to steel or brass, 15% silver minimum
• Be certain both refrigerant shutoff valves at the
outdoor unit are closed.
• Remove the caps and Schrader cores from the
pressure ports to protect seals from heat damage.
Both the Schrader valves and the service valves
have seals that may be damaged by excessive heat.
• Clean the inside of the fittings and outside of the
tubing with a clean, dry cloth before soldering.
Clean out debris, chips, dirt, etc., that enters tubing
or service valve connections.
• Wrap valves with a wet rag or thermal barrier
compound before applying heat.
INSTALLATION
Interconnecting Tubing (cont.)
TEMPORARY
HANGER
PERMANENT
HANGER
ST-A1226-05-00
Summary of Contents for RP13
Page 50: ...50 FOR SINGLE PHASE WITH PSC FAN MOTORS WIRING DIAGRAMS Wiring Diagrams...
Page 51: ...51 Wiring Diagrams WIRING DIAGRAMS 3 PHASE 208 230V MODELS...
Page 52: ...52 Wiring Diagrams WIRING DIAGRAMS FOR 3 PHASE 460 575V...
Page 54: ...54...
Page 55: ...55...
Page 56: ...56 CM 0815...

