37
High- and Low-Pressure Controls (HPC and LPC)
Standard on RP14: These controls keep the
compressor from operating in pressure ranges
which can cause damage to the compressor. Both
controls are in the low-voltage control circuit.
The high-pressure control (HPC) is an automatic-
reset which opens near 610 PSIG and closes near
420 PSIG.
The low-pressure control (LPC) is an automatic-
reset which opens near 15 PSIG and closes near
40 PSIG.
CAUTION:
The compressor has
an internal overload protector. Under some
conditions, it can take up to 2 hours for this
overload to reset. Make sure overload has had
time to reset before condemning the compressor.
Components
Demand Defrost Control (cont.)
The demand defrost control monitors the outdoor
ambient temperature, outdoor coil temperature
and the compressor run time to determine when a
defrost cycle is required.
Enhanced Feature Demand Defrost Control
This defrost control has high and low pressure
control inputs with unique pressure switch
logic built into the microprocessor to provide
compressor and system protection without
nuisance lockouts. The control cycles the
compressor off for 30 seconds at the beginning
and the end of the defrost cycle to eliminate the
increased compressor noise caused by rapidly
changing system pressures when the reversing
valve switches. See next page for diagnostic flash
codes and sensor resistance values at various
temperatures.
Defrost Initiation
A defrost will be initiated when the three
conditions below are satisfied:
1. The outdoor coil temperature is below 35°F as
measured by a good coil sensor,
2. The compressor has operated for at least 34
minutes with the outdoor coil temperature below
35°F and
3. The measured difference between the ambient
temperature and the outdoor coil temperature
is greater than the calculated difference
determined by the microprocessor.
Defrost Termination
Once a defrost is initiated, the defrost will continue
until fourteen minutes has elapsed or the coil
temperature has reached the selected termination
temperature. The factory setting is 70°F but can
be changed to 50°F, 60°F or 80°F by relocating the
jumper on the control board.
Temperature Sensors
The coil sensor is located on the outdoor coil
at the point fed by the distribution tubes from
the expansion device (short 3/8” dia. Tube). The
ambient air sensor is located outside the control
box so it can sense outdoor temperatures.
If the ambient sensor fails, the defrost control will
initiate a defrost every 34 minutes of compressor
run time with the coil temperature below 35°F.
If the coil sensor fails, the defrost control will not
initiate a defrost.
Test Mode
The test mode is initiated by shorting the TEST
pins. The unit must have an active heat pump
heating call to enter the test mode. In this mode
of operation, the enable temperature is ignored
and all timers are sped up. To initiate a manual
defrost, short and hold the TEST pins. Remove the
short when the system switches to defrost mode
after the compressor noise abatement delay. The
defrost will terminate on time (14 minutes) or when
the termination temperature has been reached.
Test Sequence of Operation:
1) Provide a heating call to the heat pump.
2) Short test pins to bypass anti-short cycle timer.
(If unit is running, this step is not necessary.)
3) Short test pins and hold them shorted to enter
defrost mode.
4) Release test pins once control exits noise
abatement delay.
5) Monitor coil temperature when control exits
defrost.
6) Unit should return to heating mode.
Trouble Shooting Demand Defrost
During the test mode the coil temperature should
be monitored. If the system exits defrost at
approximately the termination temperature, the
control is operating normally.
If not, one item to check is the coil and ambient
temperature sensor resistance, using the
temperature/resistance chart.
Immerse the sensor in water and measure the
resistance of the sensor. At 35°F the resistance of
the sensor should be approximately 30,000 ohms.
Ensure that the coil sensor is properly installed
that it is not loose or touching the cabinet.
COMPONENTS AND CONTROLS
Summary of Contents for RP13
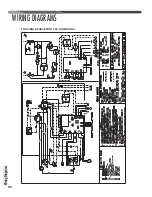
Page 50: ...50 FOR SINGLE PHASE WITH PSC FAN MOTORS WIRING DIAGRAMS Wiring Diagrams...
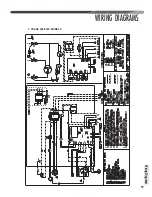
Page 51: ...51 Wiring Diagrams WIRING DIAGRAMS 3 PHASE 208 230V MODELS...
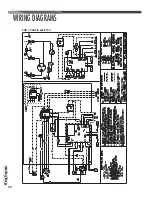
Page 52: ...52 Wiring Diagrams WIRING DIAGRAMS FOR 3 PHASE 460 575V...
Page 54: ...54...
Page 55: ...55...
Page 56: ...56 CM 0815...


