®
RVA5006
®
RUVATI USA
www.ruvati.com
Printed in USA
Page 3
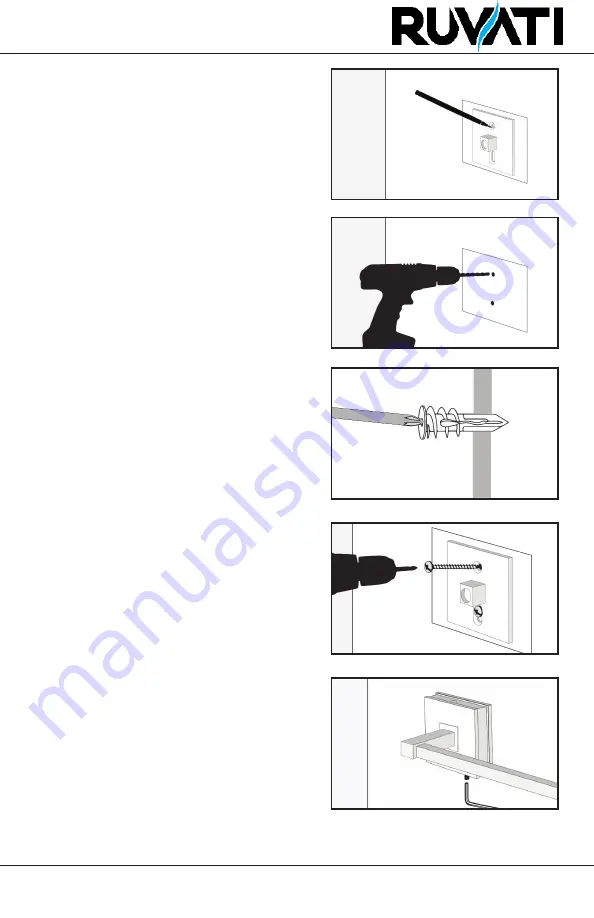
3. Position MOUNTING BRACKET in the cen-
ter of outlined back plate. Use a pencil to
mark positioning of the screw holes. (Fig. 3)
4. Drill 3/16 in. pilot holes into the wall
where the DRYWALL ANCHORS will be in-
serted. (Fig 4)
5. For installation on drywall: Push tip of
DRYWALL ANCHOR firmly into the pilot hole
you just drilled. Drive anchor clockwise into
the drywall using #2 Phillips screwdriver
or screw gun until anchor stops flush with
the outer wall surface (Fig. 5). NOTE: Do not
overtighten Drywall Anchor. If using screw
gun, stop slightly before Anchor is fully
in, and then tighten the last bit with hand
screwdriver until anchor is perfectly flush
with wall.
For installation on tiled walls: Use TILE AN-
CHOR and SCREWS for securing MOUNT-
ING BRACKETS to wall. Instead of the 3/16”
pilot holes in Step 3, drill two 1/4” diameter
holes a minimum of 1-1/4” deep. Insert the
two TILE ANCHORS flush with face of the fin-
ished wall.
6. Place the MOUNTING BRACKET over the
DRYWALL ANCHORS. Insert MOUNTING
SCREWS through the bracket and anchors,
and then tighten firmly with Philips head
screwdriver. (Fig. 6)
7. Place TOWEL BAR on top of MOUNTING
BRACKET, and secure it with Allen wrench
and SET SCREW. (Fig. 7)
8. Repeat steps 3-6 for the second MOUNT-
ING BRACKET. Then insert tubing to the oth-
er end piece and secure into place with SET
SCREW and Allen wrench.
Figure 5
Figure 6
Figure 7
Figure 3
Figure 4


