U. Inspect machine cord periodically. If damaged, repair at once.
V. Keep hands, dry, clean and free from oil and grease.
W. Stay alert. Watch what you are doing and use common sense. Do not operate machine
when you are tired.
X. Do not use machine if switch does not turn the machine ON or OFF.
Y. Drugs, Alcohol, Medication. Do not operate machine while under the influence of drugs,
alcohol, or medication.
Z. The operation of any key machine can result in foreign objects being thrown into the
eyes, which can result in severe eye damage. Always wear safety glasses or eye shields
before commencing key machine operation. We recommend wide vision safety mask for
use over spectacles or standard safety glasses.
4.
MOUNTING
THE
MACHINE
Mounting the machine. Drill two oversized ½” holes in your bench top to mount your
machine. Use ½”-13 bolts from your local hardware store. Carefully turn the machine up-
side-down and measure the spacing of the two tapped holes on the bottom of your machine
(be careful not to set the machine on the power switch). Turn the machine right-side-up
and place the machine where you want it on your work bench. Mark the bench and drill
your holes.
5.
CUTTING STANDARD KEYS
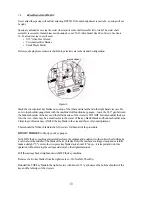
A) Most key clamping requirements use the standard top jaw configuration. The top
jaw
can be shimmed with .040" drill rod (included)—to make deeper cuts in small
keys. Narrow groove style top and bottom vise jaws are possible by reversing the
entire carriage.
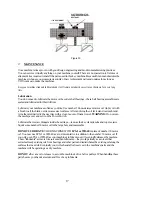
B) Keys are always gauged with the full-function flip-up key gauges. We do not
recommend bottom shoulder gauging because key blank manufacturers do not
always maintain a reliable correlation between bottom and top shoulder positions on
the key blanks they make.
C) Always remember to flip away your key gauges before cutting a key.
D) Always cut keys from
Bow to Tip.
NEVER MAKE YOUR FIRST CUT
FROM TIP-TO-BOW.
The RY45 is specifically designed to cut most cylinder keys and U.S. and Foreign
automotive keys. The key will be cut properly starting at the Bow and ending at the
Tip of the key. It is O.K. to make a "clean-up" cut back to the bow of the key ONLY
after the
key has already been cut.
NOTE: If an excessive amount of key blank material is removed on the clean-up cut (second cut) your cutter
may need replacing or sharpening.
6.
CUTTING
DEEP
CUTS IN SMALL KEYS
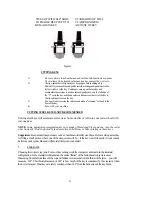
A) Most key clamping requirements use the standard top jaw configuration. If you
are making deep cuts in small keys you may have to use .040" drill rod shims in
the vises. You must use them in both left and right vise jaws.
Make sure you only open the vise jaws just enough to slide the key in—
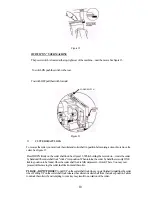
opening too wide may allow the key to sit on top of the shim. See illustration
figure 1.
3


