33
OPERATION
Use the high suction speed in cases of concentrated kitchen vapours. It is recommended that the cooker hood suction is
switched on for 5 minutes prior to cooking and to leave in operation during cooking and for another 15 minutes approximately
after terminating cooking.
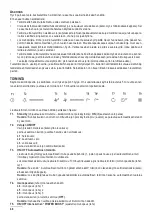
To select the functions of the hood, simply touch the controls.
T1. Standby mode
(the control panel off all functions disabled) /
ON
(control panel switched on)
Note:
After about a minute of inactivity (suction and lights), the hood will automatically switch to standby.
T2. ON/OFF lights
On certain models only
(see drawing above):
press repeatedly to select the desired light intensity:
L1:
low light
L2:
medium light
L3:
high light
Press again to turn off the lights.
T3. ON/OFF Automatic operation
The hood automatically sets the suction speed (power) 1 to increase if the environmental conditions detected by the
hood sensor require it.
If there are no variations in the environmental conditions, after 10 minutes (if the hood is already in suction speed
(power) 1), the hood turns off.
Note:
for a correct use of this function, first perform the “Setting of the parameters for Automatic Operation” (see
corresponding paragraph).
Note:
During automatic operation, if the user acts on the other functions that adjust the speed, auto ventilation func
-
tion is switched off.
T4. Manual selection of the suction speed (power):
L4:
suction speed (power) 1
L5:
suction speed (power) 2
L6:
suction speed (power) 3
Press again to turn off the hood (OFF).
Note:
manual selection excludes any other suction related set function.
T5. ON/OFF Intensive suction speed
(power)
„POWER BOOST”
(timed)
Note:
After 5 minutes of operation the hood returns to its previous state.
T6*. (Only certain models ON/OFF intensive suction speed
(power)
„POWER BOOST x 2”
(timed)
Note:
After 5 minutes of operation, the hood goes back to the previous status.
T7. ON/OFF
operation mode
“Air refresh”
Every 50 minutes of inactivity, the suction speed (power 1 is turned on for 10 minutes.
T8. ON/OFF Delayed switch off of the suction speed
(power) (approx. 30 minutes
Note:
this function is available for the speeds that can be selected with button
T4
.
T9. Indicator and reset filter saturation
The button lights on automatically with steady light when it is necessary to perform the grease filter maintenance. The
button lights on automatically with flashing light when it is necessary to perform the charcoal filter maintenance.
After performing the maintenance, with the hood off and the button active, press the button for more than 3 seconds
to perform the reset of the filter saturation indicator; repeat the operation if necessary (for ex., when both filters are
Summary of Contents for Gorenje S3 WHT641ST
Page 1: ...S3 WHT641ST S3 WHT961STX S3 WHT941ST...
Page 2: ......
Page 6: ...a b 13 17 15 14 18 16...
Page 7: ...1 4 19 21 20 22...
Page 8: ...8 BG 2012 19 Waste Electric l and Electronic Equipment WEEE...
Page 10: ...10 50cm 65cm G G...
Page 12: ...12 ON OFF T8 T9 3 T9 5 T9 5 ON OFF T3 3 T3 5 T3 5...
Page 13: ...13 10 90...
Page 56: ...56 GR...
Page 58: ...58 90 50 65 III...
Page 59: ...59 5 15 T1 Stand by ON stand by T2 ON OFF L1 L2 L3 T3 ON OFF 1 10 1 T4 L4 1 L5 2 L6 3 OFF...
Page 61: ...61 LED LED 10 90...
Page 77: ...77 KK...
Page 79: ...79 90 50cm 65cm 3...
Page 80: ...80 5 15 T1 T2 L1 L2 L3 T3 1 10 1 T4 L4 1 L5 2 L6 3 OFF...
Page 82: ...82 4 10 90...
Page 93: ...93 MK 2012 19 EC Waste Electrical and Electronic Equipment WEEE...
Page 95: ...95 50cm 65cm III...
Page 97: ...97 ON OFF T8 T9 3 T9 5 T9 5 ON OFF T3 5 1 T3 5 T3 5 4 LED LED 10 90...
Page 123: ...123 RU 2012 19 EC WEEE...
Page 125: ...125 50cm 65cm 3...
Page 127: ...127 3 T8 T9 3 T9 5 T9 5 T3 3 1 T3 5 T3 5 4...
Page 128: ...128 LED 10 90 720 16 06 97 10...
Page 159: ...159 UK 2012 19 EC WEEE...
Page 161: ...161 50cm 65cm III...
Page 163: ...163 T8 T9 3 T9 5 T9 5 T3 3 1 T3 5 T3 5 i LED 10 90...
Page 164: ...164...
Page 165: ...165...
Page 166: ...166...
Page 167: ...167...
Page 168: ...168...
Page 169: ...169...
Page 170: ...HE 170 HE...
Page 171: ...171...
Page 173: ...173 01 01 01 50...
Page 174: ...174 0 00 T1 0...
Page 175: ...175 T2 L1 L2 L3 T3 0 0 T4 L4 0 L5 2 L6 3 T5 power Boost 0 T6 Power Boost 2 0 T7 Air Fresh...
Page 176: ...176 01 0 01 T8 31 T4 T9 3 T8 T9 3 T9 0 T9 0 hood calibration Hood calibration T3 3 0 T3 0 t3 0...
Page 177: ...177 4 LED LED 01 01...
Page 178: ......
Page 179: ......
Page 180: ......


