G
Mounting and Installation
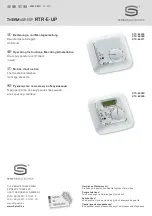
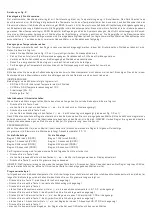
Electronic temperature controller with time control – for in-wall installation
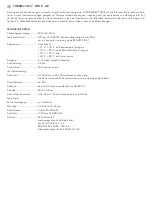
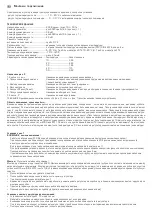
Floor temperature controller ..................... 10 ... 60 °C, with wire sensor
Room temperature controller .................... 5 ... 30 °C, with integrated room sensor
TECHNICAL DATA:
Mains voltage: ...................................................230 V ~ ± 10 %, 50 Hz
Switching current: ..........................................for 6025 ca. 16 A at cos ϕ = 1
Breaking capacity: .........................................3.6 kW
Switching current: ...........................................for 6020 ca. 10 A at cos ϕ = 1
Breaking capacity: .........................................2.3 kW
Switching temperature
difference ............................................................0,7 K
Relay contact: ...................................................“breaks“ when preset temperature is reached
Temperature sensor: .....................................NTC (according to DIN 44574), length: 4 m
Setting range: ...................................................RTK: 5 to 30 °C (scale 1 to 6), FHK: 10 to 60 °C (scale 1 to 6)
Ambient temperature: ...................................- 10 °C to + 40°C
Connection leads: ............................................max. 2.5 mm
2
Sensor characteristic: ...................................Temperature .......................... Resistance
10 ............................................... 3.66
20 ............................................... 2.43
30 ............................................... 1.66
40 ............................................... 1.15
50 ............................................... 0.82
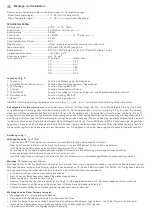
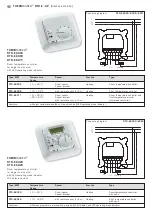
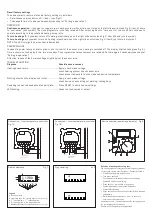
Legend for Fig. 2
1. B ⁄ –
Function: Varying setting parameters
2. Slide switch (“party switch“)
Function: Change time control programme ⁄ continuous operation
3. LED
Function: Heating ON ⁄ OFF
4. Turning knob
Function: Temperature setting
5. RESET button
Function: Deleting time and day, heating and reduced periods are retained
6. Slide switch
Function: Heating ON ⁄ OFF
7. Button “C“
Function: Programme call
NOTE: Factory setting is restored by simultaneously pressing buttons C (item 7), + and – (item 1).
Field of application ⁄ mode of operation
Settings are made differently for working days (e.g. Monday – Friday) and resting days (e.g. Sa, Su). The allocation of working days ⁄ resting days
can be varied, see 16. The slide switch “ON ⁄ OFF“ (see Fig. 2, item 6) separates the heating circuit unipolar from the mains and switches the
device off, except for the clock. The slide switch “time control programme ⁄ continuous“ (see Fig. 2, item 2) allows switching between regulat-
ing heating with and without time-control (e.g. continuous operation for a party). Pilot control: The temperature controllers have one output
(TA), which is activated during the programmed reduced periods. Therefore, such controllers can be connected as main controller for up to
10 controllers without clock (as satellite controllers) of the types 6009 or 6011. This requires a connection to be made between terminal TA
of the main controller and the respective TA terminals of the satellite controllers. Then, temperature is lowered at each satellite controller
by 5 °C when the main controller switches to reduced temperature.
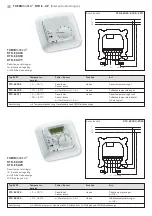
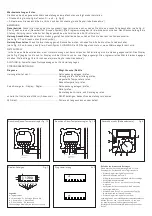
Instructions regarding Fig. 1
IMPORTANT NOTES -
ATTENTION!
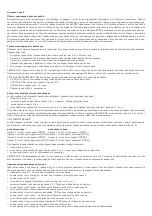
Only authorized and qualified electrician personnel may work on 230 V mains.
Respective safety regulations issued by the VDE and the local energy supply companies must be observed when connecting these de vices.
In case of fault, mains voltage might apply at the sensor wire (see Fig. 1).
For regulating hot water heating systems, control valves of the type “currentless closed“ are needed.
Connection leads must be straight with ends ca. 6 mm stripped.
The sensor cable needs to be laid in a separate conduit and must not be laid together with live mains voltage lines.
Mounting & installation
– Cut off mains voltage!
Mounting of remote sensor (for type 6025): The remote sensor is laid inside a protective conduit at heating mat level, central between heating
conductors. Mounting of temperature controller: Both controllers are installed in usual in-wall flush boxes of Ø 55 mm (according to DIN
49073, part 1). When using additional intermediate terminals, a deeper flush box should be used.
• Lift off turning knob carefully with a screwdriver.
• Loosen fastening screw and lift off controller cover.
• For connecting, please observe Fig. 1
• Attention! Arrange retainer ring above the wallpaper and mount controller with self-tapping screw to in-wall flush box.
• Thereafter, place frame and cover on the in-wall socket and tighten screws.
• Then put turning knob back on the device (watch correct groove position).
Mounting instructions – room temperature controllers:
• Mounting height: ca. 1.5 m above finished floor
• Avoid outside walls and draft from windows and doors!
• Make sure regular room convection air reaches the controller unobstructed. Therefore, the controller shall not be located inside shelf
units, or behind curtains, or similar covering.
• Foreign heat is of detrimental influence to control accuracy.
Summary of Contents for THERMASPEG RTR-E-UP Series
Page 9: ......
Page 16: ......
Page 23: ......
Page 30: ......
Page 32: ...THERMASREG RTR E UP D G F r ...

