background image

 6 

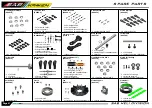
[HC437-S]

[HC430-S]

[HC586-S]

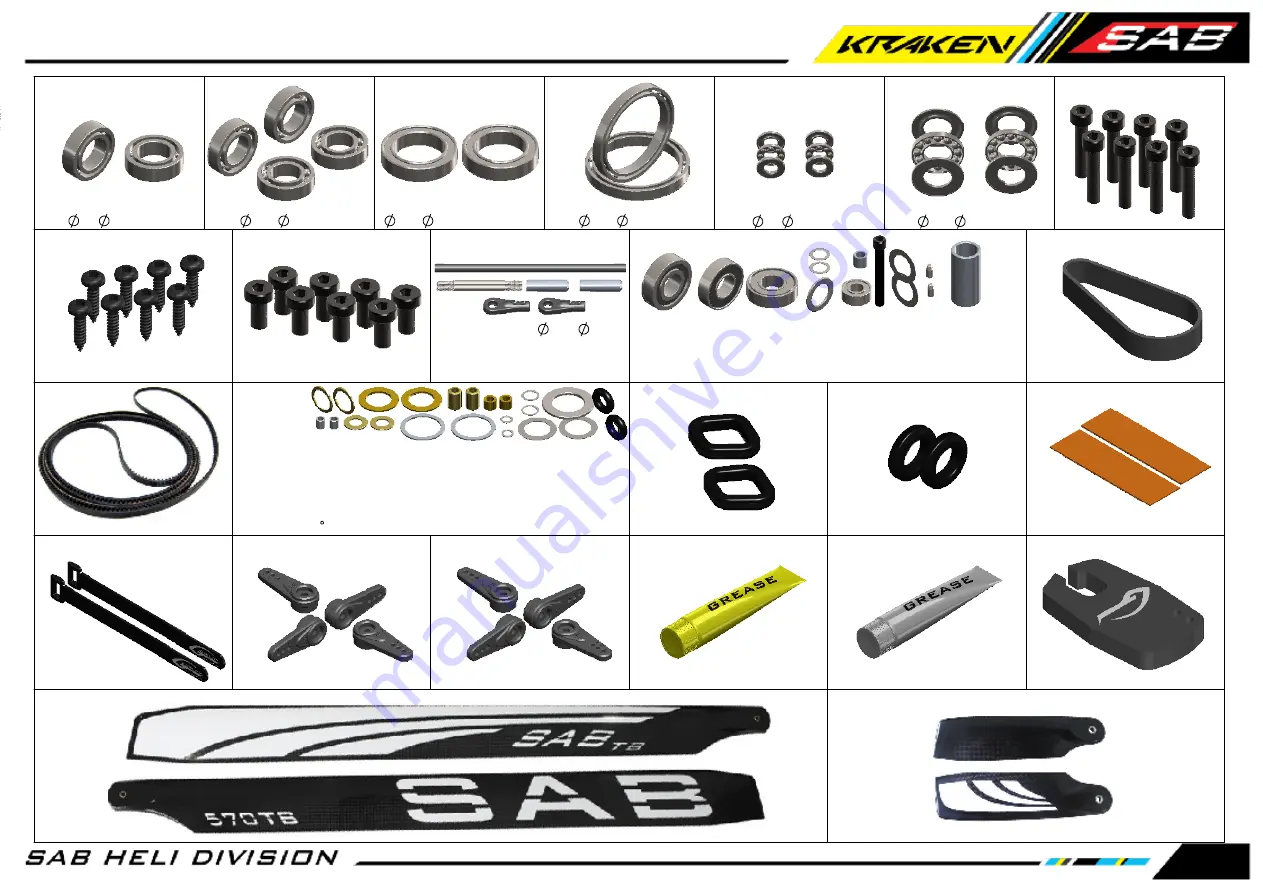
- 1 x Motor Belt GT3-288-13 mm.

- 1 x Carbon Rod 2.5x 4x570.

- 2 x Plastic Ball Linkage.

- 2 x Thread Rod M2.5x40.

- 2 x Aluminum Bush.

- 2 x Rad Bearing

        30x 37x4mm.

- 2 x Thrust Bearing

        10x 14x4mm.

[HA021-S]

[HA035-S]

[HA044-S]

[HA078-S]

- 2 x Canopy Grommet.

- 2 x Double side tape 30x100x1.

- 2 x Strap 16x205mm.

- 4 x Futaba servo arm.

[HA075-S]

[HA076-S]

- 1 x Free Wheel Clutches grease. - 1 x Tranmissions module grease.

- 2 x Ball Bearing

        8x 14x4mm.

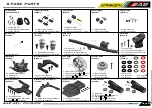
[HC417-S]

- 4 x Ball Bearing

         10x 15x4mm.

[HC420-S]

[HC434-S]

- 2 x Thrust Bearing

         4x 9x4mm.

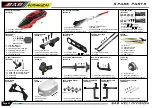
- 2 x Main Blades 570 White.

- 2 x Tail Blades 95 White.

TAIL BLADES 95 WHITE

(BW5095)

MAIN BLADES 570 WHITE

(BW0570)

[HC544-S]

- 8 x Head Cap Screw M4x20.

[HC549-S]

- 8 x Tapping Screw M3x12mm.

[HC592-S]

- 1 x Tail Belt 1722mm HTD3.

[HC582-S]

- 8 x Head Screw Special M4x8.

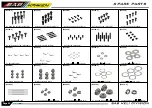
[HC587-S]

- 1 x Ball Bearing Ø10xØ24x7mm.

- 1 x Ball Bearing 10 x 22 x 6 mm.

- 1 x Ball Bearing 2RSØ10xØ22x6.

- 1 x Ball Bearing Ø6xØ13x5mm.

- 1 x Wave Washer Ø10xØ15x0.3.

- 2 x Pin 3x6mm.

- 1 x Head Cap Shoulder M4x30.

- 1 x Bushing.

- 1 x Shim Ø6xØ9x0.2mm.

[HC600-S]

[HC594-S]

[HA050-S]

[HA051-S]

- 2 x Spacer Ø7xØ9x0,5.

- 2 x Grip Link Bushing.

- 2 x Spacer Ø4xØ6,9x0,5.

- 2 x Spacer Ø8xØ12,5x0,5.

- 2 x Spacer Ø11xØ13,8x0,5.

- 2 x Spacer Arm Ø2,5xØ4x6,3.

- 2 x Oring 90 .

- 2 x Spacer Arm Ø2,5xØ4x3mm.

- 2 x Washer Ø2,5xØ4x0,3mm.

- 2 x Washer Ø4.1xØ6x0.1mm.

- 2 x Spring Washer Ø10xØ15x0.3.

- 2 x Washer Ø8xØ14x0.2mm.

- 4 x JR servo arm.

- 1 x Foam Blade Holder 580.

[HC425-S]

- 2 x Radial bearing 

12x 18x4mm.

[HA010-S]

- 2 x Cable Pass.

Page 46

SPARE PARTS

Summary of Contents for GOBLIN KRAKEN NITRO 580

Page 1: ......

Page 2: ...bly of the model Please refer to the web site www goblin helicopter com for updates and other important information VERY IMPORTANT It is extremely important that you take a moment to register your hel...

Page 3: ...tor diameter 260 mm with 95 mm tail blades Engine 50 to 60 Nitro Heli Engine GOBLIN KRAKEN 580 NITRO TECHNICAL SPECIFICATIONS Cyclic Servos Mini size 35 mm Standard size 40mm option Tail Servo Standar...

Page 4: ...RANTY NEGLIGENCE OR STRICT LIABILITY Further in no event shall the liability of SAB Heli Division exceed the individual price of the Product on which liability is asserted As SAB Heli Division has no...

Page 5: ...ers you will need for that chapter The information is printed in a black box in the upper corner of the page INSIDE THE MAIN BOX THERE ARE Green screw and Green bearing in the illustration means you n...

Page 6: ...Approx 602mm 16mm 16mm NOTE Threaded Rod M2 5x40mm HC242 S Threaded Rod M2 5x40mm HC242 S Carbon Rod 2 5x 4x570mm HC586 S Aluminum Bushing Aluminum Bushing BAG1 Page 5 CARBON ROD ASSEMBLY...

Page 7: ...Pulley Bearing Button Head Cap Screw M4x8mm HC098 S Clutch H0670 S Clutch Support H0672 S Fan H0671BM S Flat Head Cap Screw M3x8mm HC134 S Engine Shaft H1369 S SECTION Note Counterbore external side...

Page 8: ...ith The Engine Socket Head Cap Screws M3x10mm HC056 S CLUTCH UNIT ASSEMBLY Crank Clamp Engine Washer Clutch Unit HEX 6mm Socket Head Cap Screw M3x16mm HC068 S Motor Belt HTD3 288mm 13mm HC600 S ENGINE...

Page 9: ...tan sensors you can use the part of the support that already has holes in it With any other sensor you can use the part without holes and adapt as required INSTALLATION OF THE RPM SENSOR On the 580 ni...

Page 10: ...S Finishing Washer M3 H0007 S ENGINE GROUP ASSEMBLY Socket Head Cap Screw M2 5x10mm HC022 S Socket Head Cap Screw M2 5x10mm HC022 S Flat Head Cap Screw M3x8mm HC134 S Finishing Washer M3 H0007 S Fan C...

Page 11: ...12mm HC026 S HC044 S Servo Spacer H1223 S Servo Spacer H1223 S Uniball M2 H0538 S Uniball M2 H0538 S LINKAGE ASSEMBLY Plastic Ball Link M2 H0403 S Plastic Ball Link M2 H0403 S Thread Rod M2x56mm HC244...

Page 12: ...ocket Head Cap Screw M4x10mm HC102 S Engine Spacer H0678 S Engine Spacer H0678 S Engine Spacer H0678 S Button Head Cap Screw M3x6mm HC096 S Socket Head Cap Screw M4x10mm HC102 S ENGINE ASSEMBLY Engine...

Page 13: ...insert the fuel nipple into the grommet Tank Rubber H1282 S Set Screw M3x20mm HC150 S Tank H1282 S Tank Column Mount H1283 S Tank Rubber H1282 S Set Screw M3x20mm HC150 S Tank Rubber H1282 S Tank Col...

Page 14: ...shing Washer M3 H0007 S Socket Head Cap Screw M3x8mm HC050 S ENGINE GROUP ASSEMBLY TANK ASSEMBLY Socket Head Cap Screw M3x8mm HC050 S Finishing Washer M3 H0007 S Socket Head Cap Screw M3x8mm HC050 S F...

Page 15: ...S Plastic Landing Gear Support H1226 S Landing Gear Plug H1274 Landing Gear Rod H1242 S Finishing Washer M2 5 H0255 S Finishing Washer M2 5 H0255 S Socket Head Cap Screws M2 5x18mm HC032 S Frame Space...

Page 16: ...O NOT over torque the screw Main Pulley Z50 H1213 S Foam 1 BAG7 Socket Head Cap Screw M2 5x8mm HC020 S Rear Servo Mount Support H1206 S Socket Head Cap Screw M2 5x8mm HC020 S Bushing H0110 S Free Whee...

Page 17: ...t before installing the servos in the model Proceed with installation following the instructions below You can use the G10 servo tool to align the front servo arms with the theoretical horizontal line...

Page 18: ...DIUS ARM ASSEMBLY X2 Radius Arm H0204BM S Spacer Arm 2 5x 4x3mm Spacer Arm 2 5x 4x6 3mm Uniball Radius Arm H0205 S UNIBALL RADIUS ARM ASSEMBLY X2 Flanged Bearing 2 5x 6x2 5mm HC400 S Flanged Bearing 2...

Page 19: ...8 S NOTE Washer 8x 14x0 2mm HC228 S After approximately 10 20 flights please check preload you can add one 0 2mm shim HC232 on each side if preload has changed However we suggest to replace the o ring...

Page 20: ...1233 S TAIL PITCH SLIDER H1249 S Tail Pitch Slider Link H0261 S Spacer 2x 3x3mm H0261 S Socket Head Cap Screw M2x6mm HC004 S It is a normal for the tail to feel a bit tight after initial assembly as t...

Page 21: ...3T H1272 S Tail Case Spacer H1239 S Socket Head Cap Screw M2 5x6mm HC018 S Tail Side Plate H1240 S BELL CRANK LEVER H1248 S Socket Head Cap Screw M2 5x18mm HC032 S Uniball M3 H0065 S TAIL ROTOR ASSEMB...

Page 22: ...Tail Fin H1243 S Socket Head Cap Screw M2 5x8mm HC020 S BAG13 Tail Belt 1722mm HTD3 6mm HC592 S Page 21 TAIL GROUP ASSEMBLY...

Page 23: ...special tool to apply the correct torque to the nuts 1 2 3 4 Secure the Nut Block with a small amount of CA glue NOTE Do not over tighten the nuts Tighten the bolts as tight as you can with your fing...

Page 24: ...LOCKING ELEMENT TAIL H0249 S BAG15 Socket Head Cap Screws M3x10mm HC056 S Finishing Washer M3 H0007 S TAIL GROUP ASSEMBLY Finishing Washer M3 H0007 S Socket Head Cap Screws M3x10mm HC056 S BOOM GROUP...

Page 25: ...tance between the center of the servo spline and the ball must be around 18mm TAIL SERVO ASSEMBLY Self Head Cap Screw M3x12mm HC549 S Servo Spacer H0075 S TAIL SERVO TAIL BOOM ASSEMBLY NOTE Installati...

Page 26: ...Link H0066 S Plastic Ball Link H0066 S NOTE Before installing the plastic link onto the ball be sure the tail push rod moves smoothly You can open up H1315 S if you need to NOTE The carbon rod is slig...

Page 27: ...Socket Head Cap Screw M2 5x10mm HC022 S TIPS Using a 4 5mm shaft you can tension the motor belt Push the shaft on right side and then tighten the bolts Socket Head Cap Screw M2 5x8mm HC020 S Socket He...

Page 28: ...ad Cap Screw M2 5x12mm HC026 S Metric Hex Nylon Nut M4 HC212 S eg Microlube GL261 Reference Pin H1048 S Uniball M3 H0065 S Uniball M3 H0065 S SWASHPLATE ASSEMBLY Swashplate SET H1204 S BAG19 FOAM 2 SW...

Page 29: ...Initial length for the rods from the servos to the swash plate LINKAGE ROD ASSEMBLY x3 Set Screw M2 5x18mm HC140 S Plastic ball link H0066 S Plastic ball link H0066 S LINKAGE ROD ASSEMBLY BAG20 Page 2...

Page 30: ...in the boom plate Rotate the tail drive several times by hand Tension the tail case by hand and slowly tighten the 2 BLACK screws in Figure 2 NOTE To disassemble the tail boom you have to remove the...

Page 31: ...screws and the YELLOW and push the tail side plate in according with red arrow Tighten the YELLOW screw while you are pushing You can proceed step by step until the tail belt is tight enough Hard 3D...

Page 32: ...oss mount H1380 S Flat Head Cap Screw M2 5x5mm HC128 S X ross Mount H1380 S X ROSS PLATE ASSEMBLY Socket Head Cap Screw M2 5x6mm HC018 S Socket Head Cap Screw M2 5x6mm HC018 S Socket Head Cap Screw M2...

Page 33: ...However if you have issues with rescue feature of the FBL unit you can use the rubber dampeners to reduce any kind of vibrations The sensor used for the RESCUE function is different from the flight m...

Page 34: ...HA035 S NOTE You can wait to tighten this screw until after you run all of your cables EXTRA SUPPORT BAG 29 Nylon Nut M3 HC206 S Flat Head Cap Screws M3x10 HC135 S Battery Backup Support H1241 S NOTE...

Page 35: ...BAG24 2 Follow the illustrated wiring method Use the servo extension for connecting the tail servo Gluing of the connector on the carbon support is recommended as show in Figure 2 NOTE Use hot glue t...

Page 36: ...cure the batteries to the tray Use the Velcro Strap HA044 S Install the muffler before checking the CG Adjust the battery position so that the CG is located on the main shaft Battery 2S 1800 mAh Velcr...

Page 37: ...S BAG26 NOTE Put a very small drop of CA glue on the grommets and then insert the quick release canopy mounts Doing so will prevent the canopy mounts coming off when removing the canopy Be careful no...

Page 38: ...oints where they are at most risk Be sure of the gear ratio verifying carefully the motor pulley in use The forces acting on the mechanics increase enormously with increasing of rpm Although the Gobli...

Page 39: ...me instances based on wear these parts should be replaced every 100 flights Periodically lubricate the tail slider movement and its linkages as well as the swash plate movement and its linkages To ens...

Page 40: ...ail slider tail shaft Carbon rod carbon rod support All thrust bearings All plastic ball connections 12 Check tail pulley set screws Ensure they are tight It is suggested use a bit of Green Loctite 8...

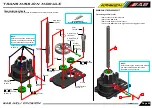
Page 41: ...1 S Serial Number H1212 S TRANSMISSION MODULE The transmission module is supplied assembled and verified ready to be used Use SAB HA076 Grease inside the module Before you open the transmission module...

Page 42: ...ews M6x10mm 2 x Washer Tail Spindle H0220 S Tail Spindle H0227 S 1 x Tail Shaft 1 x Tail Hub 1 x Set Screws M3x8mm Main Linkage H0237 S Locking Element Tail H0249 S 2 x Main Linkage 4 x Plastic Unibal...

Page 43: ...Damper B 2 x Damper C Boom Connetion H1224 S 1 x Boom Connetion 4 x Head Cap Screws M3x10mm 4 x Shim 8x 14x0 2mm 4 x Oring 70 4 x Oring 90 2 x Quick Release Canopy 2 x Socket Head Cap Screw M3x6 Quick...

Page 44: ...d Cap Screws M2 5x8mm Tail Case Spacer H1239 S 1 x Tail Fin 1 x Orange Stickers 1 x Green Stickers 1 x Yellow Stickers 1 x White Stickers 1 x Red Stickers Tail Fin H1243 S 1 x Bell Crank Lever Assembl...

Page 45: ...d Cap Shoulder M3x18mm 2 x Nylon Nut M3 Blade Grip Arm 27 H1342 S 2 x Blade Grip Arm 2 x Head Cap Screw M4x8 2 x Uniball M3x4 5 H3 5 Fan Case H1287 S 1 x Fan Case SX 1 x Fan Case DX Frame Spacer H1324...

Page 46: ...trix Nylon Nut M4 HC134 S HC140 S 8 x Set Screws M2 5x18mm 4 x Bolt M6x14mm HC224 S 4 x Nut M8 4 x Flanged Bearing 2 5x 6x2 6 HC400 S HC403 S 4 x Ball Bearing 4x 9x2 5mm HC412 S 4 x Flanged Bearing 5x...

Page 47: ...ITE BW0570 HC544 S 8 x Head Cap Screw M4x20 HC549 S 8 x Tapping Screw M3x12mm HC592 S 1 x Tail Belt 1722mm HTD3 HC582 S 8 x Head Screw Special M4x8 HC587 S 1 x Ball Bearing 10x 24x7mm 1 x Ball Bearing...

Page 48: ......

Reviews: