17
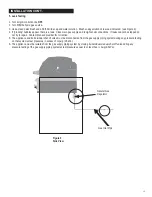
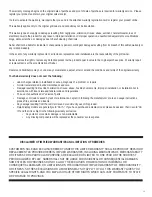
3. Pull out bulb and replace with a new bulb.
4. Reverse instructions from step 2 through step 1 to re-install
socket.
IMPORTANT
Take care not to touch the bulb with your bare fingers.
Touching bulb with your skin can leave a film on the
bulb that causes it to burn out quickly.
Cleaning the Lens
1. Prior to cleaning, make sure the light switch is in the “
OFF”
position and the light plug is disconnected from the power
suply.
2. Do not clean the glass lens when warm. Allow to cool before
cleaning. Sudden change in temperature may cause cracking
of the glass lens.
3. Use a damp towel to clean the surface of the glass lens.
4. Allow the lens to dry before reconnecting the light plug to the
power supply and pressing the light switch to the
“ON”
position.
Bulb Replacement
Note: Make sure light switch on the control panel is in the
“OFF”
position and adapter plug is disconnected from outlet.
Standard Replacement Bulb Specification:
Bulb Type:
Halogen
Wattage:
10 W per bulb
Voltage:
12 V
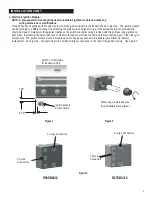
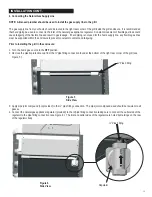
1. Release the screw securing the light socket.
2. Take out the socket and remove the lens.
Can be purchased at
a local hardware store
Summary of Contents for R50SB0412
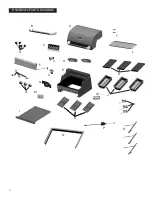
Page 22: ...R50SB0412 PARTS DIAGRAM B G M L O N E A P Q C U J I S K D H W V R T 22 X F ...
Page 24: ...F 24 R67SB0312 PARTS DIAGRAM M L I D A E U P V G S H K J B N C O W T R Q X ...
Page 28: ...NOTES 28 ...
Page 50: ...B G M L O E A P Q C U J I S K D H W V R T X F R50SB0412 DIAGRAMA DE LAS PARTES 22 N ...
Page 52: ...R67SB0312 DIAGRAMA DE LAS PARTES F M L I D A E U P V G S H K J B N C O W T R Q X 24 ...
Page 56: ...NOTAS 28 ...
Page 78: ...B G M L O E A P Q C U J I S K D H W V R T X F R50SB0412 PIÈCES SCHÉMA 22 N ...
Page 80: ...F M L I D A E U P V G S H K J B N C O W T R Q X R67SB0312 PIÈCES SCHÉMA 24 ...
Page 84: ...REMARQUES 28 ...


