36
English
»
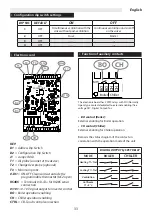
WM-AU accessory
(
C
odE
9066632)
°
C
IAQ
AUTO
AUTO
WM-AU
is a control for wall installation.
The functions of the control are:
• Switching the fan coil unit on and off.
• Setting the desired room temperature (SET).
• Possibility of selecting the summer, winter,
automatic or ventilation operation cycle directly from
the control button.
• Manual selection of the three fan speeds.
• Automatic selection of fan speeds according to the
deviation between the set temperature and the room
temperature.
• Thermostatic opening or closing control (ON-OFF),
both in the summer and winter cycle, of the water
valve (two-pipe system) or the two valves (four-pipe
system).
• Function check of the special Electronic Filter
mounted on the fan coil unit in IAQ version
(accessory)
• Checking the operation of the electrical resistance
when mounted as an accessory.
• Activating/deactivating the Energy Saving function
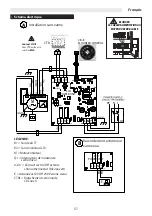
For any maintenance, make sure you have
disconnected the power supply.
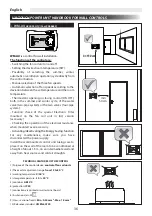
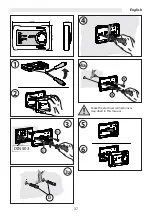
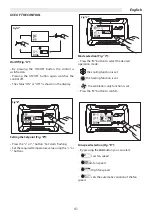
Install the wall-mounted control unit taking care to
place it on the wall of the room to be conditioned at
a height of about 1.5 m, on an intermediate wall and
away from heat sources and cold air draughts.
•
TECHNICAL FEATURES OF THE CONTROL
1) Purpose of the control device:
control of fan coil units
2) Thermostat adjustment range:
from 15 to 30 °C
3) working temperature:
0/50 °C
4) storage temperature:
-10 / +50 °C
5) container:
ABS V0
6) protection:
IP 20
7) connection via printed circuit terminal board
8) Insulation class:
II
9) Cross-section of leads:
Min. 0.50 mm² - Max. 1.5 mm²
10) Reference standard:
CEI EN 60730
h = 150 cm
°
C
IAQ
AUTO
AUTO
°
C
IAQ
AUTO
AUTO
°
C
IAQ
AUTO
AUTO
50 cm
min
°
C
IAQ
AUTO
AUTO
UP-TOUCH POWER UNIT HANDBOOK FOR WALL CONTROLS
Summary of Contents for UP-TOUCH
Page 4: ...4 Italiano Montaggio del comando CB E A B A B CTRL CTRL C...
Page 8: ...8 Italiano Montaggio del comando CB Touch A B CTRL C CTRL B CTRL C CTRL A B...
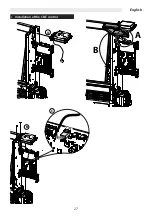
Page 27: ...27 English Installation of the CB E control A B A B CTRL CTRL C...
Page 31: ...31 English Installation of the CB Touch control A B CTRL C CTRL B CTRL C CTRL A B...
Page 50: ...50 Fran ais Montage de la commande CB E A B A B CTRL CTRL C...
Page 54: ...54 Fran ais Montage de la commande CB Touch A B CTRL C CTRL B CTRL C CTRL A B...
Page 73: ...73 Deutsch Montage der CB E Steuerung A B A B CTRL CTRL C...
Page 77: ...77 Deutsch Montage der CB Touch Steuerung A B CTRL C CTRL B CTRL C CTRL A B...
Page 96: ...96 Espa ol Montaje del mando CB E A B A B CTRL CTRL C...
Page 100: ...100 Espa ol Montaje del mando CB Touch A B CTRL C CTRL B CTRL C CTRL A B...

