Service Engine - Page 46
SERVICE ENGINE
Checking and Cleaning Air Cleaner
Elements
NOTE: It may be necessary to check the air filter
more frequently if operating vehicle in dusty
conditions.
1. Lift hood.
2. Clean any dirt and debris from the air cleaner before
removing cover.
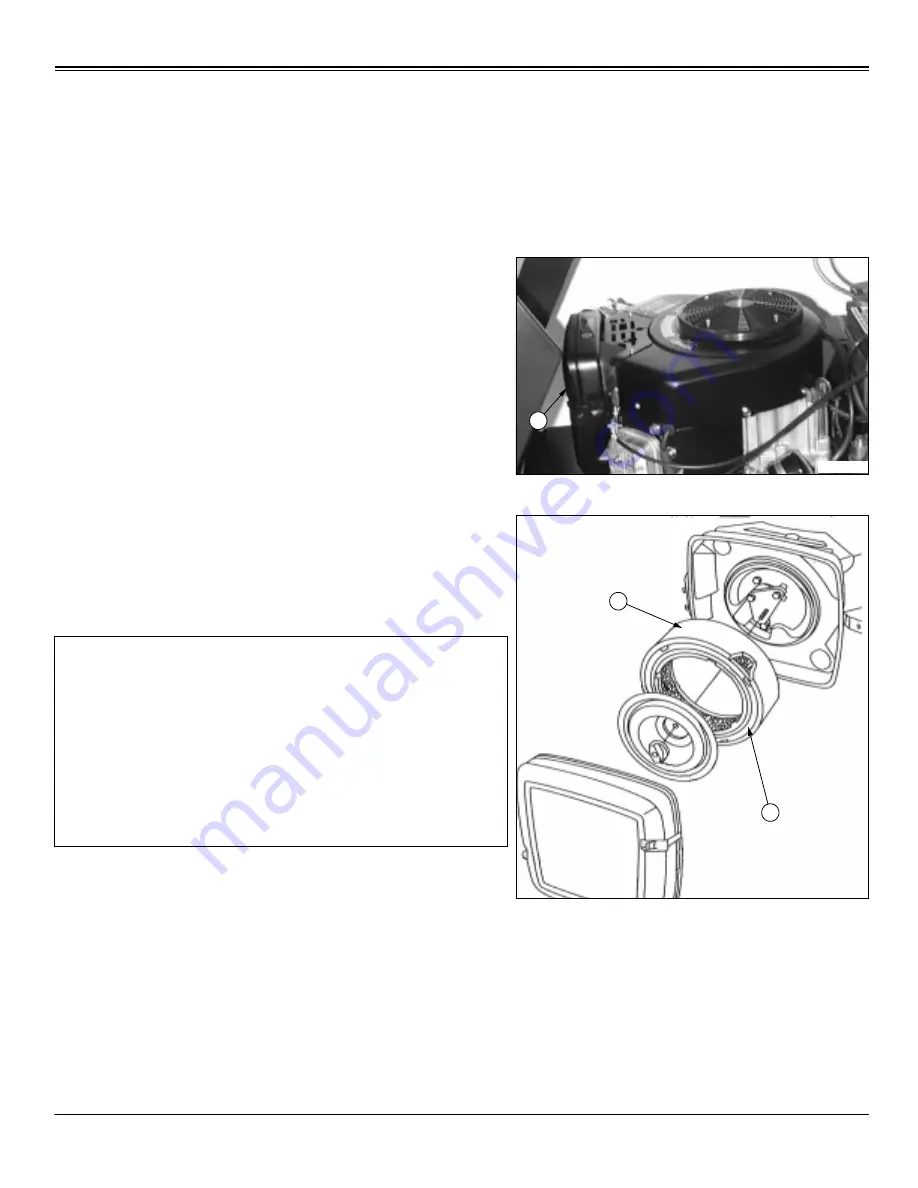
3. Remove cover (A).
4. Inspect foam precleaner (B) and element (C) without
removing.
5. If precleaner (B) is dirty, carefully remove from filter,
leaving element (C) in the air cleaner housing.
NOTE: DO NOT wash paper element.
6. Wash precleaner (B) in a solution of warm water and
liquid detergent.
7. Rinse precleaner thoroughly. Squeeze out excess
water in a dry cloth until precleaner is completely dry.
8. Put approximately 30 ml. (1 oz.) of clean engine oil
onto precleaner. Squeeze precleaner to distribute oil
evenly. Squeeze out excess oil with a clean cloth.
9. Remove and replace filter element (C) ONLY if
damaged or very dirty.
10.Carefully remove element (C) from air cleaner
housing. Replace with a NEW element.
11.Carefully clean air cleaner housing. Prevent any dirt
from falling into carburetor.
12.Install precleaner onto new filter element and install
into air cleaner housing.
13.Install cover. Lower hood.
IMPORTANT: A damaged paper element (C) can
allow dirt into the carburetor and can cause poor
engine performance, engine damage or failure:
• DO NOT attempt to clean paper element by
tapping against another object.
• Replace element ONLY if very dirty.
• DO NOT use pressurized air to clean element.
• If element is damaged or the seal is cracked,
replace.
M88590
A
C
B


