background image

Summary of Contents for Atlante 500

Page 1: ...Vending Machine UK WARNING This instruction manual is intended exclusively for specialized personnel USE AND MAINTENANCE ...

Page 2: ...English 2 MAIN PARTS ATLANTE 500 MAIN PARTS 1 Door lock 2 Display 3 Product keypad 4 Coin slot 5 Coin return button 6 Instruction plate 7 Dispensing outlet door 8 Coin return slot ...

Page 3: ...ts 26 Fluid discharge tank 14 Container 3 instant products 27 Collecting tray 15 Container 4 instant products 28 Cup dispenser 16 Coffee grinder 29 Stirrer dispenser 17 Instants opening 30 Sugar container 18 Mixer 31 CPU card 19 Spiral mixer 32 Change giving coiner support 20 Safety switch 33 Dispensing outlet 21 Dispensing arm 34 Coin return duct 22 Drip Tray 35 Coin box set ...

Page 4: ...7 Collecting tray 14 Container 3 instant products 28 Cup dispenser 15 Container 4 instant products 29 Stirrer dispenser 16 Coffee grinder 30 Sugar container 17 Instants opening 31 CPU card 18 Mixer 32 Change giving coiner support 19 Spiral mixer 33 Dispensing outlet 20 Safety switch 34 Coin return duct 21 Dispensing arm 35 Coin box set 22 Drip Tray 48 Coffee bean hopper K 23 Coffee Group ...

Page 5: ...English 5 ATLANTE 500 1 2 GRINDER VERSION MAIN PARTS 36 Power Board 37 Air break device 39 Coffee boiler 40 Pump 41 Triac board 43 Suction unit 44 Water connection coupling 45 Power cord socket ...

Page 6: ...er 2 instant products 28 Cup dispenser 14 Container 3 instant products 29 Stirrer dispenser 15 Container 4 instant products 30 Sugar container 17 Instants opening 31 CPU card 18 Mixer 32 Change giving coiner support 19 Spiral mixer 33 Dispensing outlet 20 Safety switch 34 Coin return duct 21 Dispensing arm 35 Coin box set 22 Drip Tray 47 Container 7 instant products ...

Page 7: ...English 7 ATLANTE 500 INSTANT VERSION MAIN PARTS 36 Power Board 37 Air break device 41 Triac board 42 Instant product boiler 43 Suction unit 44 Water connection coupling 45 Power cord socket ...

Page 8: ...English 8 ATLANTE 700 MAIN PARTS 1 Door lock 2 Display 3 Product keypad 4 Coin slot 5 Coin return button 6 Instruction plate 7 Dispensing outlet door 8 Coin return slot ...

Page 9: ...nt products 26 Fluid discharge tank 13 Container 2 instant products 27 Collecting tray 14 Container 3 instant products 28 Cup dispenser 15 Container 4 instant products 29 Stirrer dispenser 16 Coffee grinder 30 Sugar container 17 Instants opening 31 CPU card 18 Mixer 32 Change giving coiner support 19 Spiral mixer 33 Dispensing outlet 20 Safety switch 34 Coin return duct 21 Dispensing arm 35 Coin b...

Page 10: ...ainer 2 instant products 27 Collecting tray 14 Container 3 instant products 28 Cup dispenser 15 Container 4 instant products 29 Stirrer dispenser 16 Coffee grinder 30 Sugar container 17 Instants opening 31 CPU card 18 Mixer 32 Change giving coiner support 19 Spiral mixer 33 Dispensing outlet 20 Safety switch 34 Coin return duct 21 Dispensing arm 35 Coin box set 22 Drip Tray 48 Coffee bean hopper K...

Page 11: ...E 700 1 2 GRINDER VERSION MAIN PARTS 36 Power Board 37 Air break device 38 Steam boiler 39 Coffee boiler 40 Pump 41 Triac board 42 Instant product boiler 43 Suction unit 44 Water connection coupling 45 Power cord socket ...

Page 12: ...Collecting tray 13 Container 2 instant products 28 Cup dispenser 14 Container 3 instant products 29 Stirrer dispenser 15 Container 4 instant products 30 Sugar container 17 Instants opening 31 CPU card 18 Mixer 32 Change giving coiner support 19 Spiral mixer 33 Dispensing outlet 20 Safety switch 34 Coin return duct 21 Dispensing arm 35 Coin box set 22 Drip Tray 46 Container 8 instant products ...

Page 13: ...English 13 ATLANTE 700 INSTANT VERSION MAIN PARTS 36 Power Board 37 Air break device 41 Triac board 42 Instant product boiler 43 Suction unit 44 Water connection coupling 45 Power cord socket ...

Page 14: ...7 7 1 DISPLAY 37 7 2 KEYPAD 37 7 3 KEY DESCRIPTION IN STANDARD OPERATION MODE 37 7 4 CPU CARD KEYS 37 7 5 5 BUTTON KEYPAD 37 8 SUPPLY AND STARTING UP 38 8 1 CONTAINER CONFIGURATION 38 8 2 INSTANT PRODUCT SUPPLY 39 8 3 SUGAR SUPPLY 39 8 4 COFFEE BEAN SUPPLY 39 8 5 DOSE CALIBRATION 39 8 6 COFFEE GRINDING CALIBRATION 40 8 7 SETTING THE WATER CAPACITY FOR INSTANT PRODUCT SOLENOID VALVES 40 8 8 STIRRER...

Page 15: ...r skills required The symbol is integrated with a message suggesting use procedures or actions and providing useful information for the correct operation of the machine Warning Indicates dangerous situations for the users supply operators and maintenance technicians dealing either with the vending machine or the product to be dispensed Prohibition notice It is used to highlight actions operations ...

Page 16: ...provided that the Maintenance Technician bears full responsibility for all work carried out This manual is an integral part of the machine and must be always read carefully before performing any operation 2 2 Description and intended use The vending machine is intended for automatic distribution of coffee and hot beverages decaffeinated coffee cappuccino chocolate etc and is programmable for every...

Page 17: ... The following data can be found on the plate name of Manufacturer marks of compliance model serial number year and month of manufacture supply voltage V supply frequency Hz electrical power consumption W It is strictly forbidden to tamper with or modify the data plate When contacting the technical service always refer to this plate by indicating the technical data shown on it ...

Page 18: ... 4 Min water inlet pressure 0 15 MPA 1 5 bar Max water inlet pressure 0 8 MPA 8 bar A Weighted sound pressure level less than 70 dB PR Data plate showing minimum and maximum water supply pressure Container capacity Coffee beans 1 Grinder model 3 5 kg Coffee beans 2 Grinders model 2 6 2 6 kg Freeze dried coffee Instant Model 1 2 kg Decaffeinated coffee 1 kg Hot Chocolate 3 kg Milk 2 5 kg Lemon tea ...

Page 19: ... MPA 1 5 bar Max water inlet pressure 0 8 MPA 8 bar A Weighted sound pressure level less than 70 dB PR Data plate showing minimum and maximum water supply pressure Container capacity Coffee beans 1 Grinder model 4 2 kg Coffee beans 2 Grinders model 3 5 3 5 Kg Freeze dried coffee Instant Model 1 2 kg Decaffeinated coffee 1 kg Hot Chocolate 3 kg Milk 2 5 kg Lemon tea 3 kg Barley 1 kg Sugar Espresso ...

Page 20: ...d the instructions contained in this publication and in the enclosed documents carefully use personal protection devices during installation testing and maintenance operations Use a new gasket kit every time you disconnect and then connect again the machine to the water supply Precautions for preventing human errors make the operators aware of safety issues handle the vending machine either packag...

Page 21: ...an can intervene by inserting the relevant key into the safety switch and resetting the voltage even if the door is open This operation necessary for starting up the vending machine disables the safety system It must therefore be carried out by qualified personnel Maintenance Technician aware of the risks resulting from the presence of live or moving components 3 5 Residual risks The dispensing ou...

Page 22: ...chine overturning or laying the vending machine flat during transport and handling shaking the vending machine lifting the vending machine with ropes or cranes leaving the vending machine exposed to the elements in humid areas or close to heat sources 4 2 Storage If the vending machine is not installed immediately it should be stored in a sheltered area conforming to the following instructions the...

Page 23: ...back and the wall in order to keep the air outlet grille free 5 2 Unpacking and positioning On receipt of the vending machine make sure that it has not been damaged during transportation and that package has not been tampered with or that internal parts have not been removed A bag called CUSTOMER KIT is supplied with the vending machine It contains the following items Instruction booklet Power cor...

Page 24: ...ur supporting feet B Assemblethebasebytighteningthetwoscrewsasshowninthefigure Adjustthelevellingusingtherelevantfeet Before operating the machine unscrew the 4 screws to remove the centralplatesupportbracket 5 3 Use of different sized stirrers The vending machine is delivered with the stirrer set designed for use of 90 mm stirrers If 90 mm stirrers are used make sure that the rubber pin is insert...

Page 25: ...to the hole corresponding to the desired dimension and tighten the two screws 5 4 Label application 5 4 1 Product labels Remove the cup dispenser and unscrew the 4 knobs holding the keypad panel in place Remove the protection and disconnect the connectors Withdraw the keypad panel Insert the product labels Check the exact position of the labels against the selection key ...

Page 26: ...English 5 26 Standard product configuration Atlante 500 Instant ...

Page 27: ...English 5 27 Standard product configuration Atlante 700 Instant ...

Page 28: ...English 5 28 Standard product configuration ATLANTE 500 1 macina ...

Page 29: ...English 5 29 Standard product configuration ATLANTE 700 1 macina ...

Page 30: ...English 5 30 Standard product configuration ATLANTE 500 2 macina ...

Page 31: ...English 5 31 Standard product configuration ATLANTE 700 2 macina ...

Page 32: ...4 3 Atlante 700 Instruction Plates Loosen the two upper knobs remove the protection and release the transparentprotectionsbypressingontheinternalretainers Place the plates on the transparent protections and fit them back on the keypadpanel 5 5 Fitting the coffee grounds bag Remove the clip from the grounds discharge channel Slip the clip into the coffee grounds bag capacity of 50 litres Place the ...

Page 33: ...acturer declines any liability for any damage to the vending machine to property and or injury to persons caused by the installation of the payment system The responsibility falls to the person who carried out the installation 5 7 Connection to water mains It is recommended to use a descaling device for the water network supplying the vending machine especially for water with a high calcium and ma...

Page 34: ...tage corresponds to that indicated on the data plate If in doubt do not proceed with the installation and ask qualified and authorized personnel to check the system accurately The vending machine is equipped with a power cord which must be plugged into the appropriate socket on the vending machine back panel Do not use adapters or multi sockets Make sure that the electrical plug is easily accessib...

Page 35: ...e for 8 seconds 6 3 2 Key Sugar Quantity Decreases the quantity of sugar in the selected beverage Press the key before selecting the beverage The preselection remains active for 8 seconds 6 3 3 Set 1 Pre selection button The function connected to the button may be chosen from the following options A Beverage 11 B Pre selection of beverages 16 30 C Disabled 6 3 4 Set 2 Pre selection button The func...

Page 36: ...sent Button 5 CUP FOOD CHECK and SNACK SUPPLY Machine without snack slaves Enables the dispensing of one cup Machine with connected snack slaves Reset for food error Restores function of the selections blocked following an error 75 Restore independence If the independence management is enabled press the key to set the enabled quantities for each spiral to the maximum value In practice the person i...

Page 37: ...antity Decreases the quantity of sugar in the selected beverage Press the key before selecting the beverage The preselection remains active for 8 seconds 7 3 3 Set 1 Pre selection button The function connected to the button may be chosen from the following options A Beverage 16 B Pre selection of beverages 21 40 C Disabled 7 3 4 Set 2 Pre selection button The function connected to the button may b...

Page 38: ...fee Sugar 8 not present Freeze dried coffee 8 1 2 Single Grinder Version The containers delivered are designed to dispense the following products Instantproduct Atlante 500 Atlante 700 1 Tea Tea 2 HotChocolate Hot Chocolate 3 Milk Milk 4 Decaffeinated Decaffeinated 5 optional Barley 6 not present Instantpr ofyourchoice 8 1 3 Double Grinder Version The containers delivered are designed to dispense ...

Page 39: ...ng operations Lift the cover of the sugar container and fill the container with sugar Close the container cover 8 4 Coffee bean supply Remove the container cover Put coffee beans into the container Replace the cover on the container For the double coffee grinder version the operation described above must be repeated for both the containers using different coffee blends 8 5 Dose calibration The ven...

Page 40: ...arried out To adjust the solenoid valve capacity turn the flow regulating screw Turn it clockwise to reduce water capacity or anti clockwise to increase it In the maintenance menu a specific item see sect Description of messages in the maintenance menu helps carry out the adjustment by keeping the solenoid valve open for a fixed time of 10 To adjust a solenoid valve for instant products proceed as...

Page 41: ...lf diagnosis phase is activated to check the correct positioning of the machine devices Duringtheself diagnosisphase thefollowingdevicesareactivated the brew group the nozzle arm and the stirrer sugar dispenser to get a correctstartingpositioning if necessary also the cup release motor and the cup holder will be activated Instantproductsandcoffeeboilersarerefilledalsoduringtheinitialisation phase ...

Page 42: ...illing the boiler manually After switching the vending machine on it is possible to fill the boiler by activating the following procedure Procedure A press the P2 key to enter the maintenance menu Enter the Maintenance Washes menu and start the automatic washing cycle Procedure B press the P2 key to enter the maintenance menu Enter the Maintenance Boiler Refill menu and start the automatic refill ...

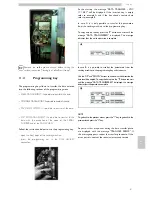
Page 43: ...fication request the value of this setting decreases Key UP By pressing this key it is possible to access the next entry inside the same level If used after requesting the change of a setting the value of this setting increases 9 2 Programming menu The structure of the programming menu is indicated in section Structure of the Programming Menu The section Description of Messages in the Programming ...

Page 44: ...Out of service 1 23 4 Set 2 pre selection 1 23 5 Default message 1 24 Audit Device 1 24 1 Protocol 1 24 2 EA1 2 Events 1 24 3 EA3 5 Readouts 1 24 4 LA1 Prices Lists 1 24 5 PA1 5 Products 1 24 6 VA1 3 Sales 1 24 7 BA1 CA15 Cash 1 24 8 DA1 7 CashLess 1 25 Change Password 1 25 1 Password prog 1 25 2 Service Password 1 26 DisplayContrast 1 27 Arm Backwards 1 28 Tube emptying time 1 28 1 Soluble Empty ...

Page 45: ...perature 1 5 6 Defrost Time 5 7 Defrost Interval 5 8 Food Mode Settings 5 8 1 Tray 5 8 9 AlarmTemperature 5 8 10 Alarm timeout 5 8 11 Refill allarm timeout 5 9 Door Heaters 5 10 Show temperature 5 11 Photocells 5 11 1 PhotocellEnabled 5 11 2 Max motor overtime 5 11 3 Disable selection 5 11 4 Photoelectric cells block 5 11 5 Credit Return 5 12 Capacity ctrl enabled 5 13 Capacity 5 14 Unit enabling ...

Page 46: ...2008 1 3 2 Number of litres of water that can still be dispensed before the filter needs to be regenerated When this value is less than 1 a Warning W83 is recorded in the Error LOG Remaining qty 95 1 3 3 Number of litres of water that can still be dispensed from the filter Filter limit 100 1 3 4 Select YES to indicate a new filter has been installed This operation returns Remaining Qty to the same...

Page 47: ...rm up phase 1 6 3 Allows to set by how many C the steam boiler temperature must be reduced during the ECO mode phase Delta temp Eco 1 7 It allows enabling of the automatic rinsing of the mixing bowls Rinsing cycle yes 1 7 1 The automatic rinsing is performed as follows Automatic the first rinsing takes place 10 minutes after the machine ready status if necessary other rinses occur 7 hours after th...

Page 48: ...cts has to be used after the same mixer had been used for hot products Or if the circuit remained idle for a longer time than set in the Mixer Cool Timeout option circuit tubes after cooler now contain hot water The options in this menu allow setting the amount of water used for rinsing each water circuit and the time of inactivity expressed in minutes after which the rinse starts Important note b...

Page 49: ...sed with or without the cup Set1 no cup Important The Set1 No cup option shall be used to set a discount for beverages dispensed without the cup The machine does not allow to set discounts on the prices but the same result can be achieved by using the second beverage set and setting the reduced price and deactivating the cup dispensing for this set To save you from copying the recipes of the stand...

Page 50: ...PU card has to count the coffees or all dispensed beverages Pulse counter Coffee 1 18 Allows selecting which beverages will be enabled for multiple brewing and the number of brewings Multiple beverage 1 18 1 Multiple beverage 000 1 18 2 Enable Multiple Bev 1 18 3 Beverage 1 yes 1 19 It allows enabling of the RESET for data in the statistics maintenance menu Enable reset no 1 20 It enables the P3 k...

Page 51: ...ase wait 1 23 2 it allows setting the message appearing on the display when the vending machine is dispensing a product Dispensing Please wait 1 23 3 It enables setting the text on the display when the vending machine stops due to a fault Out of service Call service centre 1 23 4 Allows setting the display message when the pre selection mode of the button 17 is activated for beverages 41 55 and 58...

Page 52: ...on and the display of the Remove cup message to the user Such delay is necessary to allow a complete drainage of the liquid in the dispensing tubes Tube emptying time 1 8 1 29 It allows displaying for a few seconds the selection counters total and since last reset during the machine start up phase Audit Msg Enable 1 30 To prevent syrup nozzle from clogging it is possible to enable a periodic dispe...

Page 53: ...ocol MDB SLAVE the vending machine operates as slave to another machine The NO PROTOCOL setting will be used when a payment system operating with one of the protocols provided by the other settings EXECUTIVE PRICE HOLDING BDV MDB MDB SLAVE or EXEC MASTER SLAVE is not installed on the VM Is necessary since the VM continuously checks for dialogue with the provided payment system If the VM detects no...

Page 54: ...etting Yes the change giver is called on to dispense change Alt payout no Change is limited to 255 times the scaling factor typically 12 75 for the Euro area with scaling factor of 5 By setting No change is given by exploiting the machine s algorithm Max change is 60000 units typically 600 for the Euro area 2 4 6 Enables setting of the maximum amount of change which can be dispensed by the change ...

Page 55: ...ayed residual credit The time is adjustable at intervals of 10 seconds Setting 000 the function is disabled 2 8 Enables setting of the number of fixed zeros of the credit Fixed Zeroes 0 2 9 Enables setting of the position of the decimal point of the credit Decimal Digits 0 2 10 Enabling this option an internal control is activated which resets the communication with the payment systems if the comm...

Page 56: ...e Beverage 1 The value can be set between 20 and 100 The lower the value the smaller the water delivery rate Pump 3 50 Important The pump parameter is displayed only on the machines without instant product boiler If the sequence includes several instant products the sequence INSTANT PRODUCT WATER DELAY INSTANT PRODUCTS OF INSTANT PRODUCT will be shown again If the setting relative to the instant p...

Page 57: ... wash Washing of the sugar cup mixer is performed under the following conditions Functionality for the selected beverage enabled Beverage dispensed with sugar The sugar mixer has been last used to dispense one of the instant products located next to the sugar container The quantity of water used for the wash is a factory preset value 3 5 The coffee prebrewing is a pause during coffee brewing that ...

Page 58: ...ages are given the same price level Global price 4 2 3 1 Global price setting Global price P00 0 00 By pressing the UP and DOWN keys and confirming with ENTER it is possible to choose the price level to associate to all beverages 4 2 3 2 each beverage will be given a specific price level Single Prices 4 2 3 2 Single price setting Single Prices Enables selection of the price level to associate to e...

Page 59: ...ICE TABLE Snack 1 2 Prices 4 3 1 4 4 1 The setting modes used for the beverages are also valid for the snack product prices Normal 4 3 1 1 4 4 1 1 Global price 4 3 1 1 4 4 1 1 Global price P00 0 00 4 3 1 2 4 4 1 2 Single Prices 4 3 1 2 4 4 1 2 Single Prices B01 P00 0 00 4 3 2 4 4 2 Differentiated 1 4 3 2 1 4 4 2 1 Global price 4 3 2 1 4 4 2 1 Global price P00 0 00 4 3 2 2 4 4 2 2 Single Prices 4 3...

Page 60: ... 3 00 01 allows to manage 2 snack slaves but it does not allow to use the second beverage set in pre selection mode beverages from 31 to 45 for Atlante500 and from 41 to 60 for Atlante700 The products of the first slave will be identified by the numbers from 111 to 199 while the products of the second slave will be associated to the numbers from 211 to 299 The following menus allow the parameters ...

Page 61: ...he time set the machine deactivates the selections set as food Range 0 60 Alarm timeout 5 8 11 6 8 11 min When the opening of a door is detected or if the button 5 on the 5 buttons keypad is pushed the time set here will replace the usual timeout set by the previous option Range 0 120 Refill allarm timeout This prevents the machine from entering error mode after product supply operations Please re...

Page 62: ...customer who need merely note a single code It is also useful for the service provider as it guarantees that the products at the front of the unit spirals will be dispensed first thereby avoiding problems of products remaining in the machine for too long as they have not been selected Unit codes When the units are enabled each time the unit code is selected the vending machine enables a unit spira...

Page 63: ...t product 121 three more times we will obtain supplies from spirals 123 then 21 and finally 122 always at a price of 0 10 If product 122 or 123 is selected it will be classed as not available By selecting product 124 we obtain a product from spiral 124 at a price of 0 30 Statistically the results are for 5 supplies of product 121 1 supply of product 124 and 0 supplies for all others Faulty motor e...

Page 64: ... HH 14 L and M and HL 15 Never change always available Key L channel with the lowest coin value below the minimum level M channel with the medium low coin value below the minimum level HL channel with the medium high coin value below the minimum level HH channel with the highest coin value below the minimum level STATISTICS TABLE STATISTICS Prices Capacity Errors All unit supplies will be counted ...

Page 65: ...Beverage 14 14 Beverage 14 Beverage 29 Beverage 44 15 Beverage 15 15 Beverage 15 Beverage 30 Beverage 45 KEY 11 PRESELECTION KEY 11 BEVERAGE 11 KEY 12 BEVERAGE 12 KEY 12 PRESELECTION KEY Press Press KEY Press Press KEY PRESELECTION 11 KEY KEY PRESELECTION 12 KEY 1 Beverage 1 Beverage 16 1 Beverage 1 Beverage 31 2 Beverage 2 Beverage 17 2 Beverage 2 Beverage 32 3 Beverage 3 Beverage 18 3 Beverage 3...

Page 66: ...Beverage 19 19 Beverage 19 Beverage 39 Beverage 59 20 Beverage 20 20 Beverage 20 Beverage 40 Beverage 60 KEY 16 PRESELECTION KEY 16 BEVERAGE 16 KEY 17 BEVERAGE 17 KEY 17 PRESELECTION KEY Press Press KEY Press Press KEY PRESELECTION 16 KEY KEY PRESELECTION 17 KEY 1 Beverage 1 Beverage 21 1 Beverage 1 Beverage 41 2 Beverage 2 Beverage 22 2 Beverage 2 Beverage 42 3 Beverage 3 Beverage 23 3 Beverage 3...

Page 67: ...T appears Select YES and press ENTER 9 3 2 Structure of the maintenance menu ITEM NO MENU ITEM 1 MAINTENANCE 1 1 Error log 1 2 Rinsing time 1 3 Water Filter 1 3 1 Last filter change 1 3 2 Remaining qty 1 3 3 Filter reset 1 4 Calibrations 1 4 1 Dose K calib 1 4 2 Dose C calib 1 4 3 Brew Group Calib 1 4 4 EV calib 1 5 Cool Down Boiler 1 6 Drain boiler 1 7 Boiler filling 2 STATISTICS 2 1 Total sales ...

Page 68: ...e use of the water filter to be checked Water Filter 1 3 1 Date of the last filter reset Last Filter Change 1 3 2 Number of litres of water that can still be dispensed before the filter needs to be regenerated When this value is less than 1 a Warning W83 is recorded in the Error LOG Remaining qty 1 3 3 Select YES to indicate a new filter has been installed This operation returns Remaining Qty to t...

Page 69: ...ter is dispensed from the coffee nozzle 2 STATISTICS 2 1 The total revenue from the sales of all selections and beverages is displayed By pressing ENTER it is possible to obtain detailed information of this revenue for Total sales beverages further divided according to price level if required cups sold discounts and increases made 2 2 The amount of credit collected when the OVERPAY time has elapse...

Page 70: ...hinewhereanerrorwasdetected Ifthealignmentis carriedoutsuccessfully thependingerrorsareremovedandthemotorisactivatedfordispensing Thisprocedure willremoveallthephotoelectriccellpendingerrors Auto alignment 3 4 4 4 Shows recorded temperatures for the product tray for the last 24 hours Values are recorded every 10 minutes and saved with the time of detection Temperature log LOG TABLE Exx WHAT xx cod...

Page 71: ...s inducing the MACHINE READY status before the boilers reach their set temperature If pressed after the MACHINE READY status is reached this button allows dispensing a free product this function can be enabled from the menu FREE BUTTON 9 5 Reset Open the door disable the safety device see section Safety Devices and press the button P4 to restart the vending machine management programme ...

Page 72: ...e key is pressed After the key is pressed the display shows the message NOT AVAILABLE the dispensing outlet door is closed If this is not the case the display shows the message CLOSE SERVICE DOOR The brewing cycle cannot be interrupted by the dispensing outlet door open until cup sugar and stirrer loading is complete If the door is opened accidentally it should be closed and the beverage brewing w...

Page 73: ... be cleaned using non abrasive sponges or damp cloths Do not direct water jets on the components and or on the vending machine Check for correct brewing of beverages and adjust the grinding when necessary To guarantee the correct operation of the vending machine it is recommended to conform to the instructions and times indicated in the MAINTENANCE SCHEDULE 11 2 Cleaning and scheduled maintenance ...

Page 74: ...rge tank See section Emptying the fluid discharge tank x Stirrer chute See section Cleaning the Spoon Chute x Coffee Group See section Cleaning the Coffee Brew Group x Dispensing arm Seesection CleaningtheInstantProductDispenserandtheMixer x Mixer Seesection CleaningtheInstantProductDispenserandtheMixer x Dispensing outlet See section Cleaning the Dispensing Tray x Coffee bean container See sectio...

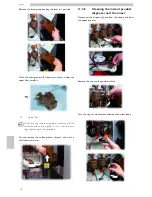
Page 75: ...tray 11 2 3 Replacement of the coffee ground bag Tighten the clip extract the full bag and replace it with a new one 11 2 4 Emptying the fluid discharge tank Remove the tank from the vending machine Wash the tank than replace it inside the machine 11 2 5 Cleaning of the coffee brew group Remove the protection carter and disconnect the hose from the dispensing arm ...

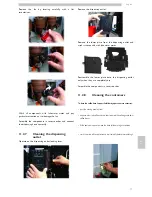
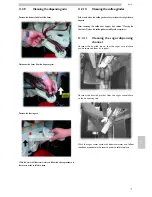
Page 76: ...sure that the reference arrows are aligned If this is not the case align them using the key provided Lift and remove the coffee ground channel and wash it with lukewarm water 11 2 6 Cleaning the instant product dispenser and the mixer Disconnect the dispensing hose from the nozzle and from the dispensing arm Remove the cap and the powders chute Turn the ring nut clockwise and remove the mixer body...

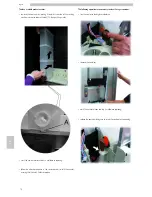
Page 77: ...pensing outlet Remove the lower plate from the dispensing outlet and wash it thoroughly with lukewarm water Reassemble the lower plate onto the dispensing outlet only when they are completely dry Assemble the components in reverse order 11 2 8 Cleaning the containers Tocleanthecoffeebeanhopperthefollowingoperationsarenecessary pushthemovingpanelinward dispenseafewtestcoffeecupsinordertoemptythecof...

Page 78: ...isterinterioranddryit wellbeforereplacing follow the above procedure in the reverse order to refit the canister ensuringthatthecatchAslotsintoplace Thefollowingoperationsarenecessarytocleanthesugarcontainer turnthecontainerlockingleverclockwise removethecontainer washthecanisterinterioranddryit wellbeforereplacing replacethecontainertakingcaretoinsertthenozzleintothecoupling ...

Page 79: ...nder of any residues that might lead to deposits After removing the coffee bean hopper see section Cleaning the Containers cleanthecoffeegrindercarefullywithanaspirator 11 2 11 Cleaning the sugar dispensing channel Unscrew the knurled pin so that the sugar swivel chute can be removed from its support Unscrew the knurled pin that fixes the sugar swivel chute to the connecting rod Wash the sugar swi...

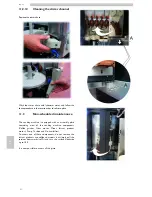
Page 80: ...enance The vending machine is equipped with an assembly plate containing most of the vending machine components Coffee grinder Gear motor Mixer Instant product motors Pump Turbine and De humidifier To access one of these components do not remove the instant products and coffee containers but simply pull the retainer downwards ref A and turn the surface clockwise up to 180 It is now possible to acc...

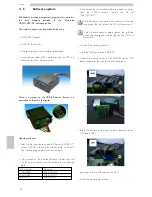
Page 81: ...fer to example A and if the key already contains data refer to example B In case A it is only possible to transfer the parameters from the vending machine to the programming key To copy data on the key press the E button and wait until the message DATA TRANSFERRED is displayed This message indicates that the write operation is complete In case B it is possible to transfer the parameters from the v...

Page 82: ...sion of the installed software is older than the 1 00 06 version rename the file based on the following table V M Version File name 1 GRINDER SAE_650C S19 2 GRINDER SAE_650M S19 INSTANT SAE_650I S19 if the version of the installed software is equal or newer than the 1 00 06 version rename the file to SAE_ATLA s19 If the file name is not correct the software will not be recognised the red light on ...

Page 83: ...or size has to be of 512 Bytes The software update request is notified by the CPU beep The file search procedure and the following recording on the microcontroller is performed according to the following steps The CPU recognises the USB key and searches for the file with the software to be loaded green and red lights on the CPU flash alternatively Once the correct file has been recognised the soft...

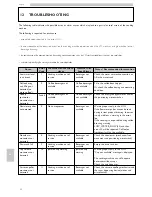
Page 84: ...movement not detected 3 and 4 Coffee beverages not available Coffee beverages not available Check the brew group gearmotor and or the positioning microswitches Flowmeter pulses not detected 5 No consequences Beverages not available Warning report only in the LOG If the flowmeter pulses cannot be read during instant product brewing the error is only visible as a warning in the error log If the read...

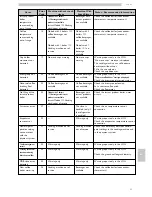
Page 85: ...tatus Abnormal coffee brewing flow detected 22 Coffee beverages not available Coffee beverages not available Check the brew group cleaning Set a coarser coffee grind Check the flowmeter No filling of the instant product boiler 24 Modelswith2boilers beverageswithinstant productsnotavailable Beverages with instant products not available Check the instant product boiler water circuit Instant Models V...

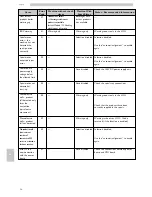
Page 86: ...ent to enable again Power board power supply voltage below the allowed limit 54 Slave disabled Check the 24VDC power supply unit Spiral motor not detected at start up 55 Slave disabled Check the spiral tray connections Photoelectric cells product fall detected only after the correction spiral extra movement 58 Warning only Warning report only in the LOG Check that the products have been correctly ...

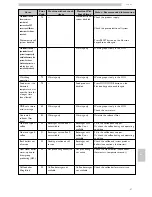
Page 87: ...oin return error message 80 Warning only Warning only Warning report only in the LOG Check the coin return Consumed softener filter signal 83 Warning only Warning only Maintain the softener filter No more type C coffee 90 Beverages with coffee C not available Beverages with coffee C not available Fill in the coffee bean hopper Or check the coffee dosing unit operating condition No more type K coff...

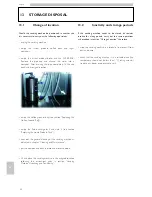
Page 88: ...section Emptying the Liquid Product Tank carry out the general cleaning of the vending machine as indicated in chapter Cleaning and Maintenance put the components back in place and close the doors lift and place the vending machine in the assigned location following the instructions given in section Vending Machine Unpacking and Positioning 13 2 Inactivity and storage periods If the vending machin...

Page 89: ...of electrical and electronic equipment By ensuring this product is disposed of correctly you will help prevent potential negative consequences for the environment and human health whichcouldotherwisebecausedbyinappropriatewastehandlingofthis product For more detailed information about recycling of this product please contact your local city office your household waste disposal serviceortheshopwher...

Page 90: ......

Page 91: ......

Page 92: ...Cod 15001683 Ed 07 Powered by TCPDF www tcpdf org ...

Reviews: