6. Replacing the brake pads
Always secure the vehicle to prevent it from
rolling away before commencing repair and
service work.
The service/parking brake and, on buses, the
frequent-stop brake, must be released.
Danger !
6.1 Removing the brake pads
6.1.1 Remove the wheels (observe the informa-
tion from the respective vehicle manufacturer).
Depending on the installation position, the brake
pads may be omitted in the following steps.
Caution!
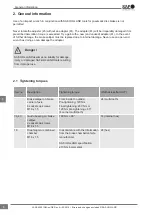
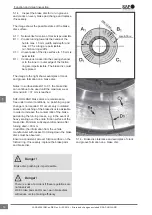
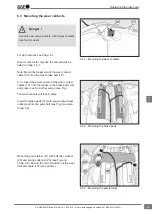
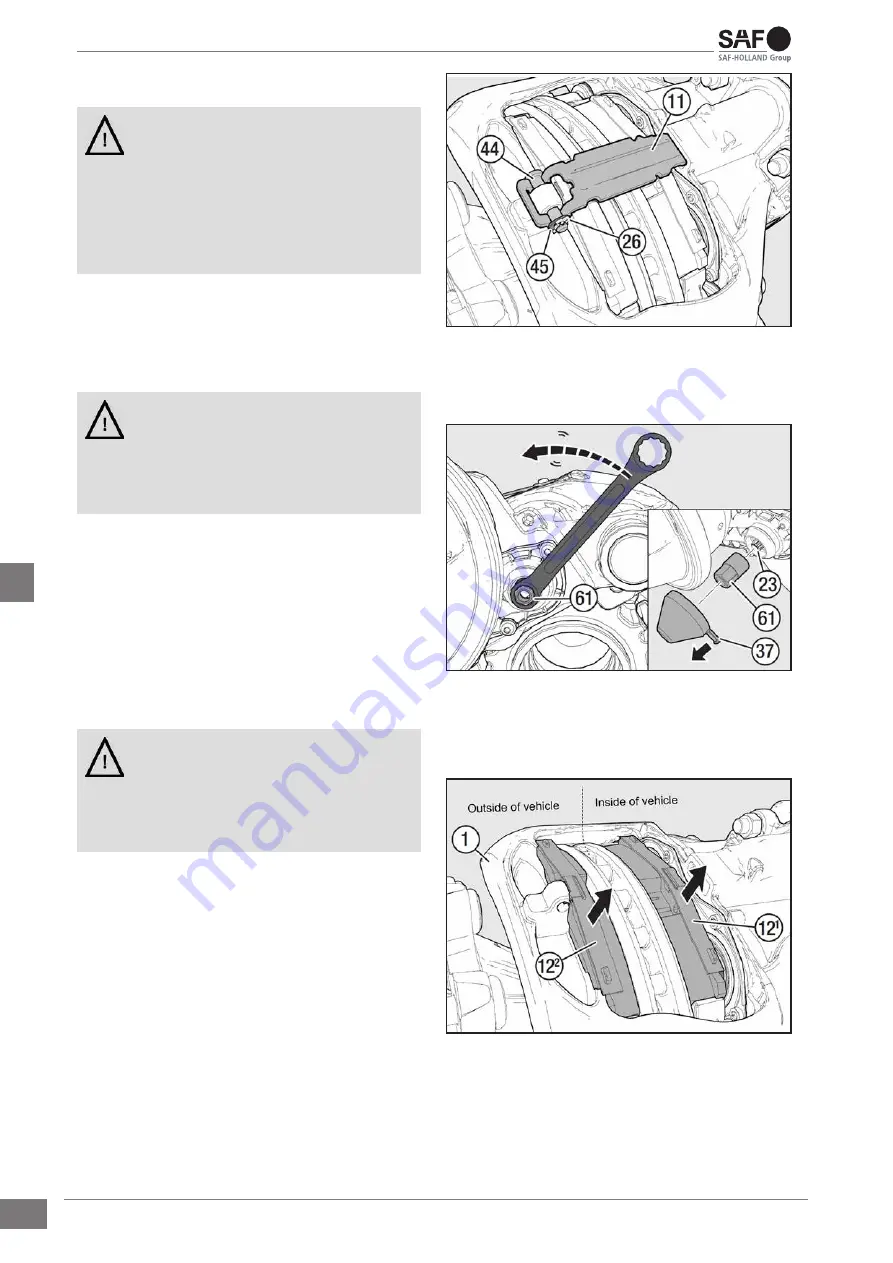
6.1.2 Remove the spring cotter pin (26) and
washer (45), pre-tension the pad retainer (11) and
press out the bolt (44) (see Fig.).
If necessary, remove the cable guide plate (104)
and wear contacts (101).
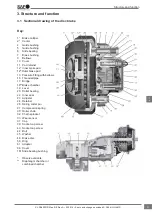
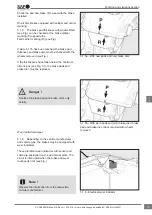
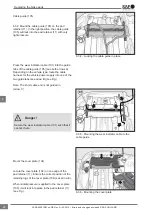
6.1.3 Remove the cap (37) with the tab
(see Fig.).
Removing the cap (37) with auxiliary equipment
can damage the adjuster seal.
Caution!
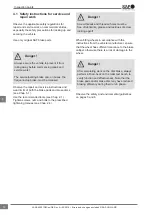
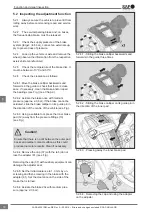
6.1.4 Using a ring spanner AF10, turn the adjust-
er adapter in an anti-clockwise direction and fully
de-adjust the threaded pipes. The turning moment
of the overload coupling in the adjuster will produce
a clicking sound (see Fig.).
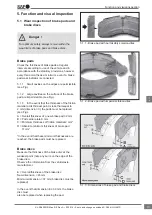
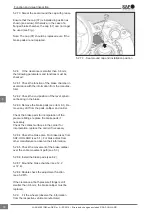
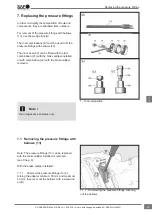
6.1.5 Pull out the brake pads (12
1
) and (12
2
)
(see Fig.).
6.1.2 - Removing the pad retainer
6.1.3 - 6.1.4 - Turning back the threaded pipes via
the adapter
6.1.5 - Pulling out the brake pads
Replacing the brake pads
22
en
XL-SA40001RM-en-DE Rev A • 02.2016 • Errors and changes excluded © SAF-HOLLAND

