5 Replacement procedure
32
en
XL-SA30000RM-en-DE Rev A • 02.2016 • Errors and changes excluded © SAF-HOLLAND
Fig. 62 -
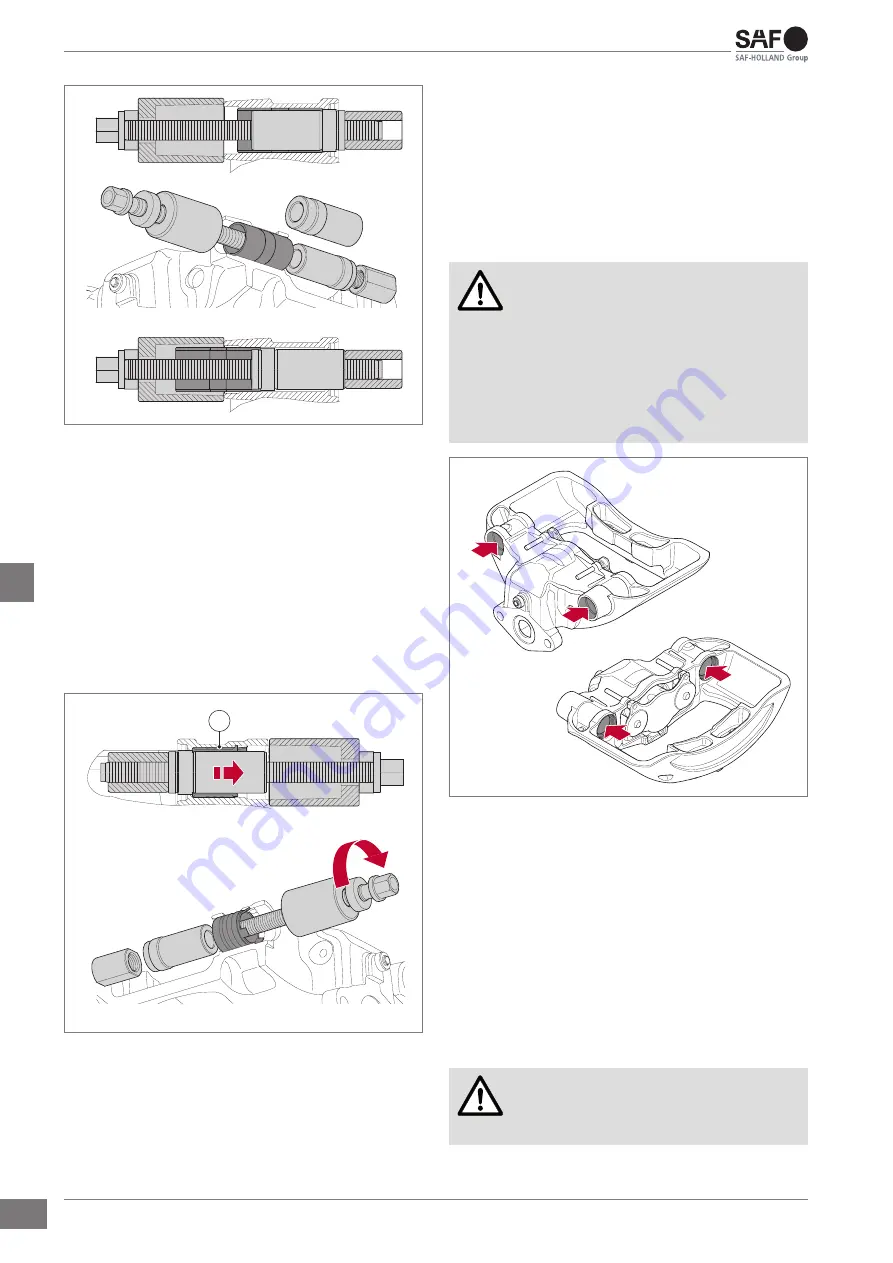
Remove the trailing slide bearing
8.
To remove both bearings (F) and the spacer (G)
on the leading side, assemble in sequence SAF
special tools P/N 4 434 3884 00, P/N 4 434 3837,
P/N 4 434 3848 0, P/N 4 434 3841 0; P/N 4 434
3890 0 and P/N 4 434 3889, as shown in ⇒Fig. 55.
9.
Once fitted correctly, rotate the threaded tool
clockwise, which will pull out the two bearings
(F) and the spacer (G). If necessary, rotate the
mandrel P/N 4 434 3889 00 half way through
the extraction process so that the nut P/N 4 434
3841 00 can be held.
H
Fig. 63 -
Removing the composite bushing
10.
The composite bushing (H) on the floating bearing
should be removed by hand.
11. If this is not possible, assemble in sequence SAF
special tools P/N 4 434 3884 00, P/N 4 434 3837,
P/N 4 434 3848 00, P/N 4 434 3841 00, P/N 4 434
3890 00 and P/N 4 434 3889,
.
12.
Once fitted correctly, rotate the threaded tool
clockwise, which will pull out the composite bush-
ing.
5.5.3 Cleaning
Caution!
●
Use a vacuum cleaner to clean the surfaces. Do
not use compressed-air.
●
Take care when using chemicals and/or cleaning
tools (e.g. knives, brushes, etc.). This to avoid
damage or displacement of hoses, seals and
other components.
Fig. 64 -
Cleaning the brake calliper bearing/bushing mating
surfaces
1. Clean the bearing/bushing/bellows mating sur-
faces of the brake calliper to ensure that they are
free from dirt, moisture, corrosion and damage,
.
2. If the sealing surfaces have lost their protective
surface coating, apply/smear a small amount of
general purpose grease over the whole area so
that when components are refitted, the grease will
provide corrosion protection.
5.5.4 Installing the slide function assembly
Caution!
Where indicated, use an SAF special tool only.


