Page 2
www.safe-t-cover.com 1-800-245-6333
Version 2.0
3.
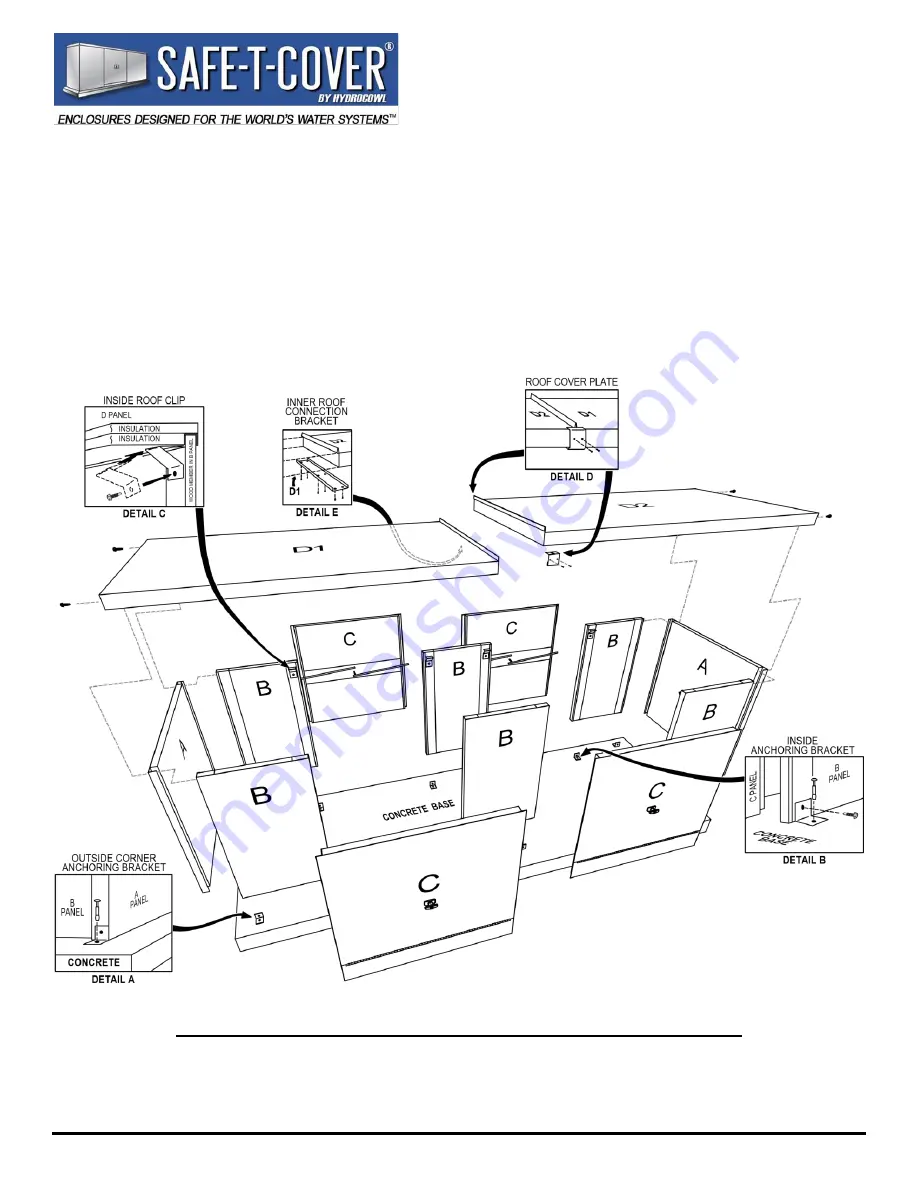
Mark the concrete base for outside the enclosure (43
3
/
8
” wide by 177
1
/
8
” long).
4.
Assemble the “B-A-B” (corner-end-corner) assemblies through the holes provided using Hex Head
Screws. (For best results, insert a bead of silicone caulk into the inside bend of the “A” panel corners.)
Set them on the marked concrete base (Fig. 1).
5.
Set the “C” (access) panels and the “B” (middle) panels in place in the following roof assembly steps
while trying to maintain about a
3
/
16
” gap on both sides of each “C” (access) panel. Measure and verify
the inside length of the enclosure during assembly progress. If the length does not match the Enclosure
Plan View, compensate by increasing or decreasing the suggested
3
/
16
” gaps until the inside length is
correct. Try to maintain the same gap at all gap locations.
FIG. 2
NOTE: model sizes and configurations vary, see the Enclosure Plan View.
6.
Set the “D1” (roof) panel on a “B-A-B” (corner-end-corner) assembly, and then fasten it in place
through the holes provided (Fig. 2) using two (2) Hex Head Screws.


