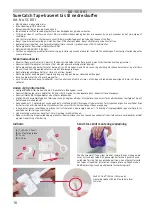
3
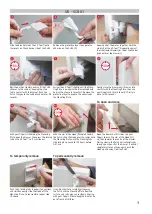
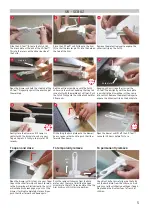
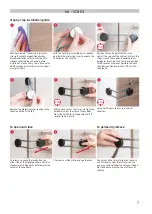
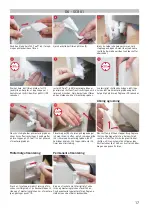
Slide the broad plate of the EZ-Tool™ onto
the recess on the adhesive side of the Catch.
Remove the protective layer to expose the
adhesive on the Catch (C).
Keeping all of the pieces together, hold the
stop tab of the EZ-Tool™ diagonally against
the side (lower drawers) or top of the cabinet
(cupboards or top drawers).
Roll the entire assembly over until the Catch
adheres to the cabinet, keeping the stop
tab in contact with the cabinet. Push the
Catch firmly onto the cabinet and hold for 30
seconds.
Swivel the EZ-Tool™ slightly until the Moun-
ting Plate is parallel to the drawer/cupboard
door as they come in to contact. Remove the
protective layer to expose the adhesive on
the Mounting Plate.
Gently close the drawer until it comes into
contact with the Mounting Plate, then use
your fingers and thumb to hold it firmly in
place for 30 seconds.
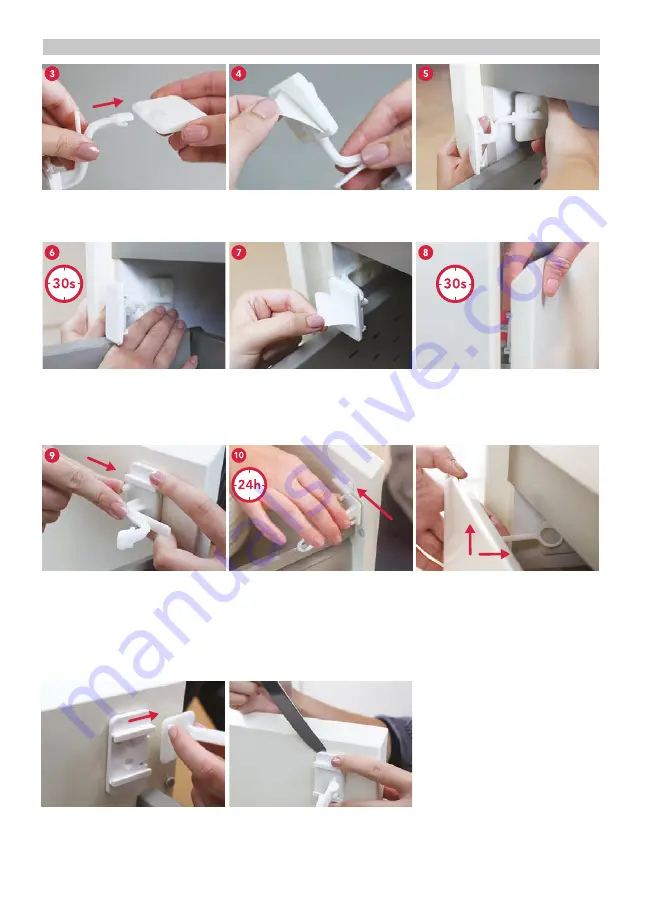
With your fingers still holding the Mounting
Plate, open the drawer, then press the locking
tab on the EZ-Tool™ so it can slide out.
With the arm of the Hook (D) angled toward
the Catch, slide the Hook over the ramps onto
the Mounting Plate until the 2 locking tabs
click into place. Leave for 24 hours before
first use.
To open and close
Open the drawer until it stops. Use your
fingers to push the arm of the Hook first
up, then towards the centre of the drawer.
Closing slowly, the Catch will automatically
re-engage as you shut the drawer. It will not
completely close until you again push the
Hook up and away from the Catch.
To permanently remove
To temporarily remove
Push the 2 locking tabs in opposite directions,
and simultaneously slide the Hook off the
Mounting Plate. To reassemble, repeat step
10 above.
Use a blunt knife to carefully prise away
the Catch and the Mounting Plate from the
surface, and rub away any residual adhesive
with your fingers. Please keep the blunt knife
out of reach of children.
UK - SC 801


