1
2
Wipe clean with bleach or bathroom sanitizer.
To Clean
Para limpiar
To Use
Cómo utilizar
1
1
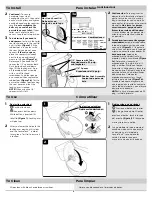
Dual action unlocking:
Push button back,
then press button down.
While button is pressed, lift
toilet lid
(Figure 1)
. Locking arm
will pivot up.
2
After you lower the lid, push the
locking arm down until it clicks
and the SecureTech
TM
symbol
turns green. Test lid to ensure it
is locked.
2
1
2
To Install
Para instalar
(continuación)
2
Continued:
To secure
hardware from step 1,
handtighten the nuts, then hold
each nut with pliers and tighten
each bolt head another quarter-
turn.
Do not overtighten the
bolts or you could crack the
porcelain on your toilet.
If your
toilet seat has plastic bolt
covers, snap them into position.
3
To determine if you need to
add spacers,
first push the toilet
seat lock down onto the seat lid
until it clicks
(Figure 3)
. If the
rubber foot is in contact with
the seat lid, you do not need
spacers.
If there is a space,
place the spacers (included)
next to the gap and visually
measure the gap
(Figure 3a)
.
Determine if you need the 1 4”
spacer, the 1/2” spacer or both.
Push button back and down,
then lift the locking arm. Pop
off the rubber foot assembly
with a small flat head
screwdriver. Snap the spacers
on as needed, then replace the
rubber foot
(Figure 3b)
. Test to
ensure the rubber foot touching
the seat cover and that the
locking arm is locked.
NOTE:
When using the 1/4”
spacer, install it first.
3a
3
3b
1/2” Spacers with Tabs
Espaciadores de 1/2 pulg.
con lengüetas
1/4” Spacer
Espaciador de 1/4 pulg.
Rubber Foot Assembly
Conjunto de patas de
hule
2
Dual action unlocking:
Doble acción destrabar:
0.25" (.64 cm)
0.5" (1.3 cm)
0.75" (1.9 cm)
Limpie con blanqueador o limpiador de baños.
Must touch seat lid.
Debe estar en
contacto con la tapa.
Combinations: Combinaciones:
0.25"
(.64 cm)
0.5"
(1.3 cm)
1
Doble acción para destrabar:
Presione el botón hacia atrás
y luego hacia abajo. Mientras
presiona el botón, levante la tapa
del asiento
(Figura 1)
. El brazo de
cierre girará hacia arriba.
2
Luego de bajar la tapa, empuje el
brazo de cierre hasta que encaje
en posición y el símbolo de
SecureTech™ se vea de color
verde. Pruebe la tapa para
asegurarse de que esté trabada.
2
1
2
Continuación:
Para asegurar los
elementos de ferretería del paso 1,
ajuste las tuercas con la mano y
luego sosténgalas con una pinza
para ajustar los pernos otro cuarto
de vuelta.
No ajuste los pernos
excesivamente, porque podría
fisurar la porcelana del inodoro.
Si las cubiertas de los pernos del
asiento son de plástico, trábelas
en posición.
3
Para determinar si necesita agregar
espaciadores,
empuje la traba sobre
la tapa del asiento hasta que encaje
con un clic
(Figura 3)
. Si la pata de
hule está en contacto con la tapa del
asiento, no necesita espaciadores.
Si
hay un espacio,
coloque los
espaciadores (incluidos) junto al
espacio y mídalo visualmente
(Figura
3a)
. Determine si necesita el
espaciador de 1/4 pulg. o el de 1/2
pulg., o ambos. Presione el botón
hacia atrás y hacia abajo, y levante el
brazo de cierre. Retire el conjunto de
patas de hule con un destornillador
de punta plana. Coloque los
espaciadores necesarios y luego
instale la pata de hule
(Figura 3b)
.
Pruebe la traba para asegurase de
que la pata de hule esté en contacto
con la tapa del asiento y que el brazo
de cierre esté trabado.
NOTA:
Si utiliza el espaciador de 1/4
pulg., instálelo primero.


