46
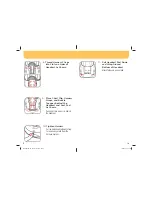
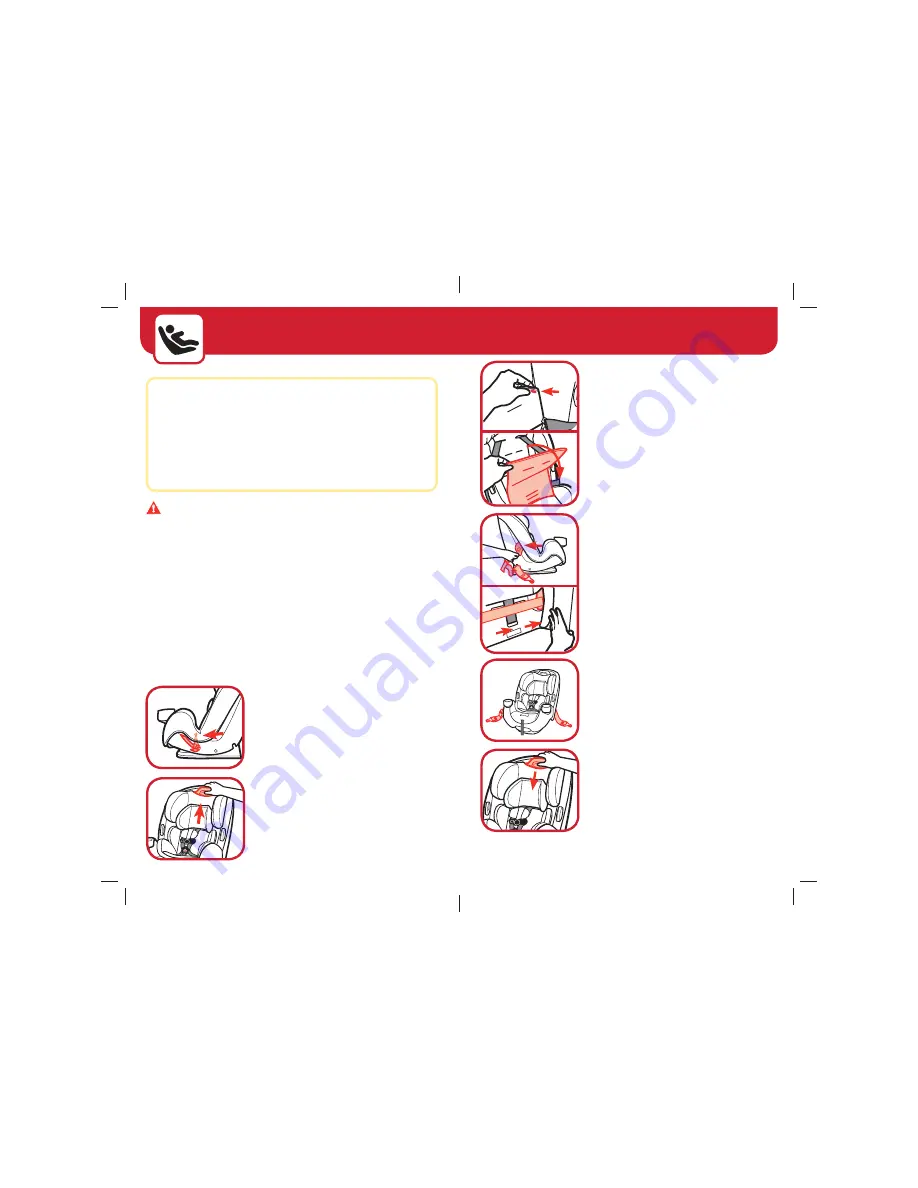
Lower Anchor Belt Installation
1.
Remove Lower Anchor
Belt from Storage
Location
Remove it from the rear-facing belt
path so both hooks are on the same
side of the seat.
WARNINGS:
Do not use the lower anchors of the child
restraint anchorage system (LATCH system) to attach this child
restraint when restraining a child weighing more than 40 lbs (18
kg) with the internal harnesses of the child restraint.
The vehicle belt must be used for installation if your child
weighs more than 40 lb (18 kg).
Do not use the lower anchor belt along with the vehicle lap or
lap/shoulder belt.
Check the lower anchor belt before each use. Use only if the belt
can be tightened properly and securely.
Do not fasten both lower anchor hooks on the same lower an-
chor bar in the vehicle.
Failure to follow these warnings can result in serious injury or
death.
continued on next page
45
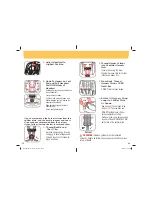
4.
Route Lower Anchor
Belt Through Forward-
Facing Belt Path
Do not twist belt.
The lower anchor belt adjuster can be
on either side.
5.
Finished Lower Anchor
Belt Routing
Safety Tips
Make sure harness and buckle fit your child correctly before
installing the child restraint. See pages 3-5.
Experts agree that children should remain rear facing as long
as possible. In this child restraint, your child can remain rear
facing up to 40 lb (18 kg) and up to 40 in. (101.6 cm).
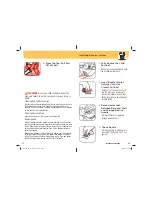
2.
Adjust Headrest to
Highest Position and
Remove Body Pillows
3.
Undo Fasteners on Seat
Pad and Pull Easy Belt
Access Panel Down
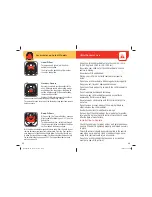
6.
Replace Easy Access Belt
Panel
Attach seat pad fasteners.
If you would like, you may put the body
pillows back in seat.
Adjust the headrest/harness to the proper height for your child
.
See page 5 for fi t guidelines.
4358-6835 Grow and Go Air.indd 51-52
4358-6835 Grow and Go Air.indd 51-52
10/29/15 3:34 PM
10/29/15 3:34 PM

