www.safetyxpress.com.au
PRODUCT INFORMATION &
INSTALLATION GUIDE
1300 049 246
Specifications
SKU
BOLSM140D
Material
Hot Dip Galvanised Steel
Colour
Powder Coated Yellow with
Class 1 Red Reflective Tape
with Blue / White Disabled
Parking Sticker
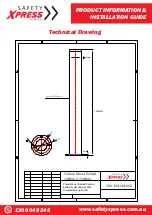
Dimensions:
Height:
1300mm
Diameter:
140mm (Pole) 250mm (Base)
Wall Thickness:
3mm
Base:
4 Mounting Holes
16mm each in Diameter
Item Weight
16kg
Surface Mount Bollard
Installation:
1.
Read all instruction steps from beginning to
end.
2.
Determine exactly where the bollard will be
placed. If you are installing more than one
bollard, it is a good idea to mark the ground
to ensure that you have a straight line to
assist you with the correct placement of
your bollards.
3.
Using your hammer drill, drill a guide hole
in the surface, through each hole in the
bollard using the drill bit. (This is to mark
the surface so that you know where to
continue to drill).
Tools Required:
•
Hammer drill with 14mm drill bit for M10 coach
screw 100mm, or 10mm drill bit for M10 concrete
screw anchors
•
Fixing kit (M10 coach screws 100mm, or 60mm
M10 concrete screw anchors, or 100mm M10
concrete screw anchors)
•
The correct sized socket
• A hammer
•
A hand broom or industrial vacuum
4.
Remove the bollard and brush or vacuum
away the dust.
5.
Continue to drill each guide hole to almost the
entire length of your fixings.
6.
If you are using a plastic plug component, put
it in the drilled hole and hammer in.
7.
Place the bollard over the holes, line up and
place your fixing in the holes and screw or
ahmmer in.
8.
Use your socket to tighten the screw if
applicable. Be careful not to overtighten.
2
2
MONTHS
MONTHS
FREE
Fixings
P
Reflective


