22
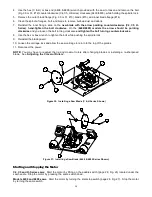
Figure 19: Installing a Saw Blade (6400 & 6800 series)
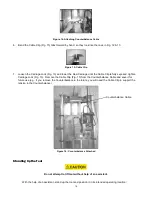
3. Tighten the carriage lock. While holding the spindle lock “in” (#16)(located on the bottom side of the motor)
remove the blade bolt by turning it clockwise. Remove the outer blade flange, but leave the inner blade flange
on the spindle.
4. Install the blade with the arrow pointing clockwise as shown Fig. 19 #15
5. Reinstall the outer blade flange (#13) and hand-tighten the arbor bolt (#12). To keep the spindle from turning
while you tighten the bolt hold “in” the spindle lock button (#16).
6. Install Blade Guard before operating (Page 22).
7. Loosen the carriage lock and allow the saw carriage to return to the top of the guides.
NOTE: It is a good idea to have spare blades available to prevent downtime.
To reduce the risk of injury, do not operate the tool without the blade guard in place.
Installing the Blade Guard (aka Dust Bonnet)
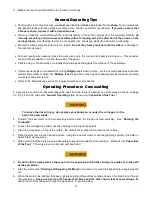
The blade guard (Fig. 20) for C & H series is in the box marked “Saw Motor.”
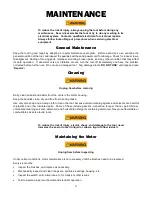
NOTE: The blade guard for 6400 & 6800 is factory installed.
Always install the blade guard before operating the saw.
The guard is shipped with two (6400 & 6800, Fig. 21) or three (C & H series, Fig. 20) torque knobs (#22) installed,
depending on the model. Remove the knobs to install the guard. Be sure to leave the rubber washers on the torque
knobs, as they prevent the knobs from slipping.
Attach the guard (Fig. 20 & 21 #21) to the carriage by reinstalling the torque knobs as shown (Fig. 20 & 21, #22).
Return the carriage to the top of the guide tubes and tighten the carriage lock.
14
15
13
12
16


