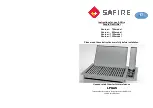


· Make sure that the gas cylinder is kept upright at all times, screw the regulator
onto the cylinder until it is fully engaged. Hand-tighten only.
· If there is a leak on your appliance (smell of gas), take it outside immediately into
a well-ventilated flame free location where the leak may be detected and
stopped.
5. Lighting, extinguishing and using the appliance
· Use this appliance only on a firm level surface.
· Do not use cooking pots that overhang the body of the appliance.
· To open the cylinder valve turn the knob anti-clockwise for 1½ turns which will
open the valve to provide sufficient gas. It is not necessary to open the valve to its
stop and doing so may cause the valve to jam in the fully open position thus
making it difficult to close.
· To ignite the appliance, turn on the control valve for the burner to be lit by pushing
it in and turning the control knob to the ignite position. This will create the spark
and ignite the applicable appliance burner. If the burner fails to ignite it can be lit
by using a match or barbecue lighter.
· Use the burner control knob to adjust the flame intensity to the desired level by
turning the knob clockwise to increase the flame and anti-clockwise to decrease.
· After use, first close valve on gas cylinder. When the flame has extinguished
close all the burner control valves on the appliance by turning the knobs
in a clockwise direction to the off position.
6. Cleaning and Maintenance
· Do not use the appliance with a cracked or perished regulator seal and/or LPG
hose. Inspect both seals and hose regularly and replace if they are not in order,
before using the appliance.
· Should the hole in the Jet become blocked this may result in a reduced flame or
failure of a burner to ignite. Do not attempt to clean the jet with a pin or other such
device as this may damage the orifice, which could make the appliance unsafe.
If a jet needs to be replaced use only genuine spares.
· To clean the appliance, simply wipe with a damp cloth using a little detergent, if
necessary. Do not immerse in water or allow water to enter the burner ports as
this will allow water to get into the mixing tube causing the appliance to
malfunction.
· It is best practice to clean the fat trap and drip tray after each use.
· If the lava rock need to be washed to remove fate residue it is important to ensure
they are completely dry before placing them back onto the appliance. Failure to
do this may result in the lava rocks cracking or splitting when the appliance is
next used. It is recommended they be placed in the sun for a few hour to make
sure they are fully dry.
· Do not use abrasive cleaners or scourers on any part as this will cause
permanent damage to the surface finish.
· There are no preset service intervals for this appliance. Simply by cleaning after
use it will give many years of trouble free service.
· Before testing for a leak firstly check that the regulator seal is in place and in
good condition. Replace if in doubt. Also check the hose clamps on both ends
of the hose are in place and properly tightened. Examine the hose for signs of
splitting or any other type of damage or wear. Replace if in doubt.
· When satisfied that the above points are all in order then follow the steps
below to check for a leak.
· Connect the cylinder to the appliance, open the cylinder valve and with the
appliance valves in the closed position, check for a gas leak as indicated below.
· To check for a gas leak, brush all the connection joints with soapy water.
· If bubbles form then there is a gas leak. Immediately turn off the gas supply
firstly by closing the control valve on the gas cylinder and then the appliance
valve, check that all the connections are properly tightened. Re-check with
soapy water.
· If a gas leak persists return the product to your gas dealer for inspection
and/or repair.
· Do not modify the appliance. Do not use it as a heater.
· During use, parts of the appliance will become hot. Avoid touching hot parts
with bare hands. The use of oven type gloves is recommended.
· Keep young children away from the appliance at all times.
· This appliance may only be used in a well ventilated area for the efficient
performance of the appliance and the safety of the occupants of the area.
3. Preparing a new appliance for use
· Make sure the appliance is standing on firm level surface.
· The correct hose and regulator is supplied with the appliance. Do not connect
the appliance directly to a cylinder without the use of a regulator as it is
dangerous to do so. Secure the hose to the connector using a meta hose clamp
· Do not twist or pinch the hose, and ensure that it is routed away form any heat
source.
· Ensure that the burner control valve is in the off position before
connecting the cylinder
· Evenly place the supplied lava rocks on the wire support frame and then place
the cooking grid on the appliance
4. Fitting and Changing the Gas Cylinder
· Before connecting the appliance to a gas cylinder, always ensure that the
rubber seal on the Regulator is in position and in good condition and blow out
any dust from the cylinder opening to prevent possible blockage of the jet.
· When removing a gas cylinder e.g. to change cylinders, firstly close the
cylinder valve and then the appliance valve, making sure the flame is
extinguished, before unscrewing the regulator. Re-fit the regulator to a full
cylinder following the same precautions as described above.
· Ensure that the gas cylinder is fitted or changed in a well-ventilated location,
preferably outdoors, away from any source of ignition, such as naked flames
and away from other people.


