


44
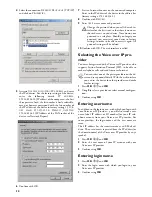
On the cordless telephone
1
Press
[
, and using
[
select
SETTINGS
.
2
Confirm using
OK
.
3
Dial using
[
ADVANCED SET.
.
4
Confirm using
OK
.
5
Dial using
[
SET BASE
.
6
Confirm using
OK
.
7
Dial using
[
DELETE HANDSET
.
8
Confirm using
OK
.
9
Using
[
select which cordless telephone you are
would like to de-register.
10
Confirm using
OK
.
11
Confirm the de-registration with
ô
Yes
. The con-
nection with the device is disconnected.
Registering the cordless telephone with
other devices
You can register a cordless telephone on four different de-
vices (= base units).
On the device
1
Register the cordless telephone with the first device as
described above.
2
Press
OK
,
58
and
OK
on the next device.
3
Confirm the preset PIN code (
0000
) or enter a new
PIN code.
4
Confirm using
OK
.
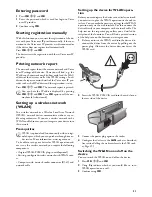
On the cordless telephone
5
Press
[
, and using
[
select
SETTINGS
.
6
Confirm using
OK
.
7
Dial using
[
ADVANCED SET.
.
8
Confirm using
OK
.
9
Dial using
[
SET HANDSET
.
10
Confirm using
OK
.
11
Dial using
[
PERSON.REGISTR
.
12
Confirm using
OK
.
13
Select the next device (= base station) using
[
.
14
Confirm using
OK
.
15
Confirm the name of the base unit, or enter a new
name.
16
Confirm using
OK
.
17
Enter the same pin code which you entered on the oth-
er device.
18
Confirm using
OK
.
19
Using
[
select the number with which you would like
to register the cordless telephone on the device.
20
Confirm using
OK
.
Setting the preferred base unit
Preferred base unit
With this function you can specify which device (= base
station) should be used for placing telephone calls if you
have registered your cordless telephone with multiple de-
vices. When you select
AUTO
, the cordless telephone auto-
matically connects to the device that is within the range.
1
Press
[
, and using
[
select
SETTINGS
.
2
Confirm using
OK
.
3
Dial using
[
ADVANCED SET.
.
4
Confirm using
OK
.
5
Dial using
[
SET HANDSET
.
6
Confirm using
OK
.
7
Dial using
[
BASE PRIORITY
.
8
Confirm using
OK
.
9
Press
õ
EDIT ENTRY
.
10
Using
[
select the device to which you would like to
assign the priority, or select auto setting.
11
Confirm using
OK
.
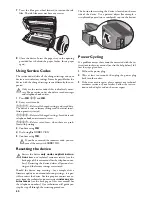
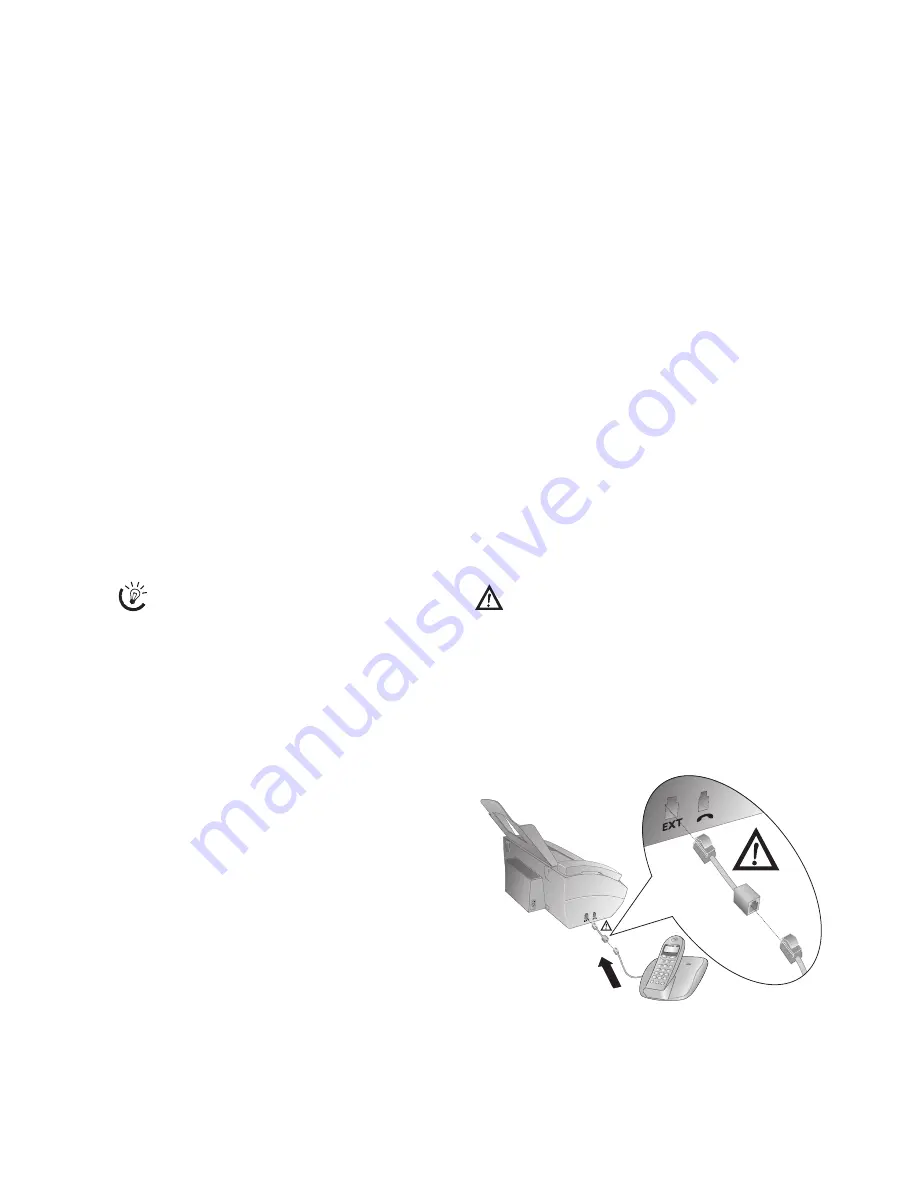
Connecting Additional Devices
Additional Devices
You can operate additional devices on a telephone line,
such as cordless telephones, answering machines, modems
or charge counters.
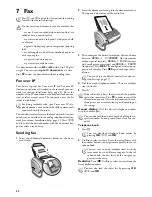
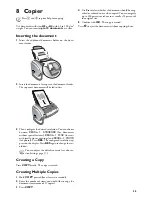
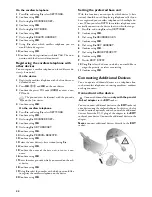
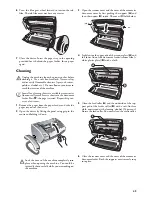
Connection to the device
EXT socket adapter
EXT connection adapter
You can connect additional devices to the
EXT
socket of
your device using the enclosed adapter. In this way, the fax
switch functions optimally and can control the additional
devices. Insert the RJ-11 plug of the adapter in the
EXT
socket of your device. Connect the additional device to the
adapter.
Never
connect additional devices directly to the
EXT
socket.
Externe Geräte anschließen
The pin code can be identical with the pin code
on the first device.
Connect additional devices
only with the provid-
ed adapter
to the
EXT
socket.
Summary of Contents for IP PHONEFAX 49A
Page 1: ...User Manual...


