background image

2. Settings

2. Settings


17

Chapter 2. Settings

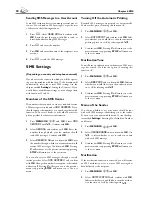
  Locking the Machine

With the locking function, you can prevent unauthor-
ised persons from using your fax machine. You can lock 
either the entire keyboard or the number pad of your fax 
machine.

  Entering the Code

You must fi rst enter a code for activating or deactivating 
the lock.

1

 Press 

MENU/OK

61

 and 

OK

.

2

 Select 

locking


code

 with 

¾

 and confi rm 

with 

OK

.

3

  Enter a four-digit code and confi rm by pressing 

OK

.

4


Enter the code again for confi rmation purposes, then 
press 

OK

. Pressing 

C

 will return you to the previous 

menu step; pressing 

STOP

 will return you to the 

root menu.

If you have already saved a code, the device will ask you 
to provide the old code fi rst before you can enter a new 
code.

    Locking the Keyboard

1

 Press 

MENU/OK

61

 and 

OK

.

2

 Select 

lock


keybd.

 with 

¾

 and confi rm with 

OK

.

3

  Enter the four-digit locking code and confi rm  by 

pressing 

OK

. Select 

with

 with 

¾

.

4

 Confi rm with 

OK

. Pressing 

C

 will return you to the 

previous menu step; pressing 

STOP

 will return you 

to the root menu.

All of the keys on the fax machine are now locked. Only 
after entering of the correct code will it be possible to ac-
cess functions or enter numbers. Th

  e lock will turn itself 

on again after each use of the fax machine. You can cancel 
the keyboard lock by repeating this process and selecting 

without

 under step 

3

.

   Locking the Number Pad

1

 Press 

MENU/OK

61

 and 

OK

.

2

 Select 

lock


number

 with 

¾

 and confi rm it by 

pressing 

OK

.

3

  Enter the four-digit locking code and confi rm  by 

pressing 

OK

. Select 

only


direct.

 with 

¾

.

4

 Confi rm with 

OK

. Pressing 

C

 will return you to the 

previous menu step; pressing 

STOP

 will return you 

to the root menu.

Th

  e number keys on the fax machine are now locked. You 

can cancel the lock on the number pad by repeating this 
process and selecting 

Free

 under step 

3

.

 Energy Saving Mode

Your fax machine switches into the energy saving mode 
by default. It is not necessary for you to set the device to 
this mode. Whenever you receive a fax or if you would 
like to print or make a copy, your fax machine will auto-
matically switch back from its energy saving mode to its 
operating mode.

 Setting the Fax Reception 

Mode

Th

  e built-in fax switch makes it possible to carry on a 

telephone conversation, send and receive faxes, and run 
additional devices on a single telephone PTT line. Four 
diff erent operating modes are available to you:  


FAX

EXT/ANSW.

 (answering machine), 

AUTOMATIC

 or 

manual

.

Press the 

MODE

 key to select the desired operating 

mode. Th

  e selected fax reception mode appears on the 

display.

     Setting the Number of Rings

Th

  e fax switch of your machine distinguishes between fax 

transmissions and telephone calls. Furthermore, the fax 
switch can also control additional devices that you have 
connected to your fax machine through the 

EXT

 socket. 

You can set the number of ring signals for the fax recep-
tion mode with function 17.

1

 Press 

MENU/OK

17

 and 

OK

.

2

 Use 

¾

 to select from the list of possible ring set-

tings. You can set between 0 and 5 rings.

3

 Confi rm with 

OK

. Pressing 

C

 will return you to the 

previous menu step; pressing 

STOP

 will return you 

to the root menu.

Summary of Contents for MF 3265

Page 1: ...User Manual FAX 3245 MF 3265...

Page 2: ...ser printer on ordinary paper Modem Super G3 33k6 modem Fax memory 120 pages Fax switch Automatic Manual EXT Answering machine Fax Polling of fax transmissions Automatic document feeder for 20 documen...

Page 3: ...Inserting Documents 22 Sending a Fax 22 Manually Sending a Fax 23 Speed 23 Transmission Report 23 Fax Reception 23 Sorted Print Outs 24 Printing Multiple Copies 24 Time Stamp 24 Broadcast Transmissio...

Page 4: ...cushions and do not cover the ventilation slits Oth erwise the fax machine can overheat and catch on re In the event that your fax machine becomes too hot or if you see smoke coming from the device yo...

Page 5: ...ater hot water would only cause the toner to set If the LCD should break a mildly caustic liquid can escape Absolutely avoid all contact with your skin and eyes Your fax machine has been tested in con...

Page 6: ...et External device Telephone cable USB port MF 3265 Mains Cable Toner cartridge Document support Document guide Document feed slot Operation panel with LCD display Document outlet Print out and fax ou...

Page 7: ...mission or fax reception h f F Set resolution NORMAL FINE h SFINE f PHOTO F C Delete One menu step back W Read edit or send SMS mes sages List of the last ten numbers dialled Blue key and List of last...

Page 8: ...d fax outlet tray Pull the print out and fax outlet tray out of the paper tray cover Attaching the Document outlet tray Insert the document outlet tray into the two openings under the operation panel...

Page 9: ...try and to enter your number and name as well as the date and time see chap ter on Settings If you would like to perform a quick in stall again simply press and select it with help page 2 installation...

Page 10: ...Do not inhale the released toner dust Remove the toner dust from clothing or ob jects with cold water hot water would only cause the toner to set 3 Take the new toner cartridge from the package 4 Remo...

Page 11: ...ve not installed a new cartridge press STOP If you have in stalled a new cartridge press OK and follow the descrip tion set forth above Displaying theToner Level Whenever you insert a new toner cartri...

Page 12: ...ax machine all the way to the stopping point Do not pull out the paper tray while the fax machine is in the process of printing This can lead to a paper jam If a paper jam should occur follow the sugg...

Page 13: ...service provider Private Branch Exchange PABX Private branch exchanges PABX are customary in all larger businesses Before making a telephone call or send ing a fax you must press an outside line acces...

Page 14: ...ontrol the peripheral devices see the chapter Settings Fax Reception Mode Connection to theTelephone Line You can connect additional devices to the same telephone socket Make sure the fax machine is t...

Page 15: ...nu step pressing STOP will return you to the root menu Setting the Date andTime 1 To set the date and time on the display press MENU OK 13 and OK 2 Enter the date and time in the following manner 0808...

Page 16: ...fault resolution setting Press MENU OK 16 and OK Select SCANNING MODE with then press OK Select the desired resolution and con rm with OK Pressing C will return you to the previous menu step pressing...

Page 17: ...the four digit locking code and con rm by pressing OK Select only direct with 4 Con rm with OK Pressing C will return you to the previous menu step pressing STOP will return you to the root menu The...

Page 18: ...the in coming call is a fax transmission If the device recognises a fax signal it will automatically receive the fax transmis sion If you do not have an answering machine connected or if a connected a...

Page 19: ...entries can be up to 20 characters in length Saving New Entries 1 Press 2 Select add name with and con rm by press ing OK 3 Enter a name using the letter keyboard To enter capital letters press and th...

Page 20: ...ber from 1 to 9 and con rm your entry by pressing OK The group is now saved Editing a Group 1 Press 2 Select modify with and con rm by pressing OK 3 Select the group that you would like to edit by pre...

Page 21: ...t To make use of this func tion Calling Line Identi cation Presentation CLIP must be enabled for your telephone line Contact your telephone company to inquire about whether or not this additional func...

Page 22: ...of sizes A4 210 297 millimetres let ter 216 279 millimetres or legal 216 356 millime tres with 60 to 90g m2 You will nd a table listing sizes in the chapter entitled Installation Paper Do not use any...

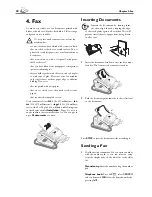
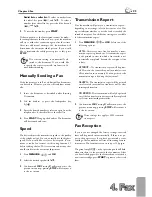
Page 23: ...ious menu step pressing STOP will return you to the root menu Transmission Report Your fax machine will print you a transmission report depending on its settings after it has sent out a fax This repor...

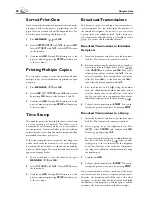
Page 24: ...ither enter the numbers of the individual recipients one by one or you can select a group from your telephone book In the latter case your fax machine will send the fax to all members of this group Yo...

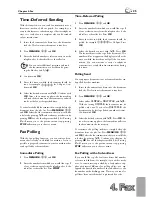
Page 25: ...ferred Polling 1 Press MENU OK 22 and OK 2 Enter the number from which you would like to poll a fax or select an entry from the telephone book the redial list or the caller list Press OK 3 Enter the t...

Page 26: ...me After the job number and job status indicator you will nd the fax number to which a fax is to be sent or from which it is to be polled Documents on the jobs list can fall into the following categor...

Page 27: ...most document will be copied rst 2 Press the COPY key twice The copying process now commences Adjusting Copies 1 Insert the documents face down into the document feed slot The lower most document wil...

Page 28: ...e SMS message Telephone book Press then select the desired entry from your telephone book by pressing Press W The fax machine will now send the SMS message Redial list Press then select the desired nu...

Page 29: ...ssages to an e mail address or as fax transmissions to another fax machine SMS Messages to E Mail 1 Press W select send SMS and con rm with OK Enter the text that you would like to send as described u...

Page 30: ...and con rm with OK Change the number for reception as described under step 3 Pressing C will return you to the previous menu step pressing STOP will return you to the root menu Turning Off the Automa...

Page 31: ...step pressing STOP will return you to the root menu Text2Fax Depending on country and telephone network From your laser fax machine you can send a text as a fax transmission to another fax machine Mo...

Page 32: ...er cartridge With P P you can scan and manage documents The laser fax machine is registered as the default printer on your computer You can access it as you would any other printer and use it to creat...

Page 33: ...hine At the conclusion of the installation process you must restart your computer Make your selection as to whether the computer should restart automatically or whether you would like to restart the c...

Page 34: ...e Click on S to change the basic settings of your fax machine Under S you can select the settings for the display of the toner level If you would like to scan documents click on the large icon D M in...

Page 35: ...the connection type and set the parameters for the fax machine You can also con gure the security codes for the fax memory and keyboard lock Displaying theToner Level Click on the S button The toner...

Page 36: ...ow opens You can also start the scanning process from any other graphics program if it is supported by the Twain Driver Select the Twain Scanner Driver as your scanner The Twain Driver selection windo...

Page 37: ...ter entitled Installation New Toner Cartridge If you have inadvertently pressed STOP you can start the re charging process by pressing MENU OK 62 and OK and then selecting new black with Con rm with O...

Page 38: ...mber pre x of an inexpensive telephone service provider see Call by Call as a telephone book entry select this entry and manually enter the desired telephone number or se lect another number from the...

Page 39: ...ing Machine bps Bits per second transfer rate CCITT Comite Consultatif International Telephonique et Telegraphique forerun ners of the ITU CE Conformit Europ enne CEPT Conference Europ enne des Admini...

Page 40: ...of each received fax A memory bu er guarantees that exact data are issued even after a pow er loss In this way you can verify exactly when a fax has reached you Tone Dialling also Dual Tone Multi Fre...

Page 41: ...w 16 Setting protected fax reception 28 reception 24 Settings for fax reception 3 SMS Service 31 Send sMS 28 Entering and sending SMS messages 32 read sms 28 Reading SMS messages 33 delete sms 29 Dele...

Page 42: ...ing Speed 10 pages minute Print Width 200mm Telephone Connection Type Public Switched PSTN Private Branch Exchange PABX Telephone Book Entries approx 200 Fax Device Type Group 3 Compatibility ITU T T...

Page 43: ...ning re shock or water damage of any nature or modi cations made without the written approval of SAGEM Communication Austria GmbH or a failure or neglect to maintain the equipment or inappropriate mai...

Page 44: ...44 ChapterAppendix...

Page 45: ...group at PC 35 number and name 15 symbols 7 telephone book entry at PC 34 Error correction mode 38 Execute jobs immediately 26 EXT fax reception mode 17 socket 14 18 Extension 38 External answering ma...

Page 46: ...nd fax 22 fax broadcast 24 fax polling 25 SMS message 28 SMS to e mail 29 SMS to fax 29 Text2Fax 31 time deferred 25 Sender identification 40 Set country 15 date and time 15 keyboard lock 17 language...

Page 47: ...vers 33 Paper Port 33 software 33 Unpacking 8 Update toner level memory 11 USB port 6 33 PC connection 32 Use Companion Suite 34 Paper Port 36 telephone book 19 User account send SMS 30 V Validity per...

Page 48: ...please contact the technical service cen tre for your country Should problems arise during use of your machine please contact your retailer rst This user manual was printed on recycled paper bleached...

Reviews: