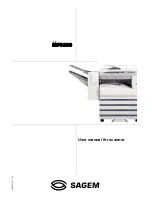
background image

S

User

 manual

 for scanner

MF9300

30000

113477

-0

 1

Summary of Contents for MF9300

Page 1: ...S User manual for scanner MF9300 30000113477 0 1...

Page 2: ...SAGEM SA Microsoft Windows operating system is a trademark or copyright of Microsoft Corporation in the U S A and other countries Windows 95 Windows 98 Windows Me Windows NT 4 0 Windows 2000 and Wind...

Page 3: ...fer to your operating system manual or the online Help function The explanations of screens and procedures in this manual are for Windows XP The screens may vary depending on your Windows version and...

Page 4: ...ION METHODS FOR SCAN TO E MAIL 22 SCANNING AND TRANSMITTING A TWO SIDED ORIGINAL when an RSPF is installed 24 SCANNING A LARGE NUMBER OF ORIGINALS when an RSPF is installed 25 SCANNING SETTINGS ORIGIN...

Page 5: ...to a preset e mail address to inform the recipient of the location of the scanned image data This is called Scan to FTP Hyperlink in this manual 2 A scanned image can be sent to a computer connected t...

Page 6: ...k scanner function Programming custom index names p 9 Setting passwords p 16 ACCESSING WEB PAGES Use the following procedure to access the Web pages 1 Open the Web browser on your computer Supported b...

Page 7: ...Desktop and Scan to E mail You can also edit or delete previously set destination information Sender p 15 Enter the sender s information that appears in the recipient s e mail program sender name and...

Page 8: ...ed from the scanned image is larger than the set limit the image file is discarded The limit can be set from 1 MB to 10 MB in increments of 1 MB The factory default setting is Unlimited If you wish to...

Page 9: ...d all of the entries click Submit The entries will be stored Configuring DNS server settings If you entered a host name in Primary SMTP Server or Secondary SMTP Server of SMTP Setup you must also conf...

Page 10: ...ction by means of user passwords stored in the LDAP server p 17 To allow the machine to use the e mail addresses in the LDAP server the LDAP server settings must be configured in the Web page 1 Click...

Page 11: ...the custom indexes follow the steps below 1 Click Network Scanning in the menu frame 2 Click Custom Index 3 Enter names for groups 1 to 6 Six group indexes are available and a name up to six characte...

Page 12: ...e menu frame 2 Click E mail 3 Enter the destination information For detailed explanations of the procedures for establishing settings click Help in the menu frame 4 When you have completed all of the...

Page 13: ...on an e mail will be sent to the recipient informing them of the file format and location of the scanned image data A hyperlink to the file server to which the scanned image data was sent appears in t...

Page 14: ...etwork scanner function has been added to the same network and you wish to perform Scan to Desktop from the added machine to a destination programmed in the previously existing machine Refer to Editin...

Page 15: ...ations in a single operation 1 Click Destination in the menu frame 2 Click Group 3 Enter the destination information For detailed explanations of the procedures for establishing settings click Help in...

Page 16: ...hed be sure to click Submit to save your changes 4 To delete the selected destination click Delete under the Destinations List A message appears asking you to confirm the deletion Click Yes to delete...

Page 17: ...r establishing settings click Help in the menu frame If user authentication is enabled and you wish to allow login using the above stored information enter the login name for that information in Login...

Page 18: ...current password in Admin Password When establishing a password for the first time enter sagem in Admin Password 4 Enter passwords in User Password and Admin Password A maximum of 7 characters and or...

Page 19: ...e SCAN key on the operation panel The login screen will appear in the touch panel 2 Touch the LOGIN NAME key 3 Touch a login name key and then touch the OK key 4 If a password has been established for...

Page 20: ...of the recipient manually instead of using a one touch key SEND SETTINGS key p 30 Touch this key to change the subject file name or sender when sending a scanned image When using Scan to E mail Two si...

Page 21: ...server is used touch this key to select a Scan to E mail destination in the LDAP server If an LDAP server is not used the key is grayed out and cannot be selected ABC GROUP key Touch this key to switc...

Page 22: ...setting is 300dpi 6 Select the file format p 29 The factory default settings are FILE TYPE TIFF COMPRESSIONMODE MMR G4 PAGES PER FILE ALL 7 Touch the ADDRESS BOOK key The address book screen appears...

Page 23: ...entered manually or you can search for a destination in an LDAP server on the network p 22 to 23 Multiple destinations can be specified for a Scan to E mail transmission p 22 When sending an image by...

Page 24: ...a destination touch the key of the destination that you wish to delete Touch the OK key to return to the initial screen 7 Continue from step 9 of BASIC TRANSMISSION METHOD p 21 ADDRESS BOOK ADDRESS E...

Page 25: ...rs have been configured and you wish to select a different server touch the ADDRESS BOOK key and then touch the GLOBAL ADDRESS SEARCH key 9 Touch the ADDRESS REVIEW key and check the destinations When...

Page 26: ...INAL key Example The icon that appears when the 2 SIDED BOOKLET key is touched 5 Continue from step 4 of BASIC TRANSMISSION METHOD p 20 to 21 If the correct original size does not appear in the screen...

Page 27: ...the next batch and press the START key Repeat this sequence until all pages have been scanned 8 When all originals have been scanned touch the READ END key SENDING PRESS C TO CANCEL appears in the tou...

Page 28: ...in the top half of the ORIGINAL key Standard sizes The following originals sizes will be correctly detected Countries regions that use inch based standard sizes 11 x17 8 1 2 x14 8 1 2 x11 8 1 2 x11 R...

Page 29: ...will be processed according to the selected type You can select the original type from TEXT TEXT PHOTO or PHOTO TEXT Text original TEXT PHOTO Original with mixed text and photos PHOTO Photograph or il...

Page 30: ...ently clear image data for normal text originals 200 dpi is equivalent to the Fine character mode used for facsimiles The 600 dpi setting should only be used in cases where high clarity image reproduc...

Page 31: ...Touch the OK key You will return to the initial screen AUTO 8 X11 ORIGINAL 300dpi RESOLUTION QUALITY TIFF G4 FILE FORMAT 300dpi TIFF 1 2 3 4 5 6 ALL MH G3 QUALITY RESOLUTION PDF OK NONE MMR G4 COMPRE...

Page 32: ...y Up to 64 characters can be entered 4 If SENDER is touched a sender selection screen will appear Touch the desired one touch key and then touch the OK key 5 Touch the OK key in the send settings scre...

Page 33: ...The touched key is highlighted 4 Touch the STOP DELETE key A message appears to confirm the cancellation Touch the YES key to delete the selected job key and cancel the transmission You can cancel a t...

Page 34: ...al original size take into consideration the part of the original that you wish to scan when placing the original For example if the actual size is 8 1 2 x 11 and you selected 5 1 2 x 8 1 2 for the si...

Page 35: ...mpression settings that are suited to the purpose of transmission and create image data that is well balanced in terms of image quality and file size pay attention to the following points Image qualit...

Page 36: ...nd just the originals that were scanned touch the SEND key If you wish to cancel the entire transmission touch the CANCEL key NO RESPONSE FROM SERVER COMMUNICATION TERMINATED DUE TO TIMEOUT The scanne...

Page 37: ...ver or network to go down The images on the following page will produce the following file sizes when scanned as 8 1 2 x 11 or A4 size originals If multiple images are scanned the file size will be ap...

Page 38: ...ouch the PRINTER TEST PAGE key 4 Touch the NIC PAGE key PRINT JOB IN MEMORY PLEASE WAIT UNTIL PRINT OUT appears in the message screen and printing begins If the NIC PAGE key does not appear touch the...

Page 39: ...e black and white images from a TWAIN interface into TWAIN compliant software applications Type Reader Professional Ver 5 0 trial Exper Vision inc This is used to scan text printed on paper and conver...

Page 40: ...e user s guides If not already installed in your computer you can install Acrobat Reader from the Network Scanner Expansion kit CD ROM Installing Acrobat Reader 1 Quit any software applications and or...

Page 41: ...running on your computer 2 Insert the Network Scanner Expansion kit CD ROM into your CD ROM drive The Companion installation screen appears Proceed to step 6 If the screen does not appear proceed to s...

Page 42: ...ex 3 Select the checkboxes of the process definitions that you wish to use and click the Next button The Network Scanner Tool provides process definitions as appropriate depending on whether or not Co...

Page 43: ...on is disabled being grayed out Click on the New button and enter the IP address of the machine To check the machine s IP address see CHECKING THE IP ADDRESS p 36 5 When the completion screen appears...

Page 44: ...SETUP icon Follow the on screen instructions to install TWAIN INSTALLING TypeReader Professional 5 0 Trial version 1 Quit any software applications and or resident programs that are running on your c...

Page 45: ...0 2000 double click the Add Remove Programs icon 3 Select the application that you wish to delete from the list and delete it When Companion is uninstalled Network Scanner Tool is also uninstalled Not...

Page 46: ...ode MH G3 MMR G4 NONE File creation method One file for all pages One file per each 1 to 6 pages Two sided originals Possible when an RSPF is installed Scan destinations Scan to FTP Scan to Desktop Sc...

Reviews: