


11
Inst
a
lla
ti
o
n
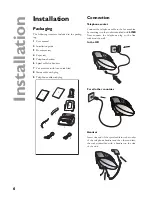
For all other countries
v
If you connect additional devices to sepa-
rate sockets (e. g. in separate rooms) your
fax switch cannot control them (which
means that your machine behaves like
any ordinary machine). For this reason
e. g. call transfer is not possible. Therefore
we recommend you to connect your addi-
tional devices to the same socket.
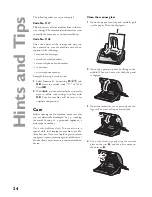
Easy Install
Easy Install ensures that your fax machine will
set itself up perfectly according to your own per-
sonal circumstances.
1
Press
w
for at least two seconds. Your fax
machine will print one page. Pull out the page
fi rmly and follow the instructions.
2
Your fax machine will then guide you on the
machines display through the fi rst settings
such as your fax number and your name.
3
Afterwards you need to enter the current time
and date. Use the dial pad to enter the correct
time and date. Confi rm with
OK
.
ISDN connection
Your fax machine is not an ISDN fax (group 4),
but an analogue fax machine (group 3). Therefore
it cannot be used directly on an ISDN connection.
You will need an (analogue) adapter or an ISDN
connection for analogue devices. For further in-
formation please refer to your ISDN instructions.
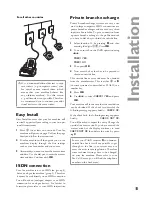
Private branch exchange
Private branch exchange systems are very com-
mon in large companies. ISDN connections are
private branch exchanges and are used very often
in private households. To get a connection from
a private branch exchange to the public network
you have to dial a key to obtain the outside line.
1
Select function 15 by pressing
M
and then
entering the digits
15
. Press
OK
.
2
You can switch on the PABX operation using
u
.
PABX:
YES
PABX:
NO
3
Then
press
OK
.
4
Now enter the key that has to be pressed to
obtain an outside line.
This outside line access code must be obtained
from the manufacturer. This is either
0
or
R
(in some systems also described as FLASH) or a
number key.
5
Press
OK
.
6
Use
u
to select
CHECK:
YES
and press
OK
.
Your machine will then check that the outside line
can be obtained. If the check is successful, the
following message appears briefl y:
check OK
.
If the check fails, the following message appears
briefl y:
check NOT OK
.
You will be asked to repeat the entry. Change the
outside line access code. If you have entered the
correct code but the display continues to read
check
NOT
OK
then delete the code by press-
ing
C
.
In case your PABX requires
R
to obtain an
outside line but it is still not possible to get
through to the line, your system may not
meet the most recent regulations. Therefore
some technical settings have to be changed
on your fax machine. Please refer to your
Fax Call Centre (you will fi nd the telephone
number on the back cover).


