Page 3
3. Connecting the F@ST3284 Gateway to Your Computer
Installation Procedure for Ethernet Interface
Follow the steps below for proper installation:
1.
Make sure your computer meets the system requirements.
2.
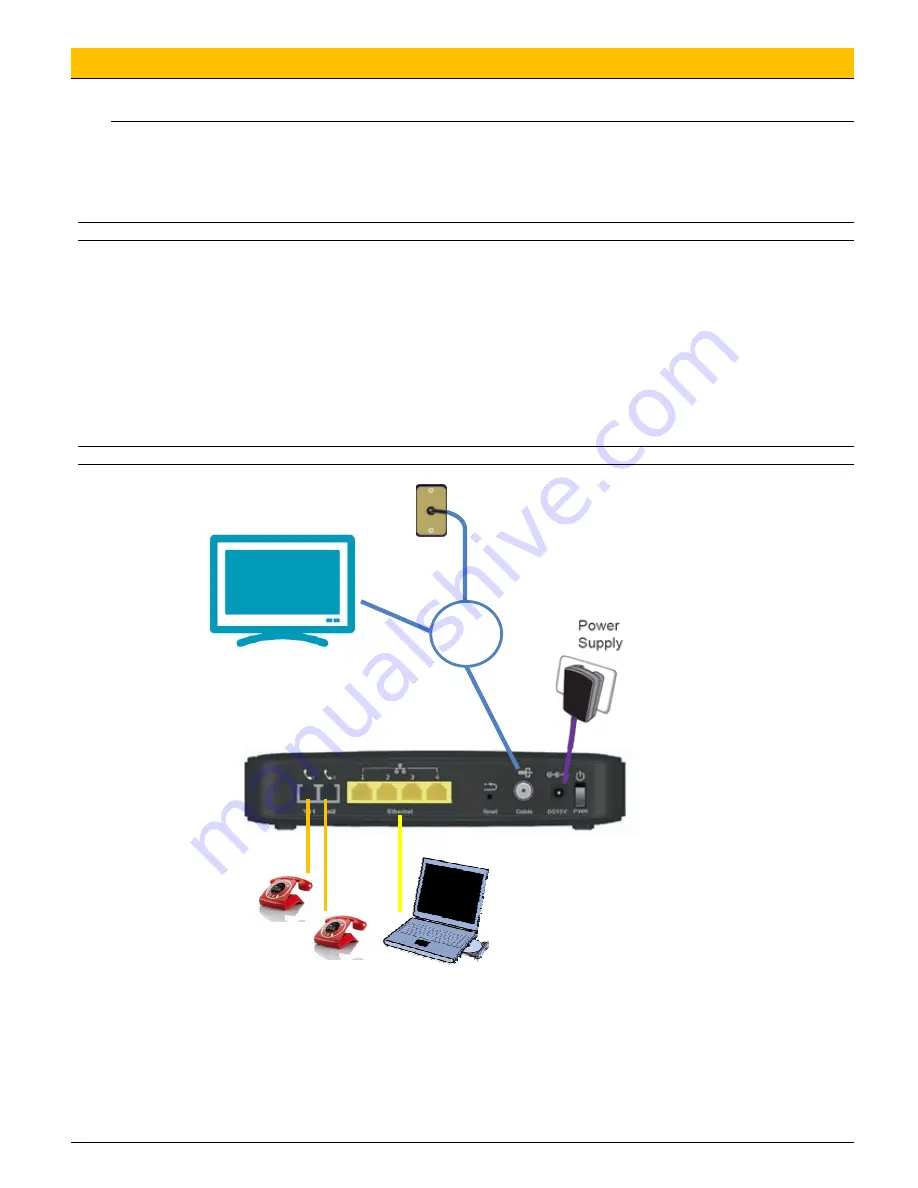
Connect a coaxial cable to the wall plug
3.
Connect a coaxial cable to the CABLE connector on the F@ST3284u and screw it at the bottom manually (do not force).
Note:
To speed up the registration process of
F@ST3284u
, the coaxial cable should be connected to the gateway prior to the power connector.
4.
Connect the RJ45 Ethernet cable to the
ETHERNET
connector on the gateway, connect the other end with the
10/100/1000BaseT Ethernet port on your computer.
5.
Plug the RJ11 telephone cord(s) to the TEL 1 or TEL2 connector (s) of the cable modem. (Plug the RJ11 telephone cord(s) to
the PSTN connector on the modem, connect to the PSTN service provider. This step is for EMTA with PSTN model only.)
6.
Plug the power supply unit into the
POWER
connector of the modem.
7.
Plug the other end of the power supply unit into a power outlet.
8. Power ON the F@ST3284u by pressing the ON/O FF button on the rear panel of the F@ST3284u.
9.
The cable gateway will look for the proper cable modem signal in the Cable Television network and process the initial
registration. The cable gateway is ready for data transfer after the LED “
INTERNET
” is in solid white. The gateway is ready to
make a phone call after the LED “
Tel1
” or “
Tel2
” is in solid white.
Note:
The
RESET
button at the rear panel is for maintenance purpose only.
The screen of the coaxial cable is intended to be connected to earth in the building installation
Cable
splitter


