background image

User Manual 


Contents 

1


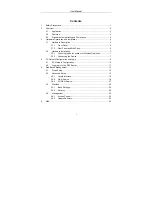
Safety Precautions ............................................................................................. 1


2


Overview ............................................................................................................ 2


2.1


Application ............................................................................................. 2


2.2


Features ................................................................................................ 3


2.3


Standards Compatibility and Compliance.............................................. 4


3


Hardware Description and Installation ............................................................... 5


3.1


Hardware Description ............................................................................ 5


3.1.1


Front Panel ................................................................................. 5


3.1.2


Rear Panel and Side Panel ........................................................ 6


3.2


Hardware Installation............................................................................. 7


3.2.1


Choosing the Best Location for Wireless Operation ................... 7


3.2.2


Connecting the Device ............................................................... 7


4


PC Network Configuration and Login................................................................. 9


4.1


PC Network Configuration ..................................................................... 9


4.2


Logging In to the DSL Router .............................................................. 11


5


Web-Based Management ................................................................................ 12


5.1


Quick Setup ......................................................................................... 12


5.2


Advanced Setup .................................................................................. 15


5.2.1


Layer2 Interface........................................................................ 15


5.2.2


WAN Service ............................................................................ 19


5.2.3


3G WAN Service....................................................................... 27


5.3


Wireless............................................................................................... 29


5.3.1


Basic Settings ........................................................................... 29


5.3.2


Security..................................................................................... 30


5.4


Management........................................................................................ 32


5.4.1


Access Control.......................................................................... 33


5.4.2


Update Software ....................................................................... 33


6


Q&A.................................................................................................................. 34


Summary of Contents for F@ST 4320

Page 1: ...F ST 4320 User Manual VER 1 0...

Page 2: ...or relocate the receiving antenna Increase the separation between the equipment and receiver Connect the equipment into an outlet on a circuit different from that to which the receiver is connected Co...

Page 3: ...provides an indication of the maximum number of terminals allowed to be connected to a telephone interface The termination on an interface may consist of any combination of devices subject only to the...

Page 4: ...t the user to disconnect the equipment Users should ensure for their own protection that the electrical ground connections of the power utility telephone lines and internal metallic water pipe system...

Page 5: ...allation 7 3 2 1 Choosing the Best Location for Wireless Operation 7 3 2 2 Connecting the Device 7 4 PC Network Configuration and Login 9 4 1 PC Network Configuration 9 4 2 Logging In to the DSL Route...

Page 6: ...it at once Proper space left for heat dissipation is necessary to avoid any damage caused by overheating to the device The holes on the device are designed for heat dissipation to ensure that the devi...

Page 7: ...e with standard connectors You can connect the Ethernet interface of WAN to Internet with Ethernet cable for ETH uplink Multiple workstations can be networked and connected to the Internet by a single...

Page 8: ...fer rates compatible with IEEE 802 11b g n Optimized Linux 2 6 Operating System IP routing and bridging Asynchronous transfer mode ATM and digital subscriber line DSL support Packet Transfer Mode PTM...

Page 9: ...application level gateway ALG ITU G 992 1 G dmt ITU G 992 2 G lite ITU G 994 1 G hs ITU G 992 3 ADSL2 ITU G 992 5 ADSL2 ITU G 993 1 VDSL ITU G993 2 VDSL2 3G WCDMA CDMA2000 TD SCDMA ANSI T1 413 Issue...

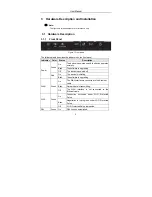
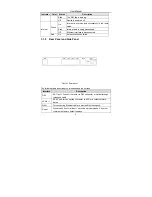
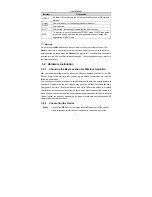
Page 10: ...operates normally Blink The software is upgrading Green Off The device is powered off On The device is initiating Power Red Blink The software is upgrading On The WAN interface is connected to the Et...

Page 11: ...has failed 3 1 2 Rear Panel and Side Panel Figure 2 Rear panel The following table describes the interfaces and the buttons Interface Description DSL RJ 11 port Connect the router to DSL connector or...

Page 12: ...efaults 3 2 Hardware Installation 3 2 1 Choosing the Best Location for Wireless Operation Many environmental factors may affect the effective wireless function of the DSL Router If this is the first t...

Page 13: ...PC through an Ethernet cable Step 3 Plug the power adapter to the wall outlet and then connect the other end of it to the Power port of the router The followig figure displays the connection of the DS...

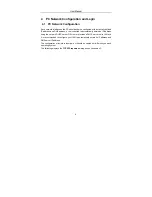
Page 14: ...tructed to automatically obtain an IP address using the network DHCP server DSL router provides a DHCP server on its LAN and it is recommended to configure your LAN to automatically obtain its IP addr...

Page 15: ...re as follows Step 1 Choose Start Control Panel Network Connections Step 2 Right click the Ethernet connection icon and choose Properties Step 3 On the General tab select the Internet Protocol TCP IP...

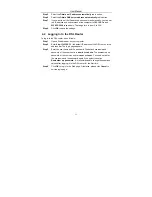
Page 16: ...er do as follows Step 1 Open a Web browser on your computer Step 2 Enter http 192 168 1 1 the default IP address of the DSL router in the address bar The login page appears Step 3 Enter the user name...

Page 17: ...all the settings and diagnose the system 5 Web Based Management This chapter describes how to use Web based management of the DSL router which allows you to configure and control all of DSL router fea...

Page 18: ...0 to 255 VCI Virtual Channel Identifier The virtual channel between two points in an ATM network ranging from 32 to 65535 1 to 31 are reserved for known protocols Encapsulation Mode You can select LLC...

Page 19: ...N Wireless stations associating to the router must have the same SSID Enter a descriptive name that is used when the wireless client is connecting to the router Select Automatic Configuration to displ...

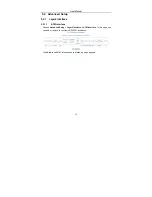
Page 20: ...tup 5 2 1 Layer2 Interface 5 2 1 1 ATM Interface Choose Advanced Setup Layer2 Interface ATM Interface In this page you can add or remove to configure DSL ATM Interfaces Click Add to add ATM Interface...

Page 21: ...en two points in an ATM network and its valid value is from 0 to 255 VCI Virtual Channel Identifier The virtual channel between two points in an ATM network ranging from 32 to 65535 1 to 31 are reserv...

Page 22: ...e the configuration and return the following page If you want to remove this Interface please select the Remove check box and click Remove 5 2 1 2 PTM Interface Choose Advanced Setup Layer2 Interface...

Page 23: ...es of equal precedence and enter the queue value Click Apply Save to save configuration 5 2 1 3 ETH Interface Choose Advanced Setup Layer2 Interface ETH Interface and the following page appears In thi...

Page 24: ...types PPPoE and IPoE 5 2 2 WAN Service Choose Advanced Setup WAN Service and the following page appears In this page you are allowed to add remove or edit a WAN service Note If PTM Interface is selec...

Page 25: ...p1 In the Wide Area Network WAN Service Setup page click the Add button to display the following page At first you must add a proper ATM or PTM interface for this WAN service Step2 In this page you ca...

Page 26: ...User Manual 21 Step3 In this page select the WAN service type to be PPP over Ethernet PPPoE Click Next to display the following page...

Page 27: ...ere all requests from the same internal IP address and port are mapped to the same external IP address and port Furthermore any external host can send a packet to the internal host by sending a packet...

Page 28: ...h PPPoE dial up If this function is enabled the modem uses this IP address as the WAN IP address Enable PPP Debug Mode Enable or disable this function Bridge PPPoE Frames Between WAN and Local Ports E...

Page 29: ...n this page it displays the information about the PPPoE settngs Click Apply Save to save and apply the settings 5 2 2 2 Adding a Bridge WAN service This section describes the steps for adding the Brid...

Page 30: ...User Manual 25 or PTM interface for this WAN service Click the Add button to display the following page Step2 Select the proper ATM Interface and then click Next to display the following page...

Page 31: ...User Manual 26 Step3 In this page you can select the WAN service type and modify the service description for this service After finishing setting click Next to display the following page...

Page 32: ...age appears This page is used to configure 3G connection If you want to access the Internet through 3G connection a 3G network card is required Connect the 3G network card to the USB interface of the...

Page 33: ...thod in the drop down list You can select Auto PAP CHAP or MSCHAP APN APN Access Point Name is used to identify the service type Enter the APN provided by your 3G ISP Dial Number Enter the dial number...

Page 34: ...tings You may also click the Auto Setting button to automatically configure the 3G connection 5 3 Wireless Choose Wireless and the submenus of Wireless are shown as below 5 3 1 Basic Settings Choose W...

Page 35: ...V can be improved SSID For the security reason you should change the default SSID to a unique name BSSID Display the MAC address of the wireless interface Country The name of the country with which yo...

Page 36: ...lows you to configure the security features of the wireless LAN interface In this page you can configure the network security settings by the Wi Fi Protected Setup WPS method or setting the network au...

Page 37: ...re This is an optional method on wireless client If you are using the PIN method you will need a Registrar access point wireless router to initiate the registration between a new device and an active...

Page 38: ...the username and password of different users After finishing setting click the Apply Save button to save and apply the settings 5 4 2 Update Software Choose Management Update Software and the followin...

Page 39: ...of router and the wall jack 4 Q Why Internet access fails while the DSL indicator is on A Check whether the VPI VCI user name and password are correctly entered 5 Q Why I fail to access the web confi...

Reviews: