background image

MF 6990dn - Agoris C935

- 49 -

6 - 

Photocopying documents

7

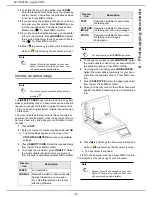
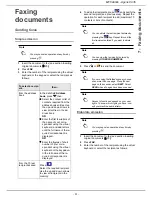
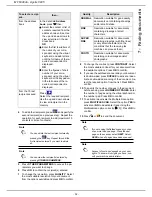
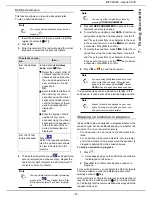
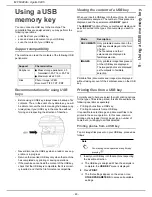
Press 

 to photocopy the document in black and 

white or 

 to photocopy the document in colour.

User rights

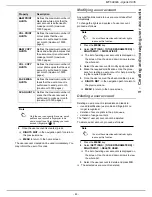
Elaborated photocopy

Elaborated copies are used to set specific settings for the 
current photocopy.

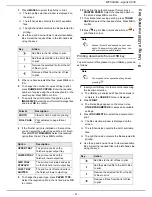
1

Insert the document to photocopy (see section 
Inserting original documents [

20]).

2

Press 

COPY

.

3

Enter the number of copies required and press 

OK

.

>

The first settings appear on the screen. Use 

OTHER PARAMETERS

 to access all available 

settings.

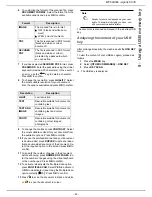
4

To change the resolution, press 

QUALITY

. Select 

the most suitable resolution for your document 
from the options available and press 

OK

 to confirm.


5

To change the contrast, press 

CONTRAST

. Select 

the most suitable contrast for your document from 
the available options. Press 

OK

 to confirm.

6

To change the luminosity, press 

BRIGHTNESS

Select the most suitable luminosity for your docu-
ment from the available options. Press 

OK

 to con-

firm.

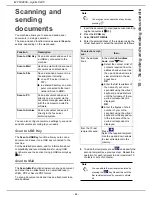
7

To activate / deactivate the assembled option, 
press 

COLLATE COPY

. Select the required op-

tion. Press 

OK

 to confirm.


8

If the finisher option is installed on the machine, 
you can select the output tray and the finish for the 
photocopied document. Press 

OUTPUT 

FINISHING

. Select the required option from the list. 

Press 

OK

 to confirm.


9

Press 

PAPER TYPE

. Select the paper type used 

from the list. Press 

OK

 to confirm.

10

To change the size of the photocopied document, 
press 

SCALE

.


11

To modify the analysis format, press 

SCAN 

FORMAT

. Select the paper format of the original 

document in the list. Press 

OK

 to confirm.

12

To define the output document format, press 

PRINTED PAPER

. Select the required option in 

the list and press 

OK

 to confirm.

Note

Access to functions depends on your user 
rights. To know which rights you have, con-
sult your machine administrator.

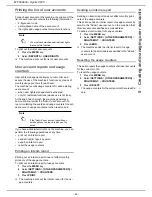
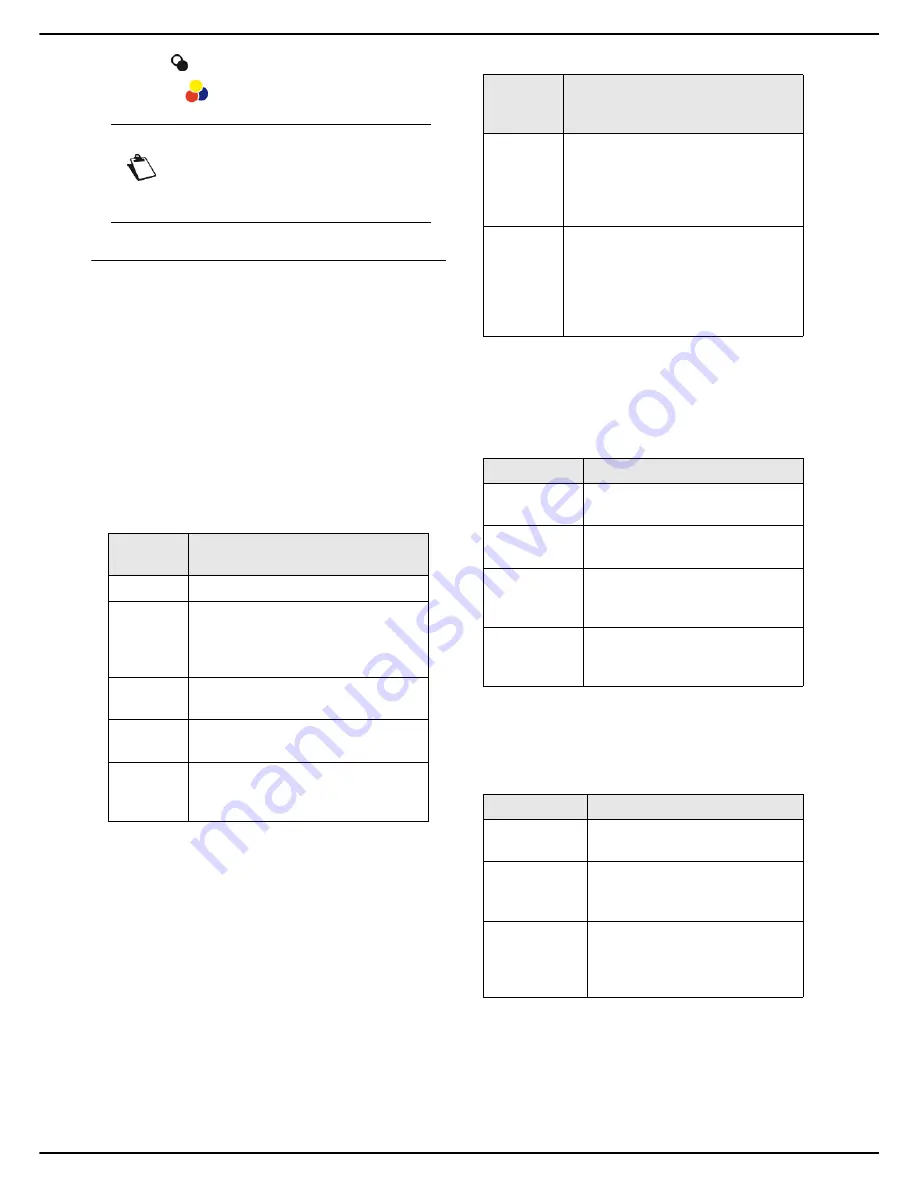
Resolu-

tion

Description

SPEED

Low resolution.

NORMAL

Resolution suited for documents with 
frames (magazines, cover pages, 
etc.). Use this resolution to prevent 
dithering problems.

TEXT

Resolution suitable for documents 
containing text.

TEXT AND 
IMAGE

Resolution suitable for documents 
containing text and colour images.

PHOTO

Resolution suitable for documents 
containing colour images, 
photographs.

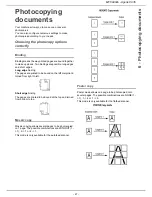
Assem-

bled op-

tion

Description

YES

The printer assembles the copies of 
the original document.
E.g.: If you make three copies of a 
10-page document, the document is 
copied three times from page 1 to 10.

NO

The printer does not assemble the 
copies of the original document.
E.g.: If you make three copies of a 
10-page document, page 1 is copied 
three times, then page 2, then page 
3 and so on.

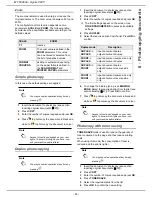
Option

Description

UPPER TRAY

The photocopied document exits 
on the finisher's upper output tray.

LOWER 
TRAY

The photocopied document exits 
on the finisher's lower output tray.

LWR TRAY 
STAPLED

The photocopied document is 
stapled and exits on the finisher's 
lower output tray.

LOW. TRAY 
SHIFTED

The photocopied document is 
offset and exits on the finisher's 
lower output tray.

Option

Description

1:1

The document is printed in scale 
1.

ZOOM

When this option is activated, the 
value defined in the 

ZOOM


parameter is taken into account.

FORMAT 
CONVERS.

Scaling is automatic depending 
on the paper formats defined in 
the 

SCAN FORMAT

 and 

PRINTED PAPER

 parameters.

Summary of Contents for MF 6990dn - Agoris C935

Page 1: ...TELECOM User Manual MF 6990dn Agoris C935...

Page 2: ...nt biometric identification user rights and administration of appliance resources management of resources available to users quotas counters Rules for using symbols This document makes use of symbols...

Page 3: ...r tray 27 Fax Settings 28 Defining the machine name and number 28 Fax emission settings 28 Fax reception settings 30 Configuring the fax server optional 32 Advanced fax settings 33 Service default set...

Page 4: ...TP 66 Scan to SMB 67 Scan to PC 69 Scan to Archive 69 Stopping an emission in progress 70 Receiving emails 70 Monitoring document emissions 70 Forcing an emission request 70 Editing an emission reques...

Page 5: ...Power switch symbols 120 Regulatory information 121 Certifications in Europe 121 Location conditions 121 Precautions for use 122 Operating environment 122 Precautions for using the machine 122 Precaut...

Page 6: ...Off button 3 Automatic document feeder 12 Master USB connector USB key 4 Original document output 13 Power cable connection 5 Access handle to flatbed scanner 14 LINE In telephone cable connection 6 T...

Page 7: ...MF 6990dn Agoris C935 7 1 Presentation of the machine 19 Paper reception stop 21 Manual feeder 20 Duplex module 22 Number pad...

Page 8: ...d Fax function To activate the Scan Document function To activate the Copy Document function To cancel the operation in progress To exit a menu without saving the changes To run the operation in progr...

Page 9: ...ll a perfume diffuser on the machine When this option is installed and activated the machine diffuses perfume every hour and for a period of time defined by you Consult the installation guide supplied...

Page 10: ...ar cover and fix it in place with the screw 9 Reconnect all cables to the machine If you are installing your machine for the first time do not switch it on First complete the configuration and connect...

Page 11: ...t exceed the fill limit 5 Close the main paper tray 6 Define the paper format and type used in the ma chine The machine automatically detects standard paper formats To check define the format and type...

Page 12: ...fill limit 6 Adjust the paper guides against the side of the pile 7 Define the paper format and type used in the ma chine The machine automatically detects standard paper formats To check define the f...

Page 13: ...hite on the right and left are re leased 7 Load the envelopes into the manual feeder 8 Adjust the paper guides against the sides of the en velopes 9 Define the paper format and type used in the ma chi...

Page 14: ...ith the print surface facing up 5 Make sure the paper does not exceed the fill limit 6 Adjust the paper guides against the side of the pile 7 Close the additional paper tray 8 Define the paper format...

Page 15: ...country from the list Use the up and down arrows to scroll through the available countries Press OK to confirm the new setting Choosing the country automatically configures the machine s default lang...

Page 16: ...ly allocate its network settings This operation may take a few minutes 3 Check that the parameters IP ADDRESS SUBNET MASK GATEWAY PRIMARY DNS SECONDARY DNS WINS 1 SERVER et WINS 2 SERVER are correctly...

Page 17: ...the upper frame of the screen displays the navigation path leading to the current menu For example to create a contact in the address book the path is as follows 1 Press the MENU key to display the ho...

Page 18: ...onfiguration parameters For more information consult the section Configuring the machine and the services 23 ADDRESS BOOK Press this button to access the machine s address book and manage contacts and...

Page 19: ...of the home screen in the form of a button The label is used to rapidly identify the nature of the problem e g paper jam A colour code is used to identify the gravity of the problem red a serious err...

Page 20: ...move staples or paper clips before inserting docu ments in the automatic feeder Do not insert the following types of documents Creased or folded paper Torn paper Corrugated paper Inserting the documen...

Page 21: ...nused for a certain time defined by the security level in your user account you are automatically logged out However you may manually force the connection or disconnection from your user account To lo...

Page 22: ...hine informs you when the option is successful If you have entered your email address the ma chine automatically sends you your fingerprint 7 When you have made the modifications press MENU to return...

Page 23: ...being executed by another connected user General settings Date Time Settings Setting the date and the time At any time you can edit the machine s date and time 1 Press MENU 2 Select SETTINGS GENERAL...

Page 24: ...network to be used in the country concerned is defined automatically 1 Press MENU 2 Select SETTINGS GENERAL GEOGRAPHICAL PHONE TYPE 3 Select the required option from the list Use the up and down arrow...

Page 25: ...the diffusion length of your choice Note that the longer the diffusion time the more the perfume is pronounced and the shorter the lifespan of the perfume unit 1 Press MENU 2 Select SETTINGS COMFORT P...

Page 26: ...PRINTER PAPER FORMAT To correct and adjust the scanner printer margins 1 Press MENU 2 Select SETTINGS SCANNER PRINTER ADJUSTMENTS 3 Make the necessary adjustment s 4 Press MENU to return to the home...

Page 27: ...of lines per page This variable is linked to the PJL variables PAPER and ORIENTATION If you change one of these variables the Line format variable is automatically updated only for the current print t...

Page 28: ...s outside the company 2 define the local prefix for a line outside the company telephone network This prefix will be automatically added when a number outside the company is di alled Prefix length To...

Page 29: ...e required recipient from the entries in the address book Press OK to confirm the new setting 7 Press MENU to return to the home screen Advanced fax emission settings 1 Press MENU 2 Select SETTINGS CO...

Page 30: ...ting received documents To activate toner saving printing 1 Press MENU 2 Select SETTINGS COMMUNICATION FAX RECEPTION PRINT 3 Press TONER SAVE 4 Select the required status from the list Press OK to con...

Page 31: ...paper tray defined as the output tray see Selecting the paper tray 31 To select the type of paper 1 Press MENU 2 Select SETTINGS COMMUNICATION FAX RECEPTION PRINT 3 Press PAPER TYPE 4 Select the requi...

Page 32: ...3 Make the required adjustments using the proce dures described below 4 When you have made the modifications press MENU to return to the home screen If the fax server function is active proceed as fol...

Page 33: ...pass from one character to the next In the event of an error use the key to delete a character 3 Press OK to confirm the new setting Defining the type of emission report You can print out an emission...

Page 34: ...INGS BY DEFAULT 3 Define the default parameters for the various func tions For the Copy function see Copy function default settings For the Fax function see Fax emission default settings For the Scan...

Page 35: ...addresses to the peripherals present on the LAN on the condition that the IP address allocated to the machine is unique and always identical Otherwise we recommend manual configuration Automatic confi...

Page 36: ...ting IEEE or Ethernet address or MAC address The machine s Ethernet interface already contains an IEEE address that cannot be modified but only consulted 1 Press MENU 2 Select SETTINGS COMMUNICATION L...

Page 37: ...dify it for example to activate FTPS Secure FTP To modify the machine s FTP port 1 Press MENU 2 Select SETTINGS COMMUNICATION SERVICES TRANS FTP FILE 3 Press SECURITY 4 Select the required encryption...

Page 38: ...print servers RAW print server LPR print server To activate and configure the protocol used by the machine on the print server 1 Press MENU 2 Select SETTINGS COMMUNICATION SERVICES 3 Press the require...

Page 39: ...to confirm 8 Press MENU to return to the home screen You can now configure the email service Email settings The machine allows you to send and receive documents by email via your local network or an i...

Page 40: ...CO and maintenance Remote reading and maintenance are functions which are part of a maintenance contract and are activated by your installer The aim of these functions is to communicate to a server ce...

Page 41: ...b 3 Select the menu TRANSFER PC 4 Select EXPORT A file saving window opens 5 Enter the name of the file the destination directory and confirm The machine settings are exported in XML format Importing...

Page 42: ...machine s hardware and software information which may be requested in the event of technical intervention or during a maintenance operation To access this information 1 Press MENU 2 Select OTHER COMMA...

Page 43: ...ghts management and limit access to all machine functions without creating user accounts the machine will only be able to be used by the Admin user account Therefore in order to set up user rights man...

Page 44: ...uthorised users ac counts can scan and send doc uments using the SCAN function after logging in Press OK to confirm the new setting Function Description Procedure Property Description CODE 4 figure co...

Page 45: ...ser account proceed as follows Administrator rights 1 Press the MENU key 2 Select SETTINGS OTHER PARAMETERS RIGHTS MGT DELETE USER The list of existing user accounts is displayed on the screen Use the...

Page 46: ...d an interim report by email export an interim report reset the usage counters Printing an interim report Printing out an interim report does not affect monthly print outs of the usage counters To pri...

Page 47: ...s and short edges Long edge binding The pages are printed to be bound on the left margin and turned from right to left Short edge binding The pages are printed to be bound at the top and turned from b...

Page 48: ...ocopy with toner saving TONER SAVE mode is used to reduce the quantity of toner consumed on the page and thus reduce printing costs When using this mode the consumption of toner is reduced and the pri...

Page 49: ...n the list Press OK to confirm 12 To define the output document format press PRINTED PAPER Select the required option in the list and press OK to confirm Note Access to functions depends on your user...

Page 50: ...To change the resolution press QUALITY Select the most suitable resolution for your document from the options available and press OK to confirm 5 To change the contrast press CONTRAST Select the most...

Page 51: ...acts required from the address book entries Use the up and down arrows to view all entries in the ad dress book OR Enter the first few letters of the name of your corre spondent using the virtual keyb...

Page 52: ...t or list of contacts required from the address book entries Use the up and down arrows to view all entries in the ad dress book OR Enter the first few letters of the name of your corre spondent using...

Page 53: ...emission queue To stop an emission in progress 1 Press A message asking you to confirm the cancellation is displayed on the screen 2 Press OK to confirm cancelling the emission in progress For severa...

Page 54: ...emission request Delete an emission request on standby or rejected Print out a document awaiting emission Forcing an emission request To force sending or resend a fax that is on standby or has been r...

Page 55: ...type of binding required long edges or short edges see the section Binding 47 specify the orientation of the document to be printed portrait or landscape or apply a 180 rotation print several pages of...

Page 56: ...s select the paper tray containing the front and back cover pages and the dividers specify the paper format and type on which to print the front and back cover pages and the dividers specify the print...

Page 57: ...eiving the print task the machine will check if the identification information correspond to those in the authorized user account Otherwise the machine will delete the print task from the print queue...

Page 58: ...ts your document If identification fails the machine displays an explanatory message insufficient rights unknown account etc In all cases contact the machine s administrator Cancelling a print in prog...

Page 59: ...and press OK You print task becomes the priority The corresponding document is printed as soon as the machine is available to print Editing a print task To edit the properties of a print task from the...

Page 60: ...you wish to print Printable files documents and images are displayed without taking account of their arborescence on the USB key Printing files from a USB key For clarity and to help you select the r...

Page 61: ...Cancelling an operation 1 Insert your USB key into the machine respecting the insertion direction The USB key is analyzed When the analysis is complete the USB KEY menu is displayed 2 Press PRINT The...

Page 62: ...SB key in JPEG PDF or Secure PDF format To scan a document and save it to a USB key proceed as follows Cancelling an operation 1 Insert the document to scan see section Inserting original documents 20...

Page 63: ...To activate deactivate the Multiple Scan option press MULTIPLE SCAN Select YES to activate it or NO to deactivate it see Using the Multiple Scan option correctly 20 Press OK to confirm 13 Press to sca...

Page 64: ...Description Scan to USB Key Scan a document and save it on a USB key connected to the machine Scan to Mail Send an email with the scanned document as an attachment Scan to File Save a scanned documen...

Page 65: ...mber pad Press OK to confirm 16 To activate deactivate the Multiple Scan option press MULTIPLE SCAN Select the option YES to activate or NO to deactivate it see Using the Multiple Scan option correctl...

Page 66: ...MENT FORMAT Select the format from the available options and press OK to confirm 11 If you have selected SECURED PDF format press PASSWORD Enter the password using the virtual keyboard maximum 20 char...

Page 67: ...ion directory shared address the SMB user and its password The SMB address is in the following format smb Server_name SharedFolder smb Server_IP_address SharedFolder When sending files the machine con...

Page 68: ...Se lect the required option from the list Press OK to confirm 15 To specify the number of pages in the document before sending press NUMBER OF PAGES Enter the number of pages using the virtual keyboar...

Page 69: ...the virtual keyboard 80 char acters maximum the default name is PUBLIC Press OK to confirm 5 To change the resolution press QUALITY Select the most suitable resolution for your document from the opti...

Page 70: ...m directly on your email client The machine can process the following formats The settings for customizing printing of received emails are described in the section Print settings for received faxes 30...

Page 71: ...ired modifications and press OK to confirm Deleting a document awaiting emission To delete an emission request from the emission queue and cancel the emission 1 Press DELETE Documents sent by email or...

Page 72: ...tions available and press OK to confirm 7 To scan the document in colour press COLOUR Select the required option in the list and press OK to confirm You can now enter the contact details with at least...

Page 73: ...onfirm 2 Press NETWORK USER Enter the SMB user name for example John Press OK to confirm 3 Press NETWORK PASSWD Enter the SMB pass word Press OK to confirm 4 Press DOCUMENT FORMAT Select the format fo...

Page 74: ...included in the list The contact selection window is displayed on the screen The left hand side contains existing contacts The right hand side contains contacts selected for the list 7 Use the up and...

Page 75: ...achine Exporting Importing the address book The address book export and import functions are particularly useful if you wish to make a backup copy of the address book restore the content of an address...

Page 76: ...tory card 1 Insert the first directory card into the machine s smart card reader The machine analyzes the directory card con tents 2 If several directory cards are required a message asking you to ins...

Page 77: ...ows 2000 minimum 512 Mb for Windows XP x86 Home and Pro 2 Gb for Windows Vista 2 Gb for Windows 7 Installing the software This section describes the following installation procedures complete installa...

Page 78: ...CD ROM drive insert the installation CD ROM and close the drive 2 An installation procedure runs automatically Auto run Otherwise double click on setup exe in the CD ROM root directory 3 A screen enti...

Page 79: ...insert the installation CD ROM The drivers are automatically detected Installing PostScript printer drivers If you wish to install PostScript print drivers on your multifunction machine 1 Connect to t...

Page 80: ...ss the Help in this manual run the PaperPort software Doc Manager To run a utility or a software present in the Companion Suite Pro kit place your cursor on it and click on the left button of the mous...

Page 81: ...K The multifunction machine will use this name to identify your PC 9 Click on OK 10 The window indicating that the installation proce dure was successful appears Click on OK Selecting the current peri...

Page 82: ...Yes To cancel the deletion click on No The peripheral no longer appears in the list You can also unregister a PC from the multifunction machine see section Unregistering a PC 40 Displaying the status...

Page 83: ...on Analysis using the Scan to function Run the application by clicking on the Companion Director icon on your desktop or from the menu Start All programmes Companion Suite Companion Suite Pro LH2 Comp...

Page 84: ...1 Use the Print command in the File menu of the ap plication currently open on the screen 2 Select the printer Color HFCv2 For more information on the print options see the section Printing documents...

Page 85: ...elect the Cover page tab and check the box With cover page Select the cover page you want to include in the drop down menu or create a new one For more information consult the section Cover page 88 7...

Page 86: ...uests currently being sent deferred emission requests requests for which several attempts have been made and which are about to be reattempted requests which have been rejected failed calls Rejected r...

Page 87: ...s automatically printed when it is sent Print the send report An emission report is printed out each time a fax is sent Print the send log The log is automatically printed out when its content reaches...

Page 88: ...nt There are two steps to creating the cover page template First step Create a background image with the re quired logos and page formatting Second step Add the field you want to be displayed on the c...

Page 89: ...cover page 2 Click on the New button The cover page Creation page is displayed 3 Click on Open in the tool bar switch the file filter to fax and go to the directory C Program Files Com panion Suite P...

Page 90: ...Companion Suite Companion Suite Pro LH2 Uninstall 1 A confirmation window appears Click on Yes to continue uninstalling the Companion Suite Pro pro gramme 2 The uninstall programme starts You can canc...

Page 91: ...m 2 Select the Color HFCv2 printer and click on the right button of your mouse 3 Select Remove device in the menu click on the left button of your mouse 4 Click on OK to confirm the deletion 5 Open th...

Page 92: ...of the printer using a soft cloth soaked in mild household detergent Use a soft cloth to clean the printer Never use abrasives or corrosive detergents Cleaning the touch screen To clean the touch scre...

Page 93: ...the message PLEASE CLEAN THE SCANNER FEED ROLLER AS DESCRIBED IN THE USER MAN UAL THEN PRESS STOP informs you that the automatic feeder can no longer feed sheets of paper dust dirt or debris obstructi...

Page 94: ...right and left are re leased 3 Clean the paper feed rollers by wiping them with a soft dry cloth To clean them rotate them in the same direction as normal paper feed 4 Close the manual feeder Cleanin...

Page 95: ...ing them with a soft dry cloth To clean them rotate them in the same direction as normal paper feed 3 Close the additional paper tray 4 Open the right side cover of the additional paper tray 5 Clean t...

Page 96: ...d of its lifespan The following messages will appear on your machine THE TONER CARTRIDGE X IS NEARLY EMPTY the toner cartridge whose colour is identified by X C for cyan M for magenta Y for yellow and...

Page 97: ...when it is empty If you do not replace it the machine will not print The procedure for replacing the consumable is included with the new print unit Replacing the waste toner bottle Replace the waste...

Page 98: ...nt of this consuma ble into account Replacing the perfume cartridge Replace the perfume cartridge when the machine displays the message THE PERFUME CARTRIDGE IS AT THE END OF ITS LIFE REPLACE IT The p...

Page 99: ...y the message THE STAPLE CARTRIDGE IS EMPTY appears To replace the staple cartridge 1 Open the cover of the stapling unit 2 Remove the stapling unit 3 Remove the stapler 4 Remove the empty staple cart...

Page 100: ...E Servicing In order to ensure the performance of your machine the printer should be serviced drum change etc every 120 000 pages printed The feeder shoe should be replaced about every 50 000 pages sc...

Page 101: ...Scanner paper jam In the event of paper jam 1 Open the cover of the autofeed scanner 2 Remove the paper causing the jam without tearing it 3 Close the cover of the autofeed scanner Main paper tray ja...

Page 102: ...the paper on a flat surface 6 Load the sheets into the paper tray with the print surface facing up 7 Close the main paper tray Additional paper tray jam 1 Open the right side cover of the additional...

Page 103: ...g up 7 Close the additional paper tray Duplex module paper jam 1 Open the manual feeder 2 Open the cover of the duplex module 3 Remove the paper causing the jam without tearing it 4 Close the cover of...

Page 104: ...it down 5 Close the right side cover Manual feeder and Transfer roller paper jam 1 Open the right side cover by pulling on the latch WARNING The fuser unit may reach very high tempe ratures during op...

Page 105: ...t paper jam 1 Open the upper cover 2 Remove the paper causing the jam without tearing it 3 Close the upper cover WARNING The fuser unit may reach very high tempe ratures during operation To avoid inju...

Page 106: ...Open the finisher cover 2 Remove the paper causing the jam without tearing it To remove a paper jam visible at the auxiliary output tray 1 Open the finisher cover 2 Remove the paper causing the jam wi...

Page 107: ...e cartridge guide and remove any jammed staples 5 Replace the guide in its initial position and replace the stapler 6 Replace the stapling unit 7 Close the cover of the stapling unit Storage If you pl...

Page 108: ...printer and place it in its original box with all the original protective spacers 3 Place all documentation printed documents CD Rom etc in the box 4 Close the box using adhesive tape Firmware update...

Page 109: ...achine on again A system error occurred Contact a maintenance technician The machine does not detect the presence of the document inserted in the autofeed scanner The document is too thick or incorrec...

Page 110: ...ler for more information An incorrect toner cartridge is installed Only use the correct toner cartridges See the consumable specifications described in Characteristics 143 Contact your retailer for mo...

Page 111: ...ies before loading them The jam message remains displayed The right side cover must be opened and closed to reinitialize the printer Open and close the right side printer cover One or several sheets h...

Page 112: ...tray Special media must only be loaded into the manual feeder The recommended print side of transparencies or sheets of labels is not turned the right way up in the manual feeder Load the transparenci...

Page 113: ...the media in the paper tray Load the appropriate media into the paper tray Several sheets are fed at the same time into the printer Remove the sheets from the paper tray and check they are not stickin...

Page 114: ...ective toner cartridge s Fuzzy printing Stained back ground Lack of lustre One or more toner cartridges are defective Remove the toner cartridges and check their condition Replace the defective toner...

Page 115: ...e toner cartridges and check their condition Replace the defective toner cartridge s Reinstall the toner cartridges correctly Traces of toner on the underside of the printed page There is toner in the...

Page 116: ...d check that the toner is evenly distributed inside Reinstall the toner cartridges correctly One or more toner cartridges are empty or nearly empty Check whether the message THE TONER CARTRIDGE IS NEA...

Page 117: ...r in logs and emission reports General codes Code Meaning Reason Solution 01 Busy or no fax answer This code appears after 6 unsuccessful attempts You should try again later 02 Busy or no fax answer T...

Page 118: ...is systematic check the internet connection and server parameters 68 Cannot connect to POP3 server Cannot connect to incoming POP3 server the service is momentarily unavailable If the error is systema...

Page 119: ...han those specified in this guide may result in hazardous light exposure This equipment complies with international safety standards and is classified as a Class 1 Laser Product With specific referenc...

Page 120: ...been placed on the machine in the positions indicated below For your safety never touch these surfaces when removing a paper jam or replacing the toner cartridge Power switch symbols In accordance wit...

Page 121: ...perature or humidity Choose a stable horizontal surface on which the machine will not be exposed to intense vibrations Keep the machine away from any objects that may obstruct the air vents Do not pla...

Page 122: ...high voltage circuits Any contact with these cir cuits may lead to a risk of electric shock Never try to modify the machine This may cause a risk of fire or electric shock Ensure that all paper clips...

Page 123: ...to the machine Keep toners used or unused toner cartridges or bottles ink used or unused or ink cartridges out of the reach of children Take care not to cut yourself when working inside the machine to...

Page 124: ...o report the leak Handling and moving the machine Shocks during handling During printing the paper tray paper feeder trap and other machine parts should not be subjected to any shocks Moving the machi...

Page 125: ...r wipe your eyes or touch your mouth Ensure that toner does not come in contact with your skin If you get toner in your eyes rinse immediately with cold water and consult a doctor Toner on the hands c...

Page 126: ...e locally for this type of waste If your product contains batteries or rechargeable batteries they must be disposed of in designated collection points The crossed bin symbol on the product indicates t...

Page 127: ...ny copies of them This license will be automatically cancelled if you fail to respect the terms of this license In the event of cancellation you undertake to destroy all copies of the program and the...

Page 128: ...d Company PostScript is a registered trademark of Adobe Systems Incorporated Adobe and Adobe products mentions are is registered trademarks of Adobe Systems Incorporated PaperPort11SE is a registered...

Page 129: ...these terms so they know their rights We protect your rights with two steps 1 copyright the software and 2 offer you this license which gives you legal permission to copy distribute and or modify the...

Page 130: ...ions 1 and 2 above on a medium customarily used for software interchange or c Accompany it with the information you received as to the offer to distribute corresponding source code This alternative is...

Page 131: ...we sometimes make exceptions for this Our decision will be guided by the two goals of preserving the free status of all derivatives of our free software and of promoting the sharing and reuse of soft...

Page 132: ...e referring to freedom of use not price Our General Public Licenses are designed to make sure that you have the freedom to distribute copies of free software and charge for this service if you wish th...

Page 133: ...odification Source code for a work means the preferred form of the work for making modifications to it For a library complete source code means all the source code for all modules it contains plus any...

Page 134: ...ary even though the source code is not Whether this is true is especially significant if the work can be linked without the Library or if the work is itself a library The threshold for this to be true...

Page 135: ...patent infringement or for any other reason not limited to patent issues conditions are imposed on you whether by court order agreement or otherwise that contradict the conditions of this License they...

Page 136: ...of what it does Copyright C year name of author This library is free software you can redistribute it and or modify it under the terms of the GNU Lesser General Public License as published by the Free...

Page 137: ...gram could make it effectively proprietary To prevent this the GPL assures that patents cannot be used to render the program non free The precise terms and conditions for copying distribution and modi...

Page 138: ...u waive any legal power to forbid circumvention of technological measures to the extent such circumvention is effected by exercising rights under this License with respect to the covered work and you...

Page 139: ...ses unless such uses represent the only significant mode of use of the product Installation Information for a User Product means any methods procedures authorization keys or other information required...

Page 140: ...rmination of your rights under this section does not terminate the licenses of parties who have received copies or rights from you under this License If your rights have been terminated and not perman...

Page 141: ...lied license or other defenses to infringement that may otherwise be available to you under applicable patent law 12 No Surrender of Others Freedom If conditions are imposed on you whether by court or...

Page 142: ...to give the program s name and a brief idea of what it does Copyright C year name of author This program is free software you can redistribute it and or modify it under the terms of the GNU General P...

Page 143: ...ient temperature Operating 10 C to 35 C 50 F to 95 F with maximum differ ence of 10 C per hour Storage 0 C to 35 C 32 F to 95 F with maximum difference of 10 C per hour Admissible humidity 30 to 85 RH...

Page 144: ...ded Enve lopes Labels Weight 91 to 210 g m 25 to 55 9 lb Additional paper tray Capacity maximum 500 sheets of standard paper 80 g m 22 lb Paper format A4 B5 Executive Letter Legal Gov Letter Gov Le ga...

Page 145: ...Modified Modified Read JBIG JPEG Dial type DTMF Internet general characteristics Type PSTN V34 Communication speed 33600 bps maximum V34Fax Protocol TCP IP PPP protocols PAP CHAP MD5 C protocols SMTP...

Page 146: ...can be used Support Format Millimetres inches Main tray Manual feeder Additional tray Duplex Finisher Stapling Offset Letter 215 9 x 279 4 8 5 x 11 0 Yes Yes Yes Yes Yes Legal 14 215 9 x 355 6 8 5 x...

Page 147: ...hesive paper Folded creased warped embossed deformed or crinkled paper Cut out perforated or torn paper Paper that is too supple too rigid or too fibrous Paper with a different texture roughness on th...

Page 148: ...hickness Orientation Not supported Print side facing down Driver Thick 1 91 to 150 g m Thick 2 151 to 210 g m Weight 91 to 210 g m 25 to 55 9 lb Duplex Not supported Note Banner paper can be printed i...

Page 149: ...t on standard paper to check page formatting For more information concerning printing labels consult your application documentation Recommendations for use Using sheets of labels Recommended for laser...

Page 150: ...output tray to prevent the accumulation of static electricity Do not fan your transparencies before loading them into the manual feeder as this creates static electricity and may cause printing errors...

Page 151: ...ver the media the guaranteed print surface corresponds to the size of the media minus 4 mm from each edge On Banner paper the bottom margin is 10 mm Printable surface for envelopes Envelopes have a fl...

Page 152: ...ed are subject to change without prior notice Sagemcom Documents SAS tries to ensure that all information in this document is correct but does not accept liability for error or omission Non contractua...

Reviews: