2a.
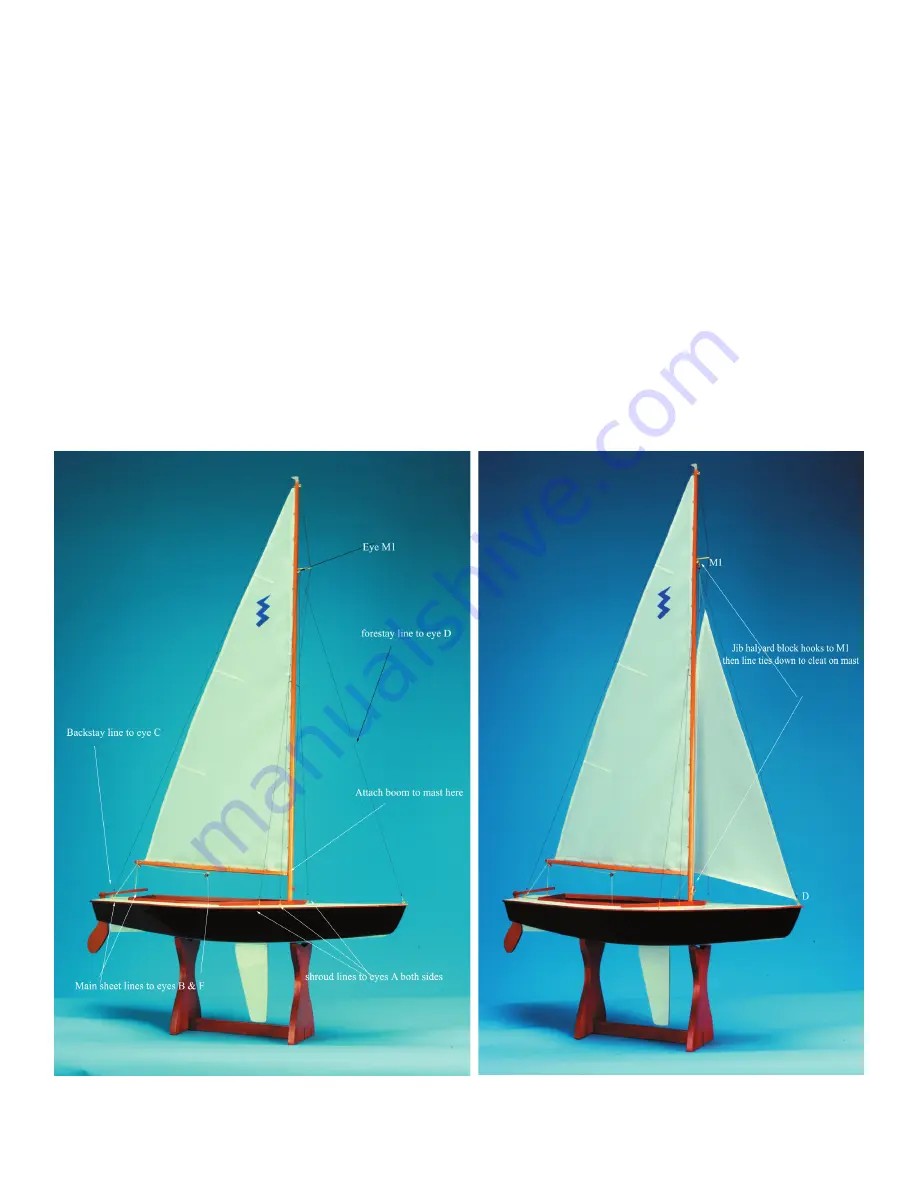
Unwrap the packing of the mast. You will find a brass hole near the bottom of the mast. The brass hole must face towards
the stern of the yacht. Insert the mast into the mast step in the center of the deck. The main sail is attached to the mast. Insert the pin
at the end of the mainsail boom into the brass eye at the base of the mast. See photo (3)
3.
On the mast, you will find two sets of black shroud lines, one set is for each side of the boat. Attached the wires at the end
of these lines to eyes A on both the port and starboard sides. See photo (3)
3a.
At the top of the mast is a black backstay line. Hook this down to eye C on the aft deck. See photo(3)
3b.
There is a black forestay line attached to eye M1 on the front of the mast. Hook this line to eye D on the front bow. See
photo (3)
3c.
Finish attaching the main sail by hooking the two mainsheet lines to eyes B. The port side has two another part of the
mainsheet line that comes up to a block on the boom, runs along the boom to another block and then ends with a hook w/coiled rope.
Attach this hook to eye F on the centerboard trunk. See photo (3)
4.
Attach the jib sail by hooking the tack end of the sail to eye D on the bow of the boat. The top head of the sail has a jib hal-
yard block w/hook. This attaches to eye M1 on the mast just below the brass jumper. Lead the halyard line down the mast and tie it
off on the cleat at the front of the mast towards the deck. Finish the jib by attaching the sheet line to eye E on the port side top deck.
See photo (4)
Your Sail Classics Lightning Model should now be complete. Enjoy!
Sail Classics, Inc. P.O.Box 747 Lakebay, WA 98349
Phone: 253-884-2267 Fax: 253-884-7858 Email: sales@sailclassics.com


