background image

Summary of Contents for AX-7C

Page 1: ...Instruction Manual SainSonic AX 7C FM Transmitter D III D So in SONIC...

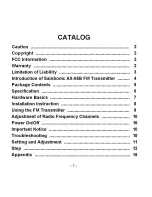
Page 2: ...tion of SainSonic AX 058 FM Transmitter 4 Package Contents 5 Specification 6 Hardware Basics 7 Installation Instruction 8 Using the FM Transmitter 9 Adjustment of Radio Frequency Channels 10 Power On...

Page 3: ...is 2ABT5AX05B7C Operation is subject to the following two condttions 1 This device may not cause harmful interference 2 This device must accept any interference received including interference that m...

Page 4: ...material and workmanship This limited warranty for SainSonic products covers the functionality of FM transmitter for their normal intended use as specified in the Owner s Guide and does not cover a ma...

Page 5: ...of SainSonic AX 058 FM Transmitter Thank you for purchasing SainSonic AX 7C FM transmitter This stereo FM transmitter covered with excellent aluminum alloy can easily build a wonderful FM radio stati...

Page 6: ...FM Transmitter frequency If you find a better antenna for this FM transmitter the transmission effect will be better The higher you place the antenna the farther you will transmit Transmission range d...

Page 7: ...se Ratio Frequency Deviation Operation Time 48d m 7W 88 1 107 9 MHz 76 108MHz 1OOKhz 0 1 Mhz 9 12V DC The current load of power supply over 1A 10ppm 10 C 50 C 20Hz 15KHz 50dB 3K True 24 7 3 5mm headph...

Page 8: ...e input 4 3 5mm Jack for electrets microphone And the computer use the same microphone input 5 Power Button On Off 6 Frequency Up Button To increase the radio frequency 7 Frequency Down Button To decr...

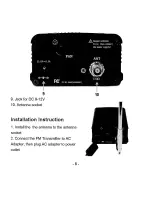
Page 9: ...9 9 Jack for DC 9 12V 10 Antenna socket Installation Instruction 1 Install the the antenna to the antenna socket 2 Connect the FM Transmitter to AC Adapter then plug AC adapter to power outlet 8 10...

Page 10: ...radio music 3 Then adjust the radio frequency channel of the Digital Transmitter to the same radio frequency channel of the radio For example if the radio frequency channel is set to 98 0MHz then the...

Page 11: ...ortant Notice This product should be kept in dry condition and away from water Keep the product off direct sunlight or high temperature environment Please unplug the power plug when it is not in use T...

Page 12: ...mitter is not being in use you can turn down the radio volume and turn up the iPod or audio player volume as long as the sound from the radio remains clear 4 There is some current acoustic interferenc...

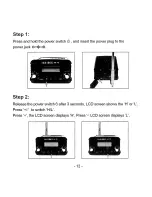
Page 13: ...and insert the power plug to the power jack e sa1n SONIC AK 7C 111 6 v Step 2 Release the power switch I after 3 seconds LCD screen shows the H or L Press to swrtch H L Press the LCD screen displays...

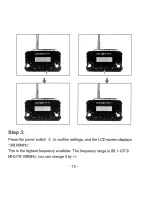
Page 14: ...Step 3 Press the power switch J to confirm settings and the LCD screen displays 10800MHz This is the highest frequency available The frequency range is 88 1 107 9 MHz 76 108MHz you can change it by 13...

Page 15: ...example to set the transmitting frequency range is 90MHz to 100MHz you can change it to 100Mhz by press the power switch 0 to confirm settings and then press to change to 90Mhz Step 4 Press the power...

Page 16: ...t Transmit Trans 1 T smit power 1 power power power power o 2uV 12dB 0 1 0 sw 1 2w 3 5w 10 3ow 3o sow co_ I OHe_J 1 os 1 2 _ _j s s Town 0 2 0 6 1 2 2 3 10 Envi 1 o_ 2__J__ _ _ 3 5 s 1s __ 1 0 _ _ _ j...

Page 17: ...Sain SONIC...

Reviews: