HS2/AS2 Series
23
24
4.3.2 Mounting Procedures
The product employs either ground mounting or wall mounting and its position is determined by the drilled
holes of bracket.
Ground Mounting
The ground should be flat and no inclination.
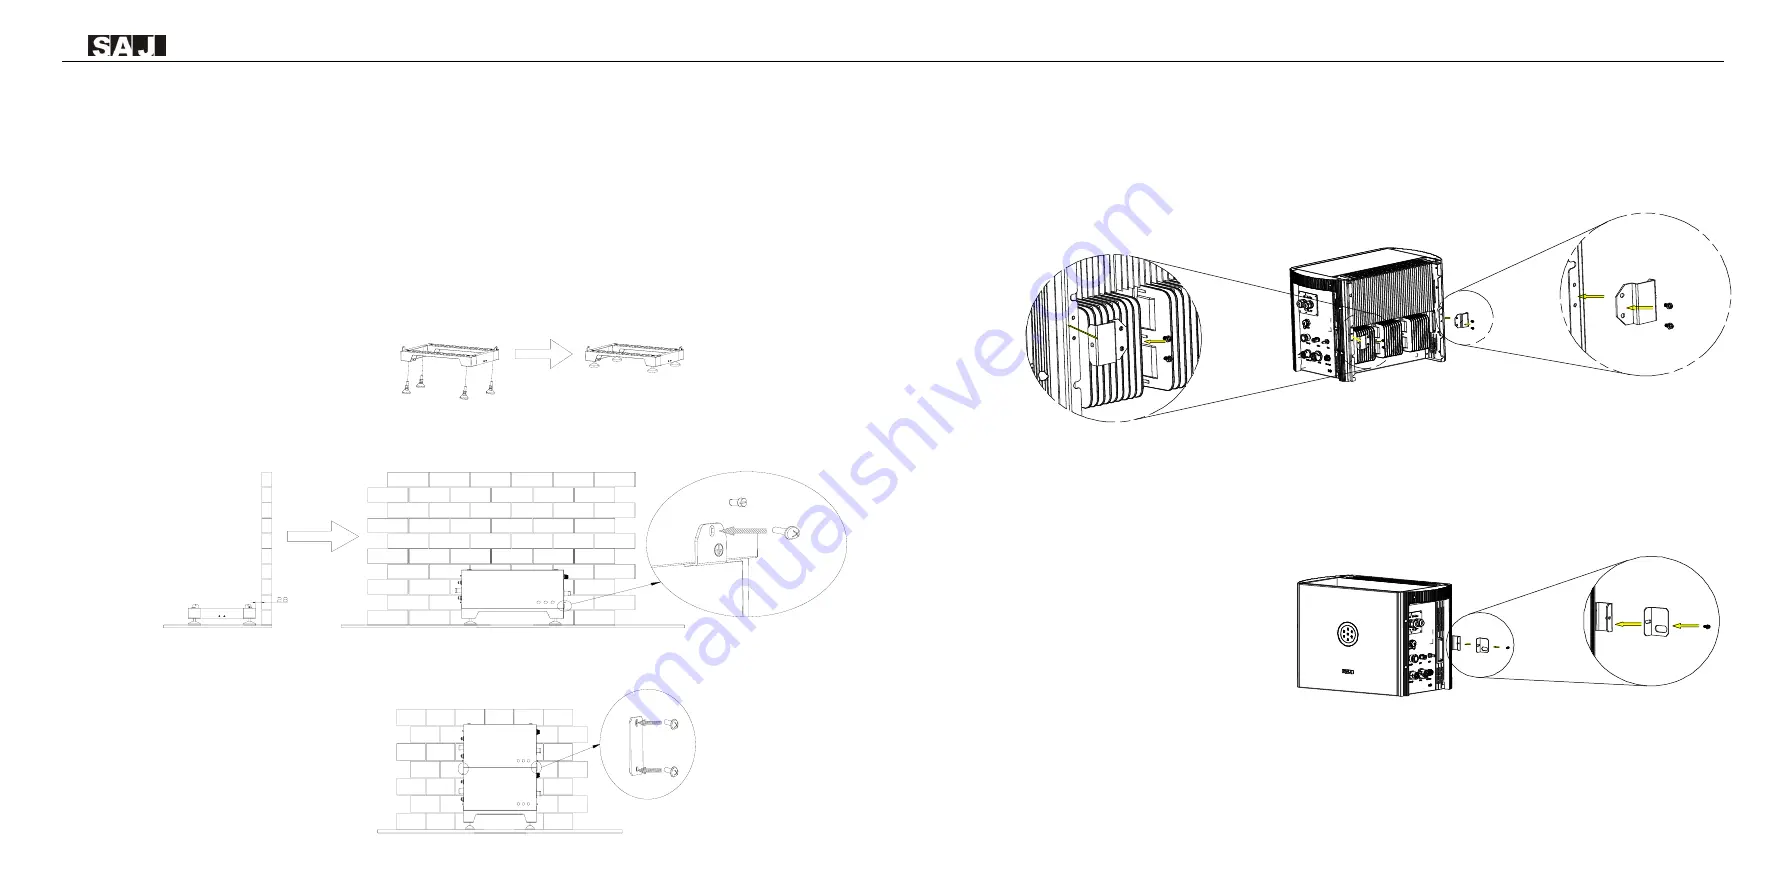
Step 1: Assemble the base. Adjust the height of foot cup, make sure the surface of base is horizontal.
Figure 4.4
Assembling the base
Step 2: Place the base on the ground, make sure the edge of base is 28~34mm away from wall. Place the
battery module on the base and secure it with screws (M4*10).
Figure 4.5
Securing the battery
Step 3: Stack the rest of the battery modules up and secure the battery modules with locking brackets
(M4*10)
Figure 4.6
Securing battery modules
with locking brackets
Step 4: Install the locking brackets (inverter) with screws (M6*12) onto the inverter, and then install the
locking brackets (wall) onto the locking brackets (inverter) with screws (M6*12).
Figure 4.7
Securing inverter
1
2


