background image


- 24 - 


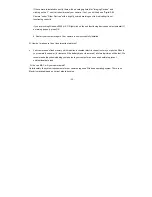
If the camera is installed correctly, there will be a category listed for "Imaging Devices" and 

clicking on the "+" next to it should reveal your camera. If not, you will likely see "Digital Still 

Camera" under "Other Devices" with a brightly colored marking next to it indicating it is not 

functioning correctly.  


If you are running Windows 2000 or XP: Right click on the non functioning device and select uninstall. If 

a warning pops up, press OK.  


6. Restart your computer again. Your camera is now successfully installed. 


Q: How do I make sure I don't lose important pictures? 


Your camera uses flash memory which requires a constant electric current to store your photos. Should 

your camera lose power (for instance if the battery dies or is removed) all stored pictures will be lost. We 

recommend always downloading your photos to your computer as soon as possible to prevent 

unintentional data loss.  

 Q: I have a MAC, will your camera work?


Unfortunately, the system requirements for our cameras require a Windows operating system. There is no 
Mac driver available and no current plan to develop 

Summary of Contents for 59097

Page 1: ...Camera Owner s Manual 2006 Sakar International Inc All rights reserved Windows and the Windows logo are registered trademarks of Microsoft Corporation All other trademarks are the property of their respective companies ...

Page 2: ...y Software 11 Software Camera Driver Installation 11 Downloading Photos 15 About Kids Cam Sticker Factory 17 Capturing AVI video using WebCam Express 19 Camera Maintenance 21 Technical Support 21 Appendix A Technical Specifications 22 Appendix B Troubleshooting 22 Introduction Thank you for purchasing your 59097 digital camera Please read this manual carefully FIRST in order to get the most out of...

Page 3: ... Computer System Requirements To be able to download photos to your PC you will need the following minimum configuration Windows 2000 XP Pentium based PC or equivalent 200 MB hard disk free space and 128 MB or more RAM Available USB Interface CD ROM Drive Color display 24 bit or higher recommended VGA Resolution 1024 X 768 ...

Page 4: ... 4 A Quick Look at Your Camera ...

Page 5: ...e LCD will flash if your batteries are running low in which case you will need to replace the camera s batteries before taking photos When the battery voltage drops below 2 2V the LCD will display Lo and then automatically switch off Note If you do not intend to use your camera for an extended period remove the batteries to avoid leakage and corrosion Warning Please download any photos you have on...

Page 6: ...ng the viewfinder The optimal distance between the camera and the subject is approximately 5 feet 2 Hold the camera steady and press the shutter button to take a photo 3 The camera will beep when a photo is taken If the camera fails to beep or if a 00 appears on the LCD this is an indication that the memory is full in which event no further photos can be taken until the existing photos have been d...

Page 7: ... If the LCD displays Lo this means that the present resolution is HI and in order to change to Lo click on the shutter button within 5 seconds 3 All photos taken after changing resolution will be taken at the new resolution There are 2 photo compressions to select from high density Hd or low density Ld 1 Press the mode button to select Hd or Ld shown on the LCD display 2 If the LCD displays Hd thi...

Page 8: ...n based on the image resolution and compression Continuous Shot Mode d8 video 1 Press the mode button to select d8 shown on the LCD display 2 Hold the shutter button down to shoot continuously 3 The camera will beep once for each photo taken Photos taken in Continuous shot mode may fail under poor lighting conditions Photos taken in this mode are saved as avi video clips 3 shot Mode CS Resolution ...

Page 9: ... photo will be taken Delete Last Photo CL To delete the last photo taken 1 Press the mode button to select the CL icon shown on the LCD screen 2 Press the shutter button again within 5 seconds and the last photo will be deleted 3 The LCD counter will display the updated number of photos that can be taken at the current resolution and compression Delete All CA To delete all photos on the camera 1 P...

Page 10: ...nd Asia and 60HZ for Europe and Japan To set the camera for the correct frequency 1 Press the mode button to select the 60 icon for 60HZ or the 50 icon for 50HZ shown on the LCD screen 2 Press the shutter button to change the frequency setting Power Off oF 1 Press the mode button to select oF shown on the LCD screen 2 Press the shutter button and the camera will switch off Energy save mode To cons...

Page 11: ...gest you follow the step by step instructions that will appear on your screen during the installation process Software Camera Driver Installation 1 Insert the CD into your CD Rom drive Make sure that your camera is not connected to the computer 2 For WIN 2000 or WIN XP operating systems On the Install your camera software screen select your camera model from the drop down list and click the Instal...

Page 12: ... 12 1 On the Kids Cam Sticker Factory screen click the Next button 2 Please review the license terms and click the Agree button to continue ...

Page 13: ...the Kids Cam Sticker Factory installer create the folder where the program will be installed to and then click Install 4 Click Finish to let the Kids Cam Sticker Factory installer finish the installation program ...

Page 14: ... 14 5 This will automatically launch the Install shield for the camera driver Click Next to continue 6 Once the camera driver has finished installing you will have to restart your computer ...

Page 15: ...Factory program to import photos and video clips AVI files from your camera 1 Plug one end of the USB cable into the USB slot on your camera 2 Plug the other end of the USB cable into a USB port on your computer 3 Make sure that your camera is connected and turned on 4 Double click the Kids Cam Sticker Factory icon that is on your desktop to launch the Kids Cam Sticker Factory program ...

Page 16: ... Click on the Get Photos button on the Main Menu 6 The Get photos from camera window will appear 7 Click the Browse button to select a folder to place your photos and videos 8 Click the OK button to proceed ...

Page 17: ...e enhance turn your photos into Active Images and share your photos with friends and family Sticker factory is packed with fun things to do with your photos including Stickers creator create multiple stickers and print your own customized stickers with pictures text and clip art on them Sticker Book creator write and print your own sticker books The sticker book offers a variety of 10 templates th...

Page 18: ...rkshop projects for FREE Choose from Calendar Creator Albums Maker Photo frames Greeting cards Postcards You can purchase and activate all 3 additional workshop projects online at anytime How to purchase additional Workshop projects 1 To purchase the Workshop Project simply click the one you want and you will be referred to an online website where you can purchase them 2 Once you purchase the Work...

Page 19: ...you will use to save the file Please take note that these AVI files take up a lot of hard drive space This is done through the PhoTags WebCam Express program This next section will walk you though capturing an AVI file 1 Double click the WebCam Express icon that is on your desktop to launch the PhoTags WebCam Express program Adjust your WebCam to the desired position The screen will display what t...

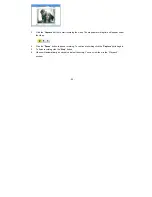
Page 20: ...ding time will appear under the video 4 Click the Pause button to pause recording To continue recording click the Capture button again 5 To finish recording click the Stop button 6 Videos will automatically be saved in a default directory You can view them in the Playback window ...

Page 21: ... User Preferences section in the Quick Start help Camera Maintenance Your camera is a delicate instrument please handle it with care Technical Support For technical support issues please visit our website at www sakarhelp com You can find manuals software and FAQ s at the website Can t find what you are looking for Fill out an online ticket and one of our technical support team members will answer...

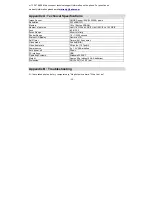
Page 22: ...QCIF Hd Hi 50 CIF Lo 152 QCIF Lens f 3 6 F2 4 Focus Range 40cm to Infinity Shutter Range 1 5 1 2400 second Status LCD display Numeric LCD Self Timer Timer with 10 sec delay Video mode 24 bits R G B Video frame rate 30 fps Lo 10 fps Hi Power source 2 x 1 5V AAA alkaline Auto power off 30 sec PC interface USB Operating Systems Windows 2000 XP Weight Approx 52g without 2 AAA batteries Dimension 58 H ...

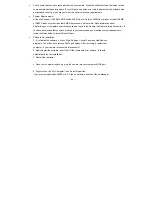
Page 23: ...Computer Information section If you have determined that you have pictures in your camera and you meet the system requirements follow the steps below to reinstall the software Software Re installation 1 First install the software Click on Start Settings Control Panel and Add Remove programs You will need to remove PhoTags Express After removing it restart your computer If your camera is connected ...

Page 24: ... 6 Restart your computer again Your camera is now successfully installed Q How do I make sure I don t lose important pictures Your camera uses flash memory which requires a constant electric current to store your photos Should your camera lose power for instance if the battery dies or is removed all stored pictures will be lost We recommend always downloading your photos to your computer as soon a...

Reviews: