background image

  11 

Options within the Resolution Modification Submenu are as follows: 


Note: Clearer photos will be taken at higher (VGA) resolution, however low 
resolution will allow you to take many more photos before you need to download 
them to your computer. 


Compression Rate Submenu 


1.  Press the Power/Menu button to enter the Main Menu, 
2.  Press the Up button until the Compression Rate icon is selected. 
3.  Press the Shutter button to toggle between the 2 compression rate options. 
4.  Press the Power/Menu button again to select and save the desired compression.  


Options within the Compression Rate Submenu are as follows: 


VGA (640x480) 


QVGA (320x240)


Summary of Contents for 98379

Page 1: ...mera User s Manual 2009 Sakar International Inc All rights reserved Windows and the Windows logo are registered trademarks of Microsoft Corporation All other trademarks are the property of their respe...

Page 2: ...k at Your Camera 6 Inserting Batteries 7 Camera Modes 7 Capturing Photos 15 Capturing Video 20 Install the Vivitar Experience Image Manager Software 22 Connect your camera to the computer 23 Get photo...

Page 3: ...u have installed the Vivitar Experience Image Manager software and the cameras driver included in the CD ROM packaged with this camera Plugging in your camera at this stage will cause the device to no...

Page 4: ...tos and videos to your PC you will need the following minimum configuration Pentium 4 processor or above with Windows XP service pack 2 512 MB RAM with 100MB of free disk space 1024 x 768 Recommended...

Page 5: ...for Super VGA graphics Available USB Interface CD ROM drive QuickTime 6 or higher Microsoft Internet Explorer 7 or higher Internet connection needed to access and use the social network sites Computer...

Page 6: ...6 A Quick Look at Your Camera...

Page 7: ...se everything in the camera s memory Note We recommend to download and save your photos and videos often so as not to lose them if the battery power becomes too low 5 more than 70 power 35 70 power 5...

Page 8: ...on if you want to make changes to the camera s default settings please read the instructions of this manual Now that your device is powered on you can enter the Main Menu by pressing the Power Menu b...

Page 9: ...y selected 2 Press the Shutter button to toggle through the following various options within the camera submenu 3 Press the Power Menu button to select and save the mode of your choice The LCD screen...

Page 10: ...enu button to enter the Main Menu 2 Press the Up button until the Resolution Modification icon is selected 3 Press the Shutter button to toggle between the 2 resolution options 4 Press the Power Menu...

Page 11: ...wnload them to your computer Compression Rate Submenu 1 Press the Power Menu button to enter the Main Menu 2 Press the Up button until the Compression Rate icon is selected 3 Press the Shutter button...

Page 12: ...s the Up button until the Frequency icon is selected 3 Press the Shutter button to toggle between the 2 frequency options 4 Press the Power Menu button to select and save the desired frequency Options...

Page 13: ...All icon is selected 3 Press the Shutter button to select this submenu Upon entering this submenu you will be shown the following screen asking if you wish to Delete All of the photos in the camera 4...

Page 14: ...is no way to recover them unless they have been downloaded first to your computer Battery Capacity Icons An icon will appear on the top right corner of your LCD screen showing the amount of battery p...

Page 15: ...ton 3 A beep will sound and the red LED indicator on the front of the camera will light up indicating that the photo has been taken Note Do not move the camera until you hear the beep Moving the camer...

Page 16: ...n one continuous shot Select the Continuous shot mode from the camera menu options on the LCD screen 1 Press the Power Menu button 2 Toggle between the camera modes by pressing the Shutter button unti...

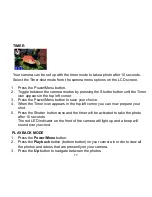
Page 17: ...ton to save your choice 4 When the Timer icon appears in the top left corner you can now prepare your shot 5 Press the Shutter button once and the timer will be activated to take the photo after 10 se...

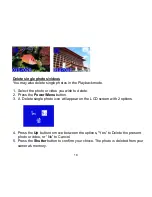
Page 18: ...sh to delete 2 Press the Power Menu button 3 A Delete single photo icon will appear on the LCD screen with 2 options 4 Press the Up button to move between the options Yes to Delete the present photo o...

Page 19: ...life To reactivate the device simply press the Power Menu button Manual Power Saving Press and hold the Power Menu button for 3 seconds After hearing two consecutive beeps the camera will go into a s...

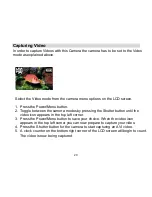
Page 20: ...ween the camera modes by pressing the Shutter button until the video icon appears in the top left corner 3 Press the Power Menu button to save your choice When the video icon appears in the top left c...

Page 21: ...before capturing the video If the lighting conditions change and become darker after the capture has begun the resulting AVI file when played back on your computer will play back very fast See the Ge...

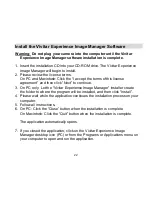
Page 22: ...to continue 3 On PC only Let the Vivitar Experience Image Manager installer create the folder to where the program will be installed and then click Install 4 Please wait while the application continue...

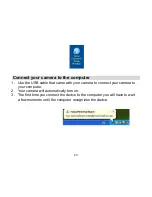
Page 23: ...SB cable that came with your camera to connect your camera to your computer 2 Your camera will automatically turn on 3 The first time you connect the device to the computer you will have to wait a few...

Page 24: ...with the provided USB cable However the images need to be downloaded before disconnecting the camera as they will not be stored in the camera s memory without batteries Do not disconnect the cable du...

Page 25: ...pears in the middle of the screen showing the number of media files downloading to your computer A message appears when the download is complete 9 The photo and video files that you selected are now d...

Page 26: ...The webcam driver is installed on your computer when you install the Vivitar Experience Image Manager for this device 1 Open your web conferencing application to activate the video camera option 2 Th...

Page 27: ...open the instant messenger and web conferencing application that you use to begin using this camera as a webcam on your computer Note Use the Control menu Video settings option of this web conferenci...

Page 28: ...parts or labor for a period of one year What Is Not Covered By Warranty Damages or malfunctions not resulting from defects in material or workmanship and damages or malfunctions from other than norma...

Page 29: ...technical support issues please visit our website at www sakar com You can find manuals software and FAQ s at the website Can t find what you are looking for E mail us at support sakar com and one of...

Page 30: ...Focus f 5 4mm Image Variation 0 5m Infinity Lens Non spherical Lens Aperture 1 2 6 Illumination 100 16000 lux File Format Jpeg AVI File Storage 8 MB Storage capability Resolution Hi Lo 640x480 26 79 3...

Page 31: ...do I make sure I don t lose important pictures Your camera uses SDRAM memory which requires a constant electric current to store your photos Should your camera lose power for instance if the battery...

Reviews: