background image


www.sakikitchen.com 


6-


Let go of the clamp and it will fasten around the pot edge and 
secure the bridge firmly. 

7-


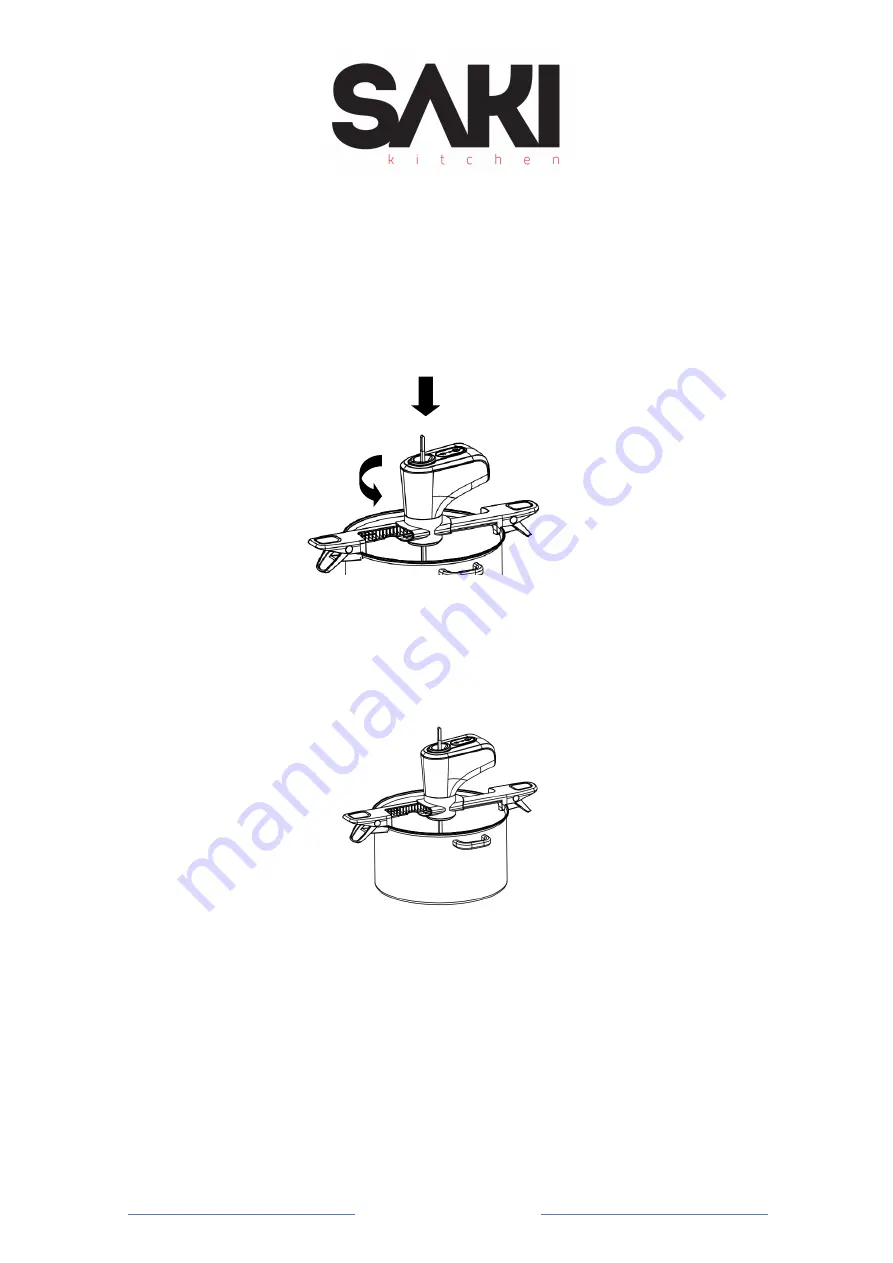
Attach the motor unit by placing it in the bridge motor cradle 
and twisting slightly counterclockwise. When the motor unit 

point

aligns with the bridge direction it is correctly placed. 


8-


You are ready to stir! 


9-


To  start  stirring  simply  press  the  On/Off  button.  The  unit 
starts at the speed it was set to last time it was in use. 

10-


To  alternate  between  high  or  low  speed  simply  press 

the speed toggle button. 

11-


The LED light indicates if you start to run out of battery. 

In this case the unit will also make an alarm sound. To stop 

Summary of Contents for SAKI-2000

Page 1: ...1 www sakikitchen com Automatic Pot Stirrer USER MANUAL Model no SAKI 2000 ...

Page 2: ...ed without risk of burning enhances the quality of stews soups sauces porridge and risottos It is extremely easy to use and easy to clean The removable arms allow it to fit comfortably in your dishwasher and allow for compact storage when you re not using the stirrer It s powerful motor with long lasting battery You will be very happy when you use it everyday in the kitchen What is included with y...

Page 3: ...t possible to use the stirrer Using the stirrer 1 Adjust the stirrer blade size according to your pot The SAKI Automatic Pot Stirrer fits most pots The stirrer blade is adjustable and make sure the stirring blade you adjusted that best fits your pot The blades flex to fit most diameters from 15cm to 25cm The axle is flexible so it will automatically adapt to your pot height ...

Page 4: ...4 www sakikitchen com Diameter Diameter Min 150mm Max 260mm Height Height Min 100mm Max 200mm 2 After adjust to the right stirring blade attach the axle by pressing it in place ...

Page 5: ... blades start turning If you insert the blades after adding food twist the stirring blade into the pot as far as possible until it reaches the bottom The blades will dig into the food once the motor unit is attached and starts turning 5 Attach the bridge while ensuring that axle comes through the center hole Use your thumb and remaining fingers to squeeze open the clamp on both sides to place the ...

Page 6: ...n the motor unit point aligns with the bridge direction it is correctly placed 8 You are ready to stir 9 To start stirring simply press the On Off button The unit starts at the speed it was set to last time it was in use 10 To alternate between high or low speed simply press the speed toggle button 11 The LED light indicates if you start to run out of battery In this case the unit will also make a...

Page 7: ...he casserole 15 Carefully lift the stirring blade out of the casserole holding the axle Be careful of dripping hot food Charging the motor unit To charge the motor unit insert the charging plug into the motor unit s charging socket and insert the charger into the outlet If you have inserted the charger plug into the cradle simply put the motor unit into the cradle making sure the charger is plugge...

Page 8: ...valued customer foremost in mind In addition we ask that you exercise a degree of care when using any electrical appliance and adhere to the following precautions Misuse can cause potential injuries IMPORTANT SAFEGUARDS This appliance is for HOUSEHOLD USE ONLY READ ALL INSTRUCTIONS BEFORE USE AND SAVE FOR FUTURE REFERENCE This is not a toy Keep away from children Use only for intended purpose and ...

Page 9: ... to run themselves in The sound from the stirrer motor unit will decrease after some use Do not leave the bridge on the pot between uses as the friction rubber material may stick and deform slightly over time This will not damage the product or the casserole but will make the rubber pads look less delicate Do not drop the motor unit on concrete floors or other hard surfaces as this may damage the ...

Page 10: ...10 www sakikitchen com TO RECYCLE Use a hammer screwdriver to remove the top lid and take out the batteries from the motor housing SAVE THESE INSTRUCTIONS ...

Reviews: