16
| EN
RIRS 1200-5500 H EKO 3.0 v2019.06
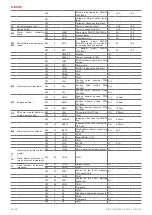
20 Motor2
04h_Read_Input
16
1
Motor2 fan speed value
0-3
Temperature sensor value
real
format (-3.3E38 - 3.3E38) example: 0h->0C, 7FFFh->3276.7C, 8000h->3276.8, FFFFh->-0.1C
21 Tlimit
04h_Read_Input
0
1
Supply air temperature value
Hex: E0
22 Texhaust
04h_Read_Input
1
1
DTJ(100) temperature sensor value
Hex: E0
23 Textract
04h_Read_Input
2
1
Exhaust air temperature sensor value
Hex: E0
24 ToutDoor
04h_Read_Input
3
1
Ouside air temperature sensor value
Hex: FFEC
25 Twater
04h_Read_Input
12
1
Return water temperature sensor value
Hex: FFEC
19.4. ELECTRICAL CONNECTION OF THE HVAC UNIT
Electrical connection can only be implemented by the qualified electrician in accordance with the applicable international and national electrical
safety requirements and requirements for installation of electrical devices.
Use only power source which meets the requirements specified on the device label.
Power supply cable should be selected based on the electrical specification of the device. If the device power supply line is far from the unit, the
distance and voltage drop should be considered.
Device must be earthed.
Install the control panel at the designated place.
Install the supplied connection cable(FLEX controller) between the control panel and the HVAC unit. It is recommended to install the control panel
separately from the power cables.
Note:
If cable is used together with other power cables, shielded control panel cable with earthed shield should be used.
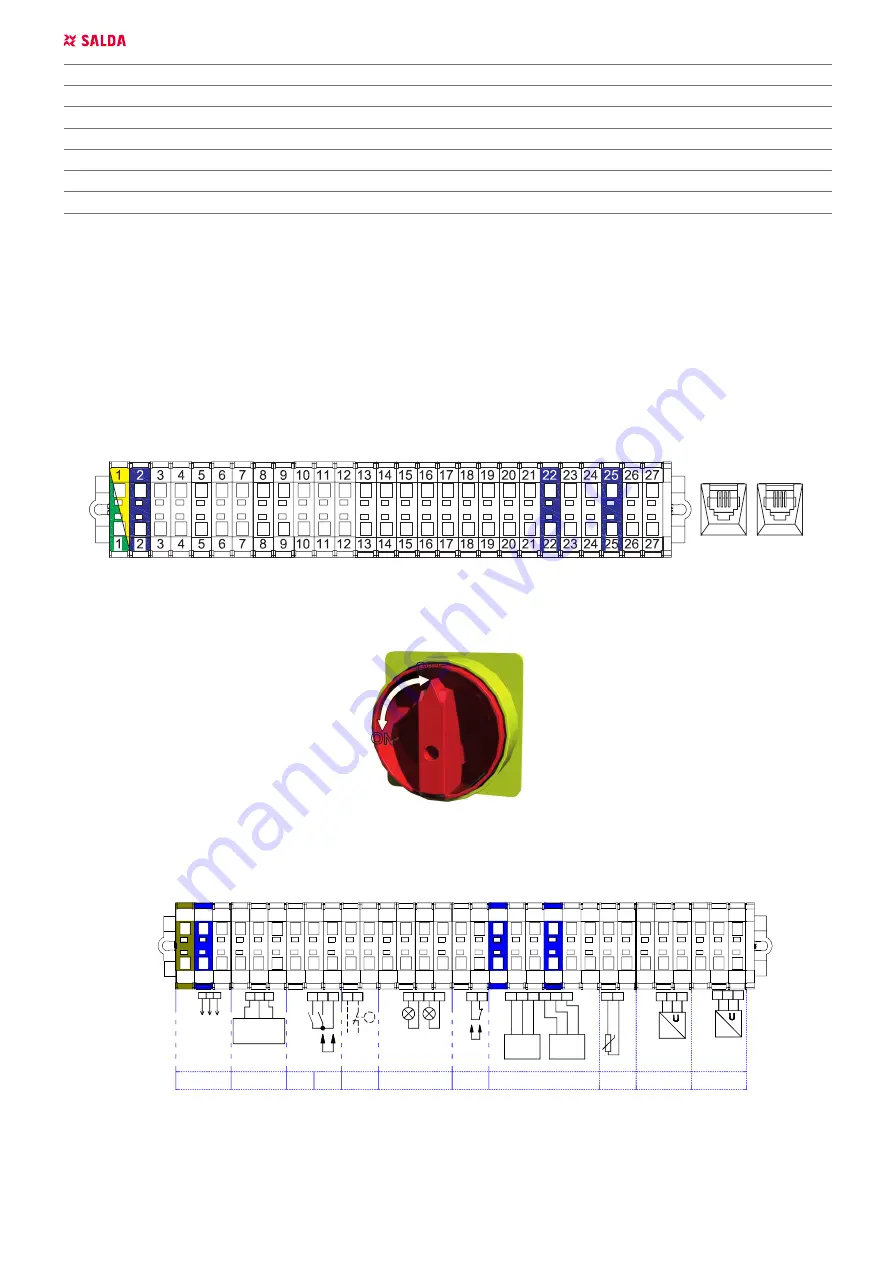
Connect the plug (RJ10 type) to the RS485-1 socket of the unit. Connect the other end to the control panel.
RS458_1 RS458_2
NOTE:
The remote control panel can be connected and (or) disconnected only after disconnecting the power supply for the HVAC unit.
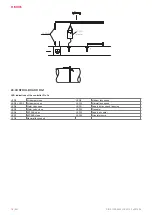
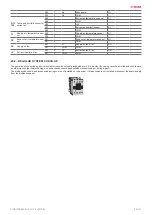
Switch on the mains voltage, switch on the blade switch Q, see
Fig. 5
(actual appearance of the blade switch can be different from the given photo
based on the model of the product).
OFF
ON
Select the desired fan rotation speed and the supply air temperature using the remote controller.
19.5. SYSTEM ADJUSTMENT GUIDELINES
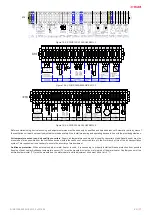
X16
B
OOS
T
S
TA
RT
-NC
ST
O
P-
N
O
Jumper
CO2; Extract air pressure
Air quality transmitter
Supply air pressure
Transmitter 2
26 - 24V DC,
27 - intput, 0-10V DC,
28 - GND,
X16.10
28
27
P
26
27 28
26
24 25
23
CE7/7
27 28
26
24 25
23
X16.7
PE N L1
L1
N
PE
L1
N
PE
L1
N
PE
1f, 230V AC
Power
supply cable
valve actuator
Water cooler
1
3
2
X16.1
Y1 Y2 G
M5
24VAC, 3-position
Y1 - OPEN (24VAC)
Y2 - CLOSE (24VAC)
G - System potential 24VAC
1 2 3 4 5 6 7 8 9 10
10
9
8
7
6
5
4
3
2
1
Boost
Start/Stop
AHU status
AHU work
AHU stop
24V
D
C
24V
D
C
3
1
P
DX Cooling
X16.4
X16.4
X16.2
13 14
8
7
X16.3
AH
U
st
op
1.
2W
m
ax
4 5 6
10
9
X16.4
1.
2W
m
ax
AHU
wo
rk
11 12
25
24
23 - 24V DC,
24 - intput, 0-10V DC,
25 - GND,
Transmitter 1
P
23
18 19 20 21 22
22
21
20
19
18
17
16
15
14
13
12
11
NTC
Supply air
TJ
temp.sensor
21 22
X16.6
11 12 13 14 15 16 17
N
L
19
X16.5
M2
M3
17 18
L
N
N L L
16
20
15
230V AC
230V AC
ON/OFF
ON/OFF
L c
ont
rol
N
L c
ont
rol
L
Supply air
Extract air
damper actuator
damper actuator
Fire alarm
input
Air quality transmitter
X16
X16
Air quality transmitter
Fire alarm
input
damper actuator damper actuator
Extract air
Supply air
L
L c
ont
rol
N
L c
ont
rol
ON/OFF
ON/OFF
230V AC
230V AC
15
20
16
L
L
N
N
L
18
17
M3
M2
X16.5
19
L
N
17
16
15
14
13
12
11
X16.6
22
21
temp.sensor
TJ
Supply air
NTC
11 12 13 14 15 16 17 18 19 20 21 22
22
21
20
19
18
23
P
Transmitter 1
23 - 24V DC,
24 - intput, 0-10V DC,
25 - GND,
24 25
12
11
AHU
wo
rk
1.
2W
m
ax
X16.4
9 10
6
5
4
1.
2W
m
ax
AH
U s
to
p
X16.3
7 8
14
13
X16.2
X16.4
X16.4
DX Cooling
P
1
3
24V
D
C
24V
D
C
AHU stop
AHU work
AHU status
Start/Stop
Boost
1 2 3 4 5 6 7 8 9 10
10
9
8
7
6
5
4
3
2
1
Y1 - OPEN (24VAC)
Y2 - CLOSE (24VAC)
G - System potential 24VAC
24VAC, 3-position
M5
G
Y2
Y1
X16.1
2 3
1
Water cooler
valve actuator
supply cable
Power
1f, 230V AC
PE N L1
PE N L1
PE N L1
L1
N
PE
X16.7
23
25
24
26
28
27
CE7/7
23
25
24
26
28
27
26
P
27 28
X16.10
26 - 24V DC,
27 - intput, 0-10V DC,
28 - GND,
Transmitter 2
Supply air pressure
Air quality transmitter
CO2; Extract air pressure
Jumper
ST
O
P-
N
O
S
TA
RT
-NC
B
OOS
T
X16
X16
Air quality transmitter
Fire alarm
input
damper actuator damper actuator
Extract air
Supply air
L
L c
ont
rol
N
L c
ont
rol
ON/OFF
ON/OFF
230V AC
230V AC
15
20
16
L
L
N
N
L
18
17
M3
M2
X16.5
19
L
N
17
16
15
14
13
12
11
X16.6
22
21
temp.sensor
TJ
Supply air
NTC
11 12 13 14 15 16 17 18 19 20 21 22
22
21
20
19
18
23
P
Transmitter 1
23 - 24V DC,
24 - intput, 0-10V DC,
25 - GND,
24 25
12
11
AHU
wo
rk
1.
2W
m
ax
X16.4
9 10
6
5
4
1.
2W
m
ax
AH
U s
to
p
X16.3
7 8
14
13
X16.2
X16.4
X16.4
DX Cooling
P
1
3
24V
D
C
24V
D
C
AHU stop
AHU work
AHU status
Start/Stop
Boost
1 2 3 4 5 6 7 8 9 10
10
9
8
7
6
5
4
3
2
1
Y1 - OPEN (24VAC)
Y2 - CLOSE (24VAC)
G - System potential 24VAC
24VAC, 3-position
M5
G
Y2
Y1
X16.1
2 3
1
Water cooler
valve actuator
supply cable
Power
1f, 230V AC
PE N L1
PE N L1
PE N L1
L1
N
PE
X16.7
23
25
24
26
28
27
CE7/7
23
25
24
26
28
27
26
P
27 28
X16.10
26 - 24V DC,
27 - intput, 0-10V DC,
28 - GND,
Transmitter 2
Supply air pressure
Air quality transmitter
CO2; Extract air pressure
Jumper
ST
O
P-
N
O
S
TA
RT
-NC
B
OOS
T
X16
1_789.0046A.0.1.2-L-0k
1_789.0046A.0.1.2-L-0k
1_789.0046A.0.1.2-L-0k
FA
NC
Jumper
FA
NC
Jumper
FA
NC
Jumper
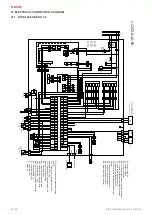
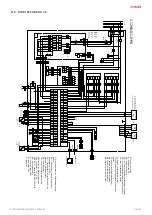
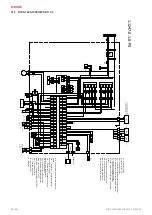
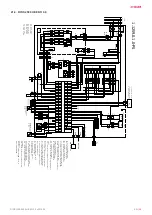
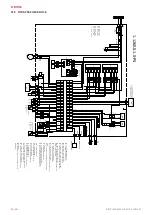
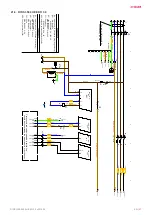
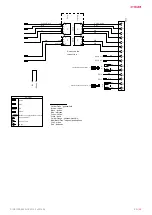
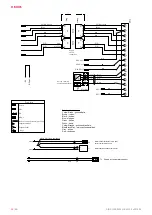
Figure 19.5.1. RIRS 1200-1900 HE EKO 3.0
Summary of Contents for RIRS EKO 3.0 1200 HE
Page 1: ...RIRS 1200 5500 H EKO 3 0 EN MOUNTING AND INSTALLATION INSTRUCTION ...
Page 28: ...28 EN RIRS 1200 5500 H EKO 3 0 v2019 06 21 7 RIRS 3500 HW EKO 3 0 ...
Page 37: ... 37 RIRS 1200 5500 H EKO 3 0 v2019 06 ...
Page 38: ...38 RIRS 1200 5500 H EKO 3 0 v2019 06 ...


