background image


10


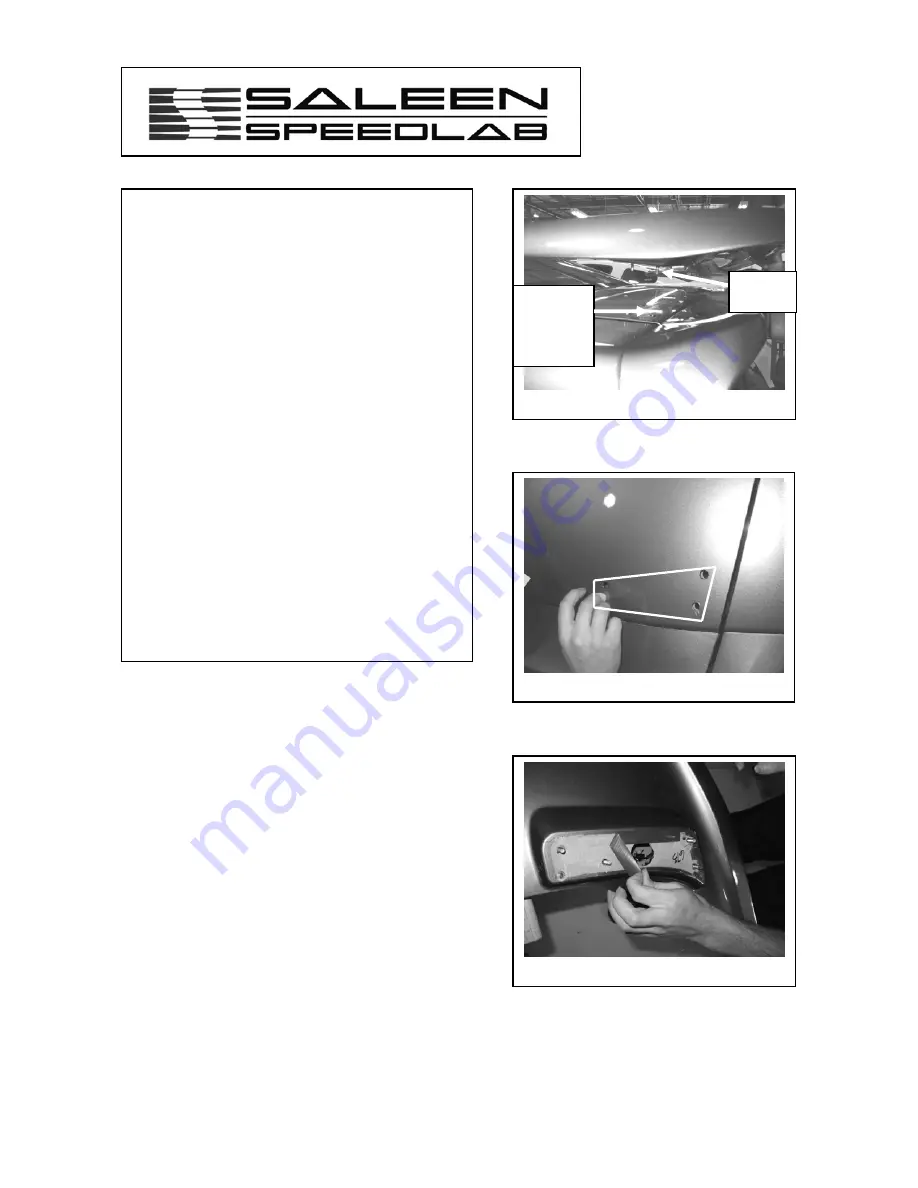
Figure 17 

Figure 16 

Figure 18 

Studs 

Holes 
in deck 
lid 

18.


Before installing the wing, make sure 
the number of studs in the wing 
equals the number of holes drilled in 
the deck lid.  Do a test fit to make 
sure all the holes line up. (Figure 16) 

19.


Apply adhesive promoter to the top 
of the deck lid around both sets of 
four holes.  Follow the pattern in 
Figure 17 (Figure 17 shows the four 
holes on the passenger side of the 
deck lid). Make sure the pattern of 
adhesive promoter matches the 
pattern of tape around the base of the 
studs on the wing. 

20.


After verifying that the wing fits, 
remove the backing from the tape on 
underside of wing. (Figure 18) 

21.


Line up the studs in the wing with the 
holes in the deck lid, and insert the 
wing studs into the deck lid. (Figure 
16)  

Summary of Contents for 10-8002-C11998B

Page 1: ...SALEEN SPEEDLAB S281SC REAR WING KIT INSTALLATION MANUAL 2005 Mustang P N 10 8002 C11998B Saleen Performance Inc 76 Fairbanks Irvine CA 92618 949 597 4900 www saleen com...

Page 2: ...2...

Page 3: ...3 IF YOU ARE NOT EXPERIENCED IN THE AREA OF AUTOMOTIVE MECHANICS WE STRONGLY URGE THAT YOU REFER THIS INSTALLATION TO A CERTIFIED INSTALLER OR TECHNICIAN...

Page 4: ...installation of our products could have been easily solved by information listed in the accompanying installation guide We want you to enjoy the product in its fully functional state and reading this...

Page 5: ...ED 1 16 PROJ 2 06 1108 B12057 REAR WING ASSEMBLY PAINTED 05 S281S C 1 06 1108 B11705 REAR WING ASSY UNPAINTED 05 S281 S C 1 06 1108 C09554 REAR WING 05 S281 1 00 9002 C11830 STUD PERF BASE 1 4 20 3 4...

Page 6: ...ll use the stud indicated in Figure 3 as well as the one similarly located on the driver side of the wing as a marker to properly place the holes in the deck lid The stud indicated in Figure 3 will go...

Page 7: ...those two rearward outboard hole locations steps 5 6 then open the holes up to 5 16 8 Place a dab of torque seal on the bottom of each stud in the wing Using two people to hold the wing line up the o...

Page 8: ...dremel with a carbide tip open up the stock holes on the underside of the deck lid at the locations indicated in Figure 9 Figure 10 is a close up of Figure 9 13 Open up both holes driver side hole sh...

Page 9: ...allow the tape to go over the edge of the elevated platform through which the studs protrude the idea is to position the tape so it is not visible when the wing is installed Cut semi circles in the t...

Page 10: ...f the deck lid around both sets of four holes Follow the pattern in Figure 17 Figure 17 shows the four holes on the passenger side of the deck lid Make sure the pattern of adhesive promoter matches th...

Page 11: ...l the way Place a piece of diameter rope inside the deck lid through the hole drilled out with the dremel and pull the thread out of the adjacent hole Figure 21 This is done to prevent hardware from f...

Page 12: ...Figure 24 is a view of the inside of the deck lid and shows the nut on the studs Torque the nuts to 5 lb ft 27 Remove the rope from the deck lid 28 Using the oval rubber plug 00 9009 C11813 cover each...

Reviews: