32
SALICRU
7.
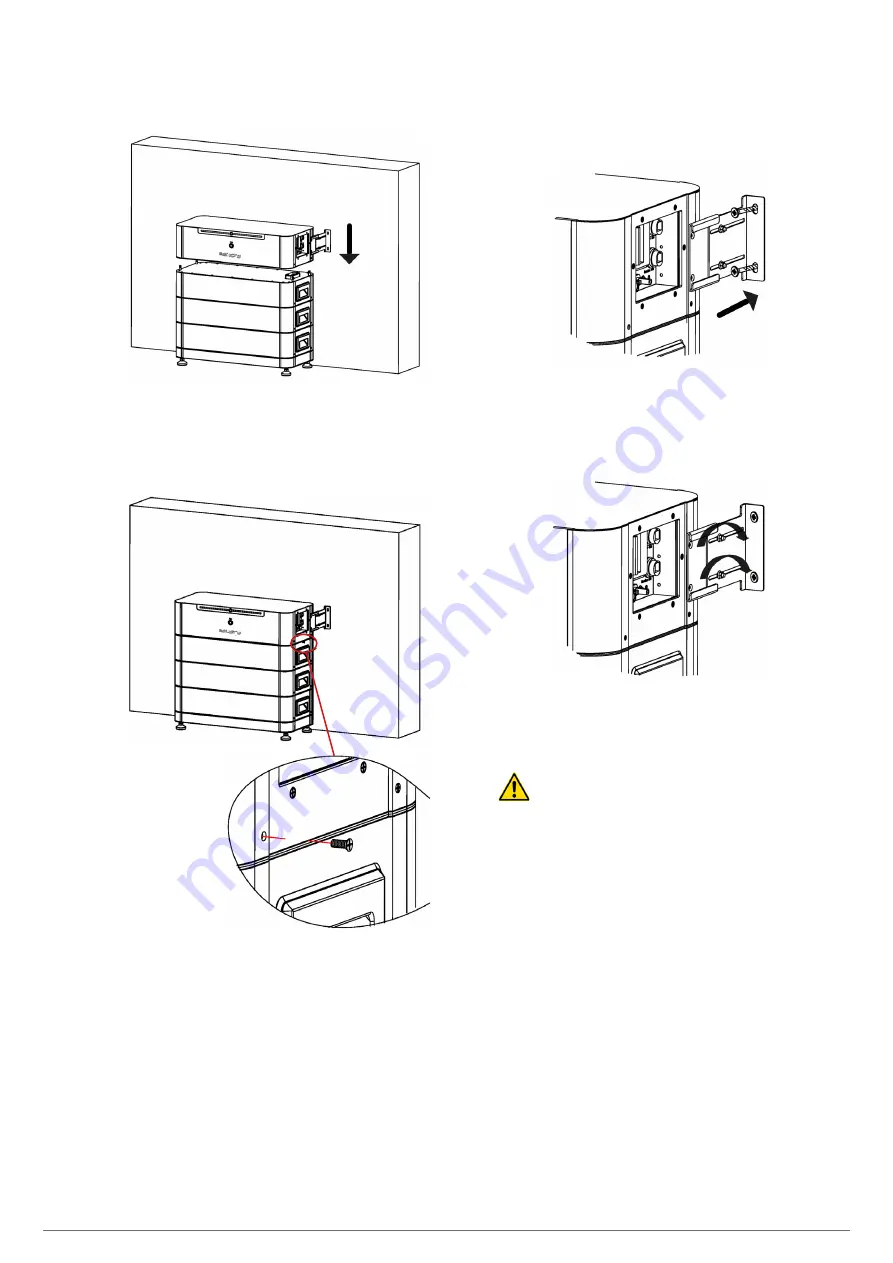
Place the control module on top of the battery module.
Fig. 17. Location of the control module.
8.
Secure the modules with fixing screws on the left and right-
hand sides.
Fig. 18. Mounting the modules.
9.
Insert the expansion screws into the holes, then fix the fas-
tening elements to the wall with the expansion screws using
a Phillips screwdriver.
Fig. 19. Screwing in the fastening elements.
10.
Turn the adjusting screw to fix the battery to the wall with
a spanner.
Fig. 20. Battery attachment.
6.2.3. Earthing connection.
Warning
A suitable earthing connection is necessary to with-
stand overvoltages and improve EMI performance.
The battery must be properly earthed.
For systems with a single battery, the PE cable must be earthed.
For a multi-battery system, all PE cables from the batteries must
be connected to the same copper earthing bar to ensure equipo-
tential bonding.
Steps for connecting the earthing terminal:
1.
The external earthing terminal is on the right side of the control
module.
2.
Fasten the earthing connection terminal to the PE cable with
a suitable tool and lock the earthing connection terminal to
the earthing connection hole on the right side of the control
module.
3.
The cross-section of the external earthing cable is 6 mm
2
.
Summary of Contents for EQUINOX BATT EQX2 BATT
Page 1: ...EQX2 BATT ES EN MANUAL DE USUARIO BATER AS MODULARES PARA INVERSORES SOLARES...
Page 2: ...2 SALICRU...
Page 19: ...19 ES EQX2 INVERSORES SOLARES DE CONEXI N A RED MANUAL DE USUARIO...
Page 21: ...EQX2BATT EN USER MANUAL MODULAR BATTERIES FOR SOLAR INVERTERS...
Page 22: ...22 SALICRU...
Page 39: ...39 EN EQX2 SOLAR INVERTERS CONNECTED TO THE GRID USER MANUAL...


