17
5 1
9 6
2 1
3 4
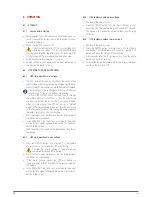
Fig. 10.
DB9 connectors for RS232 and USB.
5.2.7. smart slot for the integration of an electronic communication
unit (snmp).
•
The corresponding documentation is supplied with the op-
tion. Read it before starting installation.
Installation.
•
Remove the protective cover from the device’s slot.
•
Take the corresponding electronic unit and insert it into the
reserved slot. make sure that it is properly connected, for
which it is necessary to overcome the resistance caused in
the connector located in the slot.
•
make the necessary connections in the terminal block or
connectors available according to each case.
•
for more information, contact our
T.S.S.
or our nearest dis-
tributor.
5.2.8. management and monitoring software.
•
Through the RS232 or USb port and the free management
and monitoring software, which can be downloaded from
our website, it is possible to display the values of the dif-
ferent parameters of the Input, batteries and output on a
PC screen, and close files and applications.
The software can be downloaded in two different ways.
Ideally by registering the product. This facilitates and
streamlines warranty procedures in the event of inci-
dents:
–
enter the following in the browser's address bar:
https://support.salicru.com
.
–
Click the ‘enter’ key. The website’s on-Line Support
page will be displayed on the screen.
–
Register as a user.
–
Register the product purchased with all of the de-
tails requested.
–
documentation relating to the model, and manage-
ment and monitoring software, will be displayed
with the available operating systems.
download the required software and install it.
directly through the website.
–
enter the following in the browser's address bar:
https://www.salicru.com/
–
Click the ‘enter’ key. The page shows two sections
on the screen. Search for the device series within
them or via the ‘Product’ header menu, which is
structured in the same way.
–
when accessing the device series, you will see
below the illustrations links to the different docu-
mentation and below these, some tabs, among
them the one marked Software.
Select the Software with the required operating
system, download it and install it.
5.2.9. Considerations before start-up with connected loads.
•
It is recommended to charge the batteries for at
least 12 hours before using the UPS for the first time.
for this, it will be necessary to supply voltage to the
device. The battery charger will work automatically.
for the battery modules.
for models with batteries external to the device or
backup extension modules, firstly connect the batteries
to the device before connecting it to the AC mains.
•
Although the device can operate correctly without charging
the batteries for the specified 12 hours, the risk of a pro-
longed power cut during the first hours of operation and the
UPS’s available backup time should be assessed.
•
do not start up the device and loads completely until indi-
cated in Chapter 6.
when it is done, however, it should be carried out gradually
to avoid possible difficulties, if not at the first start-up.
•
If, in addition to the more sensitive loads, it is necessary
to connect high-consumption inductive loads, such as for
laser printers or CRT monitors, the starting up of these pe-
ripherals will need to be taken into account to prevent the
device from crashing.
SPS ADVANCE R & T
UnInTeRRUPTIbLe PoweR SUPPLy (UPS)
USER MANUAL


