30
31
EN
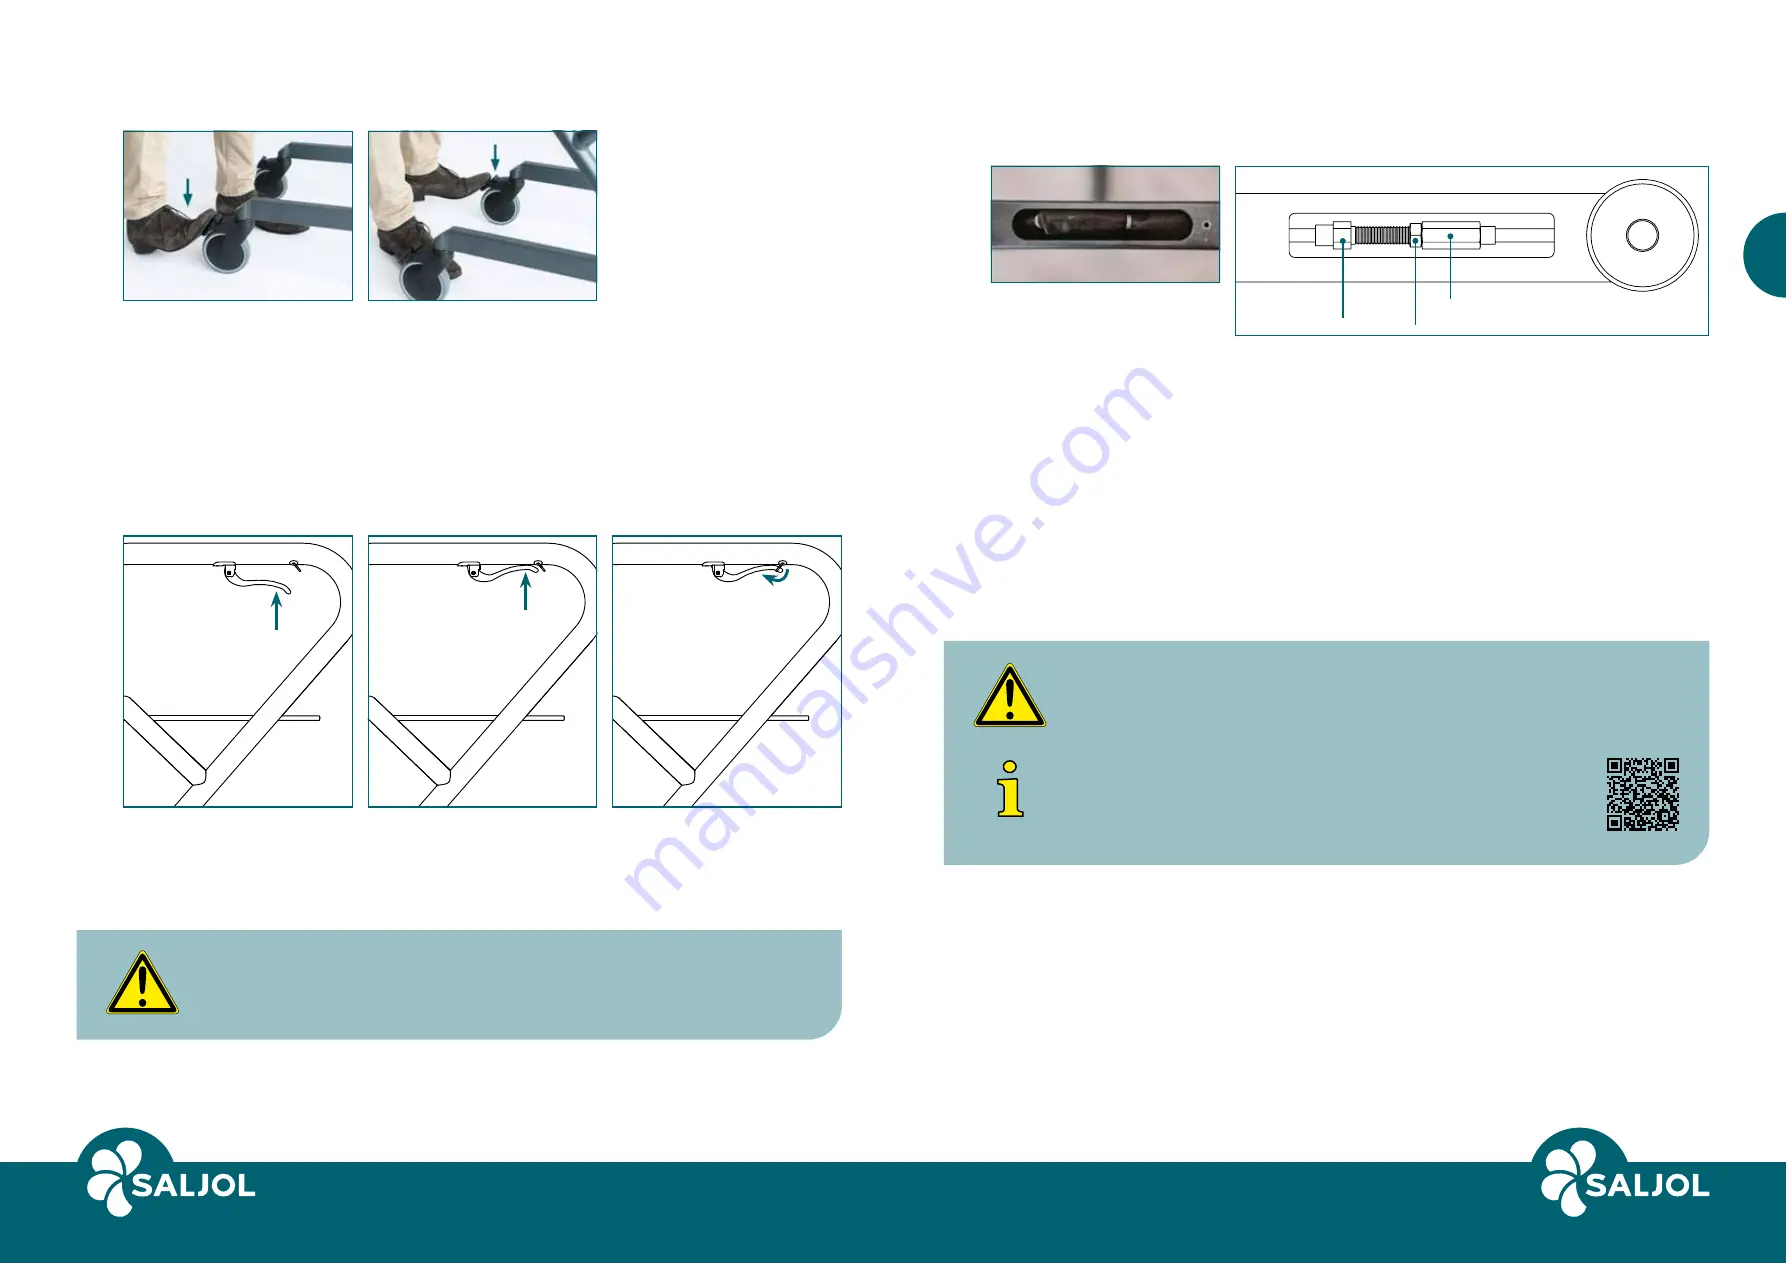
5.5 Lock footbrake
Press both foot pedals
down in succession to lock.
The wheels are locked.
To release, press the top
of the inclined pedals one
after the other. The wheels
turn freely.
5.6 Set and lock the brake (Indoor Rollator with handbrake)
Set the brake
Pull up the brake handles
on both sides.
Locking the brake
1. Pull the brake lever upwards on both sides.
2. Flip over the bracket on each side.
Important
When you sit on the Indoor Rollator to rest, it is absolutely necessary to
lock the brakes
.
Adjusting and checking the handbrake:
You will need a Torx 20 screwdriver, two size 10 open-end spanners, a pair of scissors
or small pliers and two small cable ties.
Turn the rollator over and
place it on the handrail. The
handbrake maintenance
flap is located on the un
-
derside of the frame. Use
a Torx 20 screwdriver to
open the maintenance flap
of the rollator.
Carefully undo the two
cable ties and release the
hose. Put it aside.
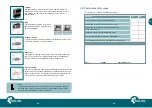
Now adjust the brake:
1. loosen the lock nut
2. hold the adjustment screw with a 10 mm open-end
spanner and unscrew the adjusting nut (the brake
becomes tighter) or screw it in (the brake becomes
smoother)
3. Check brake force
4. Repeat steps 2-3 until the desired setting is found.
5. Tighten the lock nut.
6. Put the hose around the Bowden cable adjustment
and fix it with two cable ties.
adjusting nut
Lock nut
Adjustment screw
Caution
The brake is correctly adjusted if the rear wheels lock when the brake is
applied and do not turn when pushed.
Information
Here you can find a video explaining the brake adjustment:
www.saljol.de/en/technical-data-living-room-rollator/
or scan the QR code.


