background image

23

INFLATING TIRES

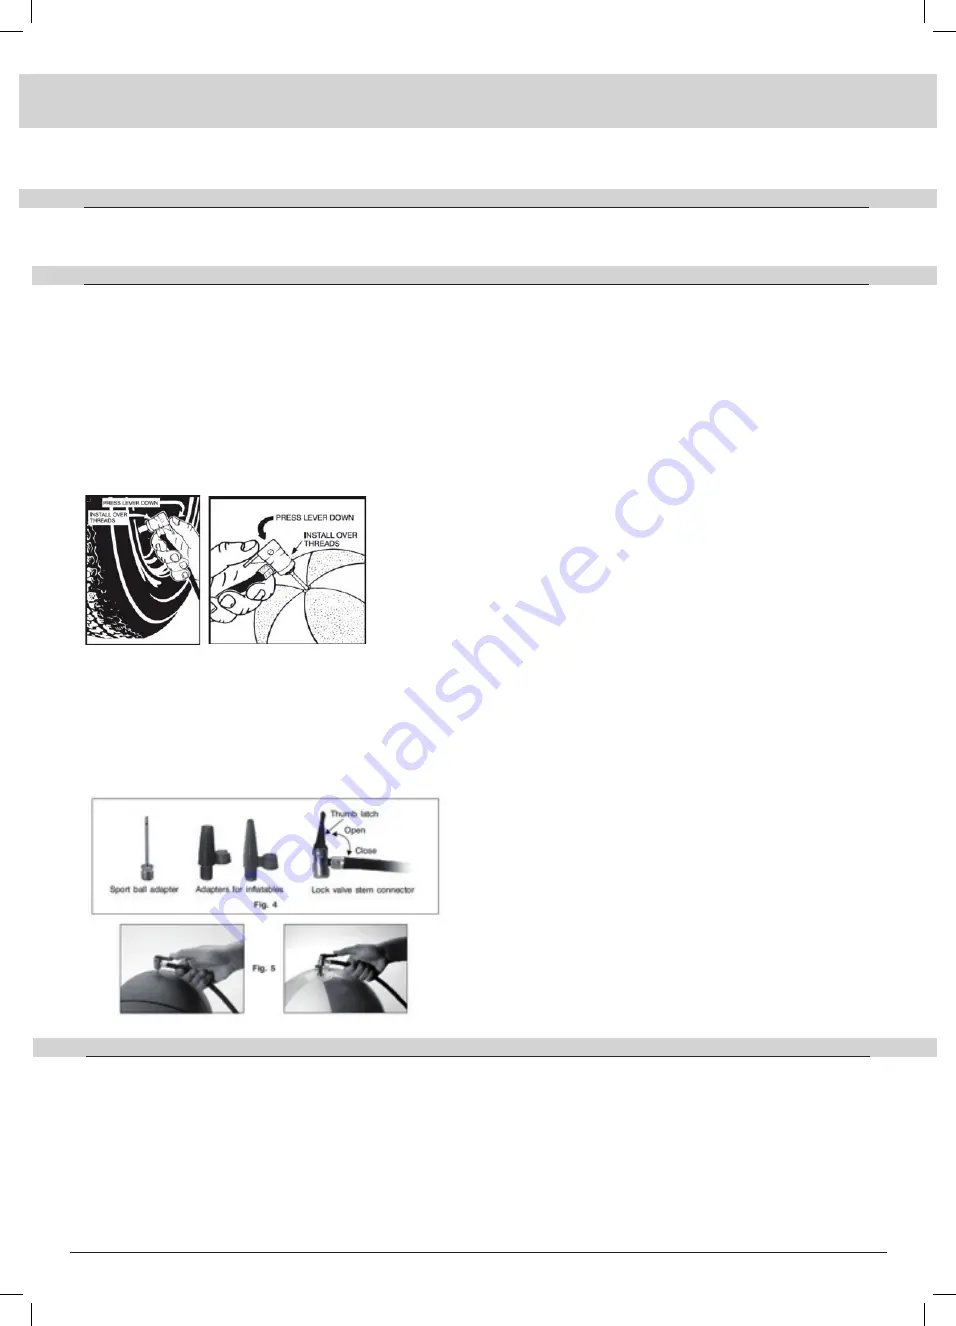
1.  Remove valve cap or valve extended from the valve stem.

2.  Depending upon the item being inflated, attach the universal thumb latch valve adaptor directly to the item or to the appropriate 

inflating accessory. Car tires require no accessories. 

3.  If it is used without an accessory, simply push the adaptor down over the threaded portion of the tire valve with the lever in the upright 

position and locking place by depression the lever down towards the hose side of the adaptor. If one of the accessories is being used, 

lock the universal thumb latch valve adaptor to the accessory in the same manner.

4.  Plug in the unit and press the on / off switch on the “ON” position. The unit will begin to inflate immediately. When pressure has 

reached the desired level, turn the unit “OFF”.  The pressure should be checked with the unit OFF. If on inspection you find that the 

correct level has not been reached, turn the unit “ON”, and repeat the procedure.

5.  If the tire is totally deflated, it’s possible that the tire could separate from the rim, allowing air to leak out when trying to inflate. This 

usually happens only on completely flat tires. In the even this situation occurs, you will have to jack up the car prior to inflating the tire.

6.  The time necessary to inflate a tire, will vary from tire to tire and will vary depending on how deflated the tire is.

For inflatables

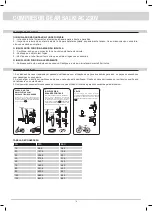
1.  Select the suitable adapter and insert it into the connector. (Fig. 4). Close thumb latch.

2.  Check our TYPICAL INFLATION PRESSURE chart. This chart is for reference only and you should consult your owner’s manual for a 

more exact pressure rating.

3.  Lock it in place and insert adapter into article to be inflated. (Fig. 5)

4.  Plug in the power cord, and turn on switch.

5.  When proper pressure is reached, turn off switch, unplug power cord.

6.  Remove adapter from inflated article and remove adapter from connector.

TROUBLE SHOOTING

INFLATOR DOES NOT START / BLOWS FUSES

1.- Push the power plug firmly into the receptacle and twist it back & forth.

2.- Check receptacle and plug terminals for dirt, particularly tobacco. Use a non-conductive probe, not fingers or metal.

INFLATOR RUNS BUT DOES NOT INFLATE

1.- Be sure the connector always touches the core of the valve stem.

2.- Check article for leaks.

3.- Check hose for breaks and leaks at fittings.

INFLATOR RUNS SLOWLY

1.- Overheated from excessive use. Shut it off and let it cool for 30 minutes.

Always use a gauge to check the actual pressure in tires, before starting using the inflator. A better pressure measure is reached when the 

tire is “cold”. Keep the car engine off while using the compressor.

CAUTION

SALKI AC 230V AIR COMPRESSOR

Summary of Contents for 8302068

Page 1: ...tenga las herramientas limpias para que funcionen bien y su uso sea seguro Siga los procedimientos de mantenimiento regular Inspeccione peri dicamente los cables y los alargadores de la herramienta Si...

Page 2: ...cciones Familiar cese con el uso correcto del producto Un uso incorrecto puede causar da os materiales o personales Caracter stica 8302068 83002000 8423303228575 8429586043577 Dimensiones Largo x Anch...

Page 3: ...lo los accesorios incluidos en el mbito de suministro g Este compresor NO ha sido dise ado para aplicaciones comerciales h El uso incorrecto del cable de conexi n y del enchufe puede ocasionar un sho...

Page 4: ...n 3 accesorios de inflado boquilla de aguja para balones y con dos adaptadores rojo y azul para otros elementos de inflado y el PORTABLE HOUSE GARAGE con estos tres mismos accesorios boquillas de aire...

Page 5: ...i n de inflado t pica No olvide consultar el manual de usuario del elemento a inflar para conocer la presi n exacta o recomendada 3 Coloque la boquilla e inserte el conector universal Fig 5 4 Conecte...

Page 6: ...ofrecida por el distribuidor 6 Para hinchables lanchas colchonetas flotadores use la boquilla adaptador pl stico simplemente presionando el conector sobre la parte superior de la boquilla pl stica y a...

Page 7: ...r tes tranchantes 11 Ne forcez pas sa position de travail Toujours demeurer dans une position stable et garder l quilibre 12 Entretenir les outils avec soin Pour des performances meilleures et plus s...

Page 8: ...ce produit Familiarisez vous avec l utilisation appropri e de l unit Toute mauvaise utilisation de l unit pourrait causer des dommages mat riels et ou des blessures corporelles SP CIFICATION TECHNIQUE...

Page 9: ...ersonnes car la haute pression peut tre dangereuse f Utilisez uniquement l appareil avec les accessoires fournis g Ce compresseur n est pas con u des vues commerciales h Une mauvaise utilisation de la...

Page 10: ...nettoyer 4 Noir Lors que plus de d bit est n cessaire et autre type de connexion Bouton On Off Pour allumer l appareil pressez le bouton sur le point marqu ON pour l teindre pressez le bouton sur le p...

Page 11: ...sont compl tement plat Dans cette situation vous devrez mettre la voiture sur cric avant de gonfler le pneu 6 le temps n cessaire pour gonfler un pneu varie selon le type de pneu et le degr de d gonfl...

Page 12: ...ecteur sur le dessus de la buse de plastique et d assurer la connexion en appuyant sur le verrou de pouce sur le connecteur Pour le sport balles utiliser l aiguille de buse Pour valve Schrader pouvant...

Page 13: ...dado Por quest es de seguran a e desempenho mantenha as ferramentas limpas e afiadas Realice procedimentos de manuten o regulares Inspecione os cabos de alimenta o e extens es el tricas periodicamente...

Page 14: ...ade Qualquer mau uso da unidade pode causar danos materiais ou no equipamento e ou ferimentos pessoais Caracter sticas principais 8302068 2073 8423303228575 8429586043577 Dimens o do insuflador CxLxA...

Page 15: ...alta press o pode ser perigosa g Utilize a unidade apenas com os acess rios inclu dos h Este compressor n o foi concebido para aplica es comerciais i O uso inadequado da ficha de terra pode resultar n...

Page 16: ...emover p ou limpar 4 Preto Para quando mais fluxo exigido e o outro tipo de conex o Interruptor de Ligar ON Desligar OFF Para ligar pressione o interruptor na posi o ON ligado para desligar pressione...

Page 17: ...a unidade na posi o de desligada OFF Se no momento da inspe o verificar que o n vel correto n o foi atingido ligue a unidade e repita o procedimento 5 Se o pneu estiver totalmente desinsuflado poss v...

Page 18: ...ondutora n o use os dedos ou metais O INSUFLADOR FUNCIONA MAS N O INSUFLA 1 Certifique se de que o conector toca no n cleo da haste da v lvula 2 Verifique se o objeto tem fugas 3 Verifique se o tubo f...

Page 19: ...maintenance procedures Inspect tool cords and extension cords periodically If damaged use a certified service technician to repair Keep handle dry clean and free from grease or oil 13 Disconnect tools...

Page 20: ...ully Be familiar with the proper use of the unit Any misuse of unit could cause property or equipment damage and or personal injury Main Features 8302068 2073 8423303228575 8429586043577 Inflator dime...

Page 21: ...nce high pressure can be dangerous f Operate only with the accessories included g This compressor is not design for commercial applications h Improper use of grounding plug can result in a possible ri...

Page 22: ...e an air stream is desired ie dusting or cleaning purpose 4 Black For higher flow and other conexions On Off switch To turn on press the switch on the sport marked ON to turn off press the switch down...

Page 23: ...r to inflating the tire 6 The time necessary to inflate a tire will vary from tire to tire and will vary depending on how deflated the tire is For inflatables 1 Select the suitable adapter and insert...

Page 24: ...priate handling of device by the user cancels the warranty offered by the distributor SALKI AC 230V AIR COMPRESSOR Push connector firmly onto the type valve and then secure by depressing the thumb loc...
Page 25: ...mpre os requisitos e condi es estabelecidos das Diretivas Europeias 2014 30 EU EMC 2006 42 EC MD 2011 65 EU RoHS Est conforme aux exigences et conditions tablies des directives europ ennes 2014 30 EU...

Page 26: ...S Cumpre os requisitos e condi es estabelecidos das Diretivas Europeias 2014 30 EU EMC 2006 42 EC MD 2011 65 EU RoHS Est conforme aux exigences et conditions tablies des directives europ ennes 2014 30...

Reviews: