background image

Discharge Pump Installation Instruction 

1. Make a hole (size 1-3/8”) for the on/off switch as shown 

Fig1. Pre drill required.

2. Place 1/8” clear hose into the rear of the switch and 

on/off switch into the hole.

3. The discharge pump kit is made to fit into the pedicure 

unit as shown is Fig2.

4. Connect EZ connector to the drain elbow.

5. Plug discharge pump outlet into black 2 minute timer.

6. Plug black 2 minute timer into the wall outlet.

7. It is very important that tip of white tube remain above 

the water level with one big loop as shown in Fig3. 

Operation Instruction

Please DO NOT run dry

1. Turn to open the drain plug - wait 2 seconds.

2. Press on/off switch to activate the timer.

3. After the water has drained out from the basin. Press the 

on/off switch again to stop.

* Loop to connect main drain
  (Must have the loop
    before the main drain
    to prevent AIRLOCK)

Fig 3.
White tube
must have
the loop

Fig 1.
On/Off Push Button

On/Off

Switch

Fig 2.
Pre Assembled
Discharge Pump

Discharge
Pump

1-1/4”

Drain Elbow

1-1/4”

EZ connector

3/4” x 1

Adapter

1/2” Check Valve
(Provided by MFG)

Wall of

the Base

Fastener

Outlet

2 min.

Timer

Electrical

Cord

Clear Tube

Joy

Water 

Discharge Pump

1” PVC pipe

Discharge Pump Kit

Summary of Contents for Water Joy

Page 1: ...Copyright 2010 by Printed in USA Whirlpool Pedicure Spa Manual Joy W a t e r...

Page 2: ...any damage Failure to note damage on the bill of lading may prevent any claims you may have against the carrier If damage is found you MUST notify the carrier at once and request an inspection DO NOT...

Page 3: ...Serial Number Order Number Installed BY 79F Express St Plainview NY 11803 Tel 516 433 0900 877 725 6683 Fax 516 433 0977 www salontechspa com info salontechspa com Whirlpool Pedicure Spa Joy W a t e r...

Page 4: ...device for faucet Vacuum breaker comply with ANSI NSF 61 2000 ASMB A112 18 1 2000 ASSE1014 and CSA standard B125 98 ANSI ASME A112 18 3M performance requirements for backflow preventive device and sys...

Page 5: ...rest Back Cushion Armrest Footrest Cushion Manicure Tray Polish Tray Due to continuous improvements on all of our products specification characteristics packing color and design are subject to change...

Page 6: ...m Air Induction System 115V 1 2 Amp 60Hz 55W Each Motor 115V 3 2 Amp 60Hz 110V 120V 60Hz 90W 5Amp 1 2 inch fitting pre installed 3 8 PIP Connection 1 2 inch fitting pre installed 3 8 PIP Connection 1...

Page 7: ...51 60 29 Joy W a t e r Arm to Arm width 30 5 51 29 16 3 41 25 5 14 5 24 5 22 15 60...

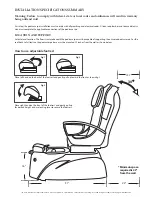
Page 8: ...st be capable of supporting the occupied pedicure spa For the seat back to full recline the pedicure spa base must be mounted 22 inches from the wall as shown below 51 22 15 7 16 Minimun space require...

Page 9: ...e r NOTE The requirement for vaccum breaker varies from state to state and province to province Please consult with the licensed plumber 15 6 37 1 5 PVC drain pipe Adjustable P Trap and connector 5 5...

Page 10: ...re oxygen is being administered Never operate If it has a damaged cord or plug or dropped in the water To disconnect press power button to turn off then remove the plug from the outlet Allow 30 minute...

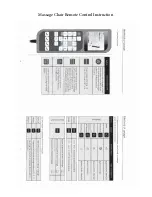
Page 11: ...Massage Chair Remote Control Instruction...

Page 12: ...ater level with one big loop as shown in Fig3 Operation Instruction Please DO NOT run dry 1 Turn to open the drain plug wait 2 seconds 2 Press on off switch to activate the timer 3 After the water has...

Page 13: ...subject to misapplication improper installation or maintenance neg ligence improper cleaning refurbished or tampered with in any way or other circumstances beyond Salontechspa s control s warranty is...

Reviews:

Related manuals for Water Joy