background image


6. 

USING THE RADIO - FM MODE 

6.1 

Turn  the  radio  on,  press  the  MODE  button  and  select  the  FM  mode.  The 
displa

y will show „switching to FM‟ and the radio will tune to 87.50 MHz. 

6.2 

To  activate  auto  search,  briefly  press  the  SCAN  button  and  the  radio  will 
start  scanning  up  the  frequency  and  stop  automatically  once  the  next 
station up has been found.  To scan downwards, press and 

hold

 the SCAN 

button for at least 1 second. 

6.3 

To search manually, press the FORWARD ( ) or BACKWARD (

) button 

to increment the frequency by 0.05MHz. 

6.4 

To change the audio mode (auto or mono) press the ENTER button on the 
unit,  this  will  switch  from  auto  to mono, press  and  again  to switch  back.  If 
auto  is  selected  the  radio  will  automatically  switch  between  stereo  and 
mono mode.  (Note: as this unit only has a single speaker, these modes will 
not affect the speaker output) 

6.5 

If an FM RDS (Radio Data Signal) is present, the display will automatically 
show the station name and radio text (where available). 
 

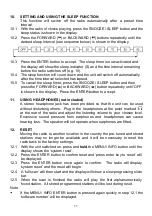
7. 

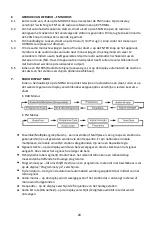
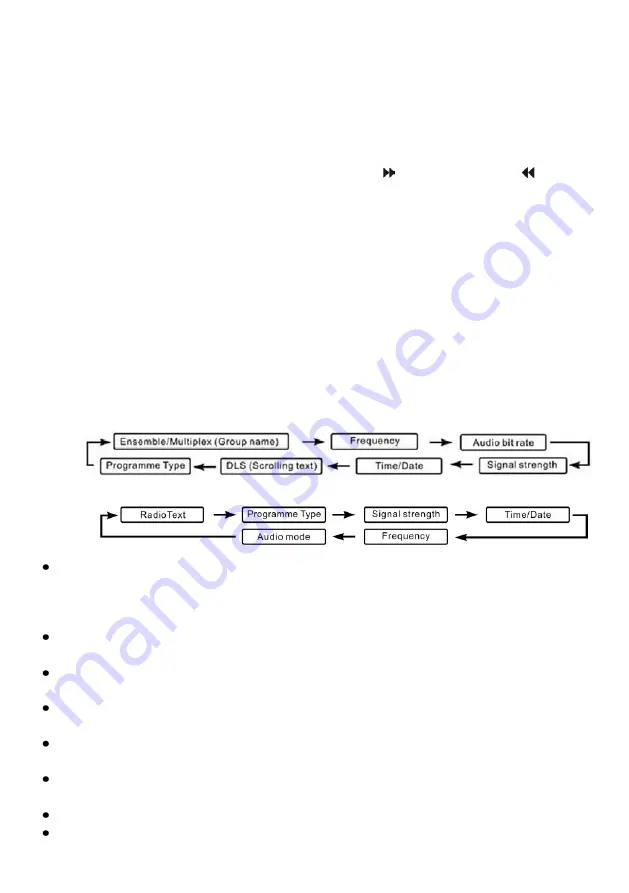
RADIO DISPLAY MODES 

If  the  MENU  button  is  pressed  repeatedly  when  a  radio  station  is  playing, 
the second line of the station display will scroll through the following modes 
with each press of the button. 


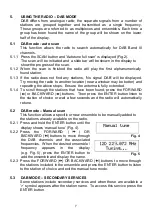
In DAB mode 


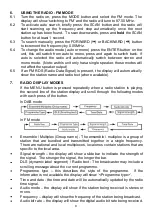
In FM mode 


Ensemble / Multiplex (Group name) - The ensemble / multiplex is a group of 
station  that  are  bundled  and  transmitted  together  in  a  single  frequency.  
There are national and local multiplexes, local ones contain stations that are 
specific to the local area. 


Signal strength 

– the display will show a slide bar to indicate the strength of 

the signal.  The stronger the signal, the longer the bar. 


DLS (dynamic label segment) / Radio text  - The broadcaster may include a 
scrolling message about the current programme. 


Programme  type 

–  this  describes  the  style  of  the  programme.    If  the 

information is not available the display will show „<Programme type>‟. 


Time and date - the time and date will be automatically updated by the radio 
time signal. 


Audio mode 

– the display will show if the station being received is stereo or 

mono. 


Frequency 

– display will show the frequency of the station being broadcast. 


Audio bit rate 

– the display will show the digital audio bit rate being received. 

Summary of Contents for CR624DAB

Page 1: ...Instruction Manual IMPORTANT Please read all instructions carefully before use and keep for future reference Ver 1 0 DAB FM Radio CR624DAB ...

Page 2: ... get damaged or cause a trip hazard The output cord of this mains adaptor cannot be replaced In the event of damage to the cable jack plug or adaptor the entire adaptor unit should be replaced Connections must only be made via the mains adaptor supplied never connect the appliance directly to the 240v mains supply Never use the adaptor supplied with any other appliance The mains adaptor will becom...

Page 3: ...iance Warning to reduce the risk of electric shock do not remove cover or back No user serviceable parts inside refer servicing to qualified service personnel The lightning flash with arrow head symbol within an equilateral triangle is intended to alert the user to the presence of un insulated dangerous voltage within the product s enclosure that may be of sufficient magnitude to constitute a risk...

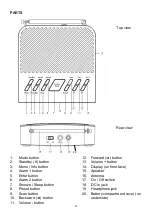
Page 4: ...arm 2 button 7 Snooze Sleep button 8 Preset button 9 Scan button 10 Backward button 11 Volume button 12 Forward button 13 Volume button 14 Display on front face 15 Speaker 16 Antenna 17 On Off switch 18 DC in jack 19 Headphone jack 20 Battery compartment cover on underside Rear view Top view 20 ...

Page 5: ...sing the ON OFF switch at rear when not in use Standby mode continues to use power and if in battery mode will flatten the batteries within a couple of days BATTERY SAFETY AND DISPOSAL CAUTION Danger of explosion if batteries are incorrectly fitted replaced Only use AA 1 5V batteries in this appliance Be sure to insert batteries correctly taking care to observe the correct polarity and Use only ba...

Page 6: ...ion The display will show the station being listened to 4 8 If the radio does not find any stations No signal DAB will be displayed Ensure the antenna is fully extended or try moving the radio to another location near a window may be better and repeat the above steps 4 9 Adjust the volume to the desired level using VOL or VOL buttons 4 10 To search the stations that have been found press the FORWA...

Page 7: ...enna is fully extended 5 1 4 To scroll through the stations that have been found press the FORWARD or BACKWARD buttons Then press the ENTER button listen to the station of choice or wait a few seconds and the radio will automatically retune 5 2 DAB mode Manual scan This function allows a specific or new ensemble to be manually added to the stations already available on the radio 5 2 1 Press and ho...

Page 8: ...RADIO DISPLAY MODES If the MENU button is pressed repeatedly when a radio station is playing the second line of the station display will scroll through the following modes with each press of the button In DAB mode In FM mode Ensemble Multiplex Group name The ensemble multiplex is a group of station that are bundled and transmitted together in a single frequency There are national and local multipl...

Page 9: ... Preset empty will be shown in the display Fig 10 9 ALARM FUNCTION This radio has a dual alarm function and it is possible to set two individual alarm times This alarm and may be set to wake as a buzzer tone or to a favourite radio DAB FM station The alarm can be set in standby or during operation 9 1 To set the first alarm press the ALARM 1 button to display the alarm 1 status use the FORWARD or ...

Page 10: ...m is switched off 9 11 To activate the snooze function press the SNOOZE SLEEP button when the alarm sounds The snooze indicator Zz will be shown in the display the alarm will silence and then sound again after approximately nine minutes 9 12 To turn off the alarm permanently press the ALARM 1 button to display the alarm status Use the FORWARD or BACKWARD button until Alarm status OFF is displayed ...

Page 11: ...the unit can be used without disturbing others Plug in the headphones at the point marked at the rear of the radio and adjust the listening volume to your chosen level Excessive sound pressure from earphones and headphones can cause hearing loss The speaker will not operate when earphones are fitted 12 RESET Moving the radio to another location in the country the pre tuned and stored stations may ...

Page 12: ...as the ON OFF button at the rear of the unit been moved to the on position No sound Is the volume control set at minimum Are headphones fitted in the phones jack Radio reception noisy FM Extend the antenna or adjust the position of the radio FM stereo if weak switch to MONO as this requires less signal strength Radio reception stutters bubbling sounds DAB Signal is weak Extend the antenna or adjus...

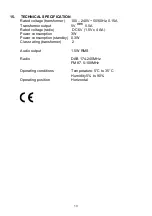
Page 13: ...ormer output 5V 0 5A Rated voltage radio DC 6V 1 5V x 4 AA Power consumption 3W Power consumption standby 0 3W Class rating transformer 2 Audio output 1 5W RMS Radio DAB 174 240MHz FM 87 5 108MHz Operating conditions Temperature 5 C to 35 C Humidity 5 to 90 Operating position Horizontal ...

Page 14: ...kan vallen De kabel van de voedingsadapter kan niet worden vervangen Indien de kabel de plug of voedingsadapter is beschadigd dient de gehele unit te worden vervangen Verbindingen dienen uitsluitend tot stand te komen door middel van de meegeleverde voedingsadapter sluit het apparaat nooit direct op een 240V aansluiting aan De voedingsadapter zal warm worden tijdens gebruik bedek deze niet of plaa...

Page 15: ...en symbool in een driehoek waarschuwt de gebruiker op de aanwezigheid van belangrijke instructies bijgesloten bij dit apparaat met betrekking tot de bediening en onderhoud van dit apparaat Waarschuwing om het risico op een elektrische schok te reduceren open de behuizing voor en achter niet Er bevinden zich geen onderdelen in het apparaat die de gebruiker kan vervangen wendt u zich tot gekwalificee...

Page 16: ...op 3 Menu Info knop 13 Volume knop 4 Alarm 1 knop 14 Display Vooraanzicht 5 Enter knop 15 Luidspreker 6 Alarm 2 knop 16 Antenne 7 Snooze Sleep knop 17 Aan Uit schakelaar 8 Preset knop 18 DC in aansluiting 9 Scan knop 19 Hoofdtelefoon aansluiting 10 Terug 5 knop 20 Batterij compartiment deksel onderzijde 16 ...

Page 17: ... apparaat In de Stand by stand wordt nog altijd elektriciteit verbruikt en bij batterijgebruik zullen de batterijen binnen enkele dagen leeg zijn VEILIGHEID EN VERWIJDERING VAN BATTERIJEN LET OP gevaar voor explosie indien de batterijen niet correct geplaatst zijn Gebruik uitsluitend AA 1 5V batterijen in dit apparaat Let bij het plaatsen van de batterijen op de juiste polariteit Gebruik uitsluite...

Page 18: ...wordt geluisterd 4 8 Indien de radio geen sta ons kan vinden verschijnt er op het scherm No Signal DAB Controleer of de antenne volledig is uitgetrokken of probeer de radio op een andere plaats te ze en dichter bij een raam kan een beter resultaat opleveren en volg de bovenstaande stappen 4 9 Pas het volume aan naar eigen inzicht door gebruik te maken van de VOL en VOL knoppen 4 10 U kunt door geb...

Page 19: ... 4 U kunt door gebruik te maken van de Vooruit 6 en Terug 5 knoppen zoeken naar een station tussen de beschikbare stations Druk daarna op de ENTER knop om het station van uw keuze te beluisteren of wacht enkele seconden zodat de radio automatisch opnieuw zal afstemmen 5 2 DAB mode Handmatig scannen Door middel van deze functie kunt u een specifiek of nieuw ensemble handmatig toevoegen aan de reeds ...

Page 20: ...DIO DISPLAY MODI Indien u herhaaldelijk op de MENU knop drukt terwijl een radiostation aan staat zullen er op de tweede regel van de display verschillende weergaveopties verschijnen iedere keer als u drukt In DAB Modus In FM Modus Ensemble Multiplex groep Naam een ensemble of Multiplexe is een groep van station die gebundeld zijn en uitgezonden worden via één frequentie Er zijn nationale en lokale...

Page 21: ...atus van het alarm 1 weer te geven gebruik de Vooruit 6 of Terug 5 knoppen tot er Alarm status On verschijnt en druk op de ENTER knop om het instelmenu te openen 9 2 Op de display verschijnt nu de huidige tijd de wektijd en de uren van de wektijden zullen knipperen Druk op de Vooruit 6 of Terug 5 knop tot het gewenste uur wordt weergeven 9 3 Druk op de enter knop om te bevestigen nu zullen de minu...

Page 22: ...ukt u op de SNOOZE SLEEP knop en de SLEEP status zal op de display verschijnen 10 2 Druk herhaaldelijk op de Vooruit 6 of Terug 5 knop tot de gewenste intervaltijd verschijnt zie onderstaande volgorde 10 3 Druk op de ENTER knop om te bevestigen De SLEEP timer is nu geactiveerd en op de display verschijnt de sleep indicator S met daarbij de resterende tijd tot de radio automatisch zal uitschakelen ...

Page 23: ...het apparaat zijn gedaan Staat de Aan Uit schakelaar aan de achterzijde van het apparaat in de ON positie Het apparaat doet het niet met batterijen Heeft u de voedingsadapter verwijderd aan de achterzijde van het apparaat Zijn de batterijen correct geplaatst Zijn de batterijen leeg Staat de Aan Uit schakelaar aan de achterzijde van het apparaat in de ON positie Geen geluid Staat het volume ingeste...

Page 24: ...panning uit 5V 0 5A Nominale spanning radio DC 6V 1 5V x 4 AA Stroomverbruik 3W Stroomverbruik Stand by 0 3W Veiligheidsklasse Voedingsadapter 2 Audio output 1 5W RMS Radio DAB 174 240MHz FM 87 5 108MHz Gebruiksomstandigheden Temperatuur 5 C tot 35 C Vochtigheid 5 tot 90 Gebruikspositie Horizontaal 24 ...

Page 25: ...ur ne peut pas être remplacé En cas de dommage du cordon la prise jack ou l adaptateur l unité toute re doit être remplacée Les branchements doivent être établis par l adaptateur secteur fourni ne branchez jamais l appareil directement à l alimenta on 240V N u isez jamais l adaptateur fourni avec un autre appareil L adaptateur secteur deviendra chaud pendant l usage ne couvrez pas ou ne le posez p...

Page 26: ... d exclama on dans un triangle équilatéral a pour but d av r l u isateur de la présence de direc ves de fonc onnement ou d entre importantes dans le manuel d in on qui accompagne l appareil Afin de minimiser les risques de choc électrique ne pas re rer le couvercle ou les pièces Il n y a pas de pièces pouvant être réparées par l u isateur dans de ce e unité confier à un agent qualifié ATTENTION RISQU...

Page 27: ...outon Volume 4 Bouton Alarme 1 14 Écran vue frontale 5 Bouton Entrée 15 Haut Parleur 6 Bouton Alarme 2 16 Antenne 7 Bouton Répétition Réveil 17 Interrupteur Marche Arrêt 8 Bouton Préréglage Mémorisation 18 Prise Jack DC in 9 Bouton Balayage 19 Prise Écouteurs Casque 10 Bouton en Arrière 5 20 Couvercle compartiment piles en dessous 27 ...

Page 28: ...utilisez pas Le mode Veille continue à utiliser d énergie et en mode piles déchargera les piles dans quelques jours PILES SECURITE ET TRAITEMENT ATTENTION Danger d explosion si les piles ne sont pas placé correctement Utilisez exclusivement les piles AA 1 5V dans cet appareil Assurez vous que les piles sont placées correctement en suivant les polarités indiquées et Utilisez exclusivement les mêmes...

Page 29: ...écran affichera le nom de la station 4 8 Si la radio ne trouve aucune de station No Signal DAB s affichera Assurez vous que l antenne est complètement déployée ou déplacez la radio à un endroit de meilleur réception près d une fenêtre pourrait être mieux et répétez la procédure ci dessus 4 9 Vous pouvez régler le volume au niveau désiré en utilisant les boutons VOL et VOL 4 10 Pour chercher la station...

Page 30: ...ne est complètement déployé 5 1 4 Pour chercher la station désirée appuyez sur le bouton FORWARD 6 ou BACKWARD 5 pour basculer entre les stations disponibles Puis appuyez sur le bouton ENTER pour écouter la station de votre choix ou attendez quelques secondes et la radio se réglera automatiquement 5 2 Mode DAB recherche manuelle Cette fonction vous permet d ajouter un ensemble spécifique ou nouveau...

Page 31: ...tion et texte de la radio si disponible 7 MODES ÉCRAN RADIO Si vous appuyez sur le bouton MENU plusieurs fois lorsque la radio est en opération la deuxième ligne de la radio basculera entre les modes suivants après chaque fois que vous appuyez sur le bouton En mode DAB En mode FM Ensemble Multiplex Nom de la Groupe L ensemble multiplexe est un groupe de stations regroupé en bouquets et diffusé ense...

Page 32: ...r la première alarme Vous appuyez sur le bouton ALARM 1 pour afficher l état de la première alarme par le bouton FORWARD 6 ou BACKWARD 5 jusqu à Alarm status ON s affiche sur l écran appuyez sur le bouton ENTER pour entrer le mode réglage 9 2 Maintenant sur l écran vous voyez l heure actuelle l heure de réveil les chiffres des heures de réveil clignotent Appuyez sur le bouton FORWARD 6 ou BACKWARD 5 po...

Page 33: ...E SLEEP et l état de cette fonction est affiché sur l écran 10 2 Appuyez sur le bouton FORWARD 6 ou BACKWARD 5 plusieurs fois pour sélectionner le temps de l intervalle désiré voyez la séquence ci dessous affiché sur l écran 10 3 Appuyez sur le bouton ENTER pour confirmer La fonction SLEEP arrêt automatique est activée et sur l écran est affiché le signe de la fonction SLEEP S et le temps restant avant q...

Page 34: ...l ne fonctionne pas avec les piles Avez vous débranché l adaptateur à l arrière de l appareil Avez vous placé les piles correctement Contrôlez si les piles ne sont pas vides Avez vous mis l interrupteur ON OFF à l arrière de l appareil en position ON Pas de son Avez vous mis le volume au minimum Avez vous branché la casque Réception de bruit de la radio FM Étendez l antenne ou changez la position ...

Page 35: ... AA Consommation électrique 3W Consommation électrique en veille 0 3W Classe énergétique transformateur 2 Puissance Audio 1 5W RMS Radio DAB 174 240 MHz FM 87 5 108MHz Conditions de fonctionnement Température 5 C à 35 C Humidité 5 à 90 Position d opération Horizontale 35 ...

Reviews: