background image

3

POLARIZED PLUG

This appliance has a polarized plug (one blade is wider than the other).  To
reduce the risk of electric shock, this plug will fit in a polarized outlet only one
way.  If the plug does not fit fully in the outlet, reverse the plug.  If it still does
not fit, contact a qualified electrician.  Do not modify the plug in any way.

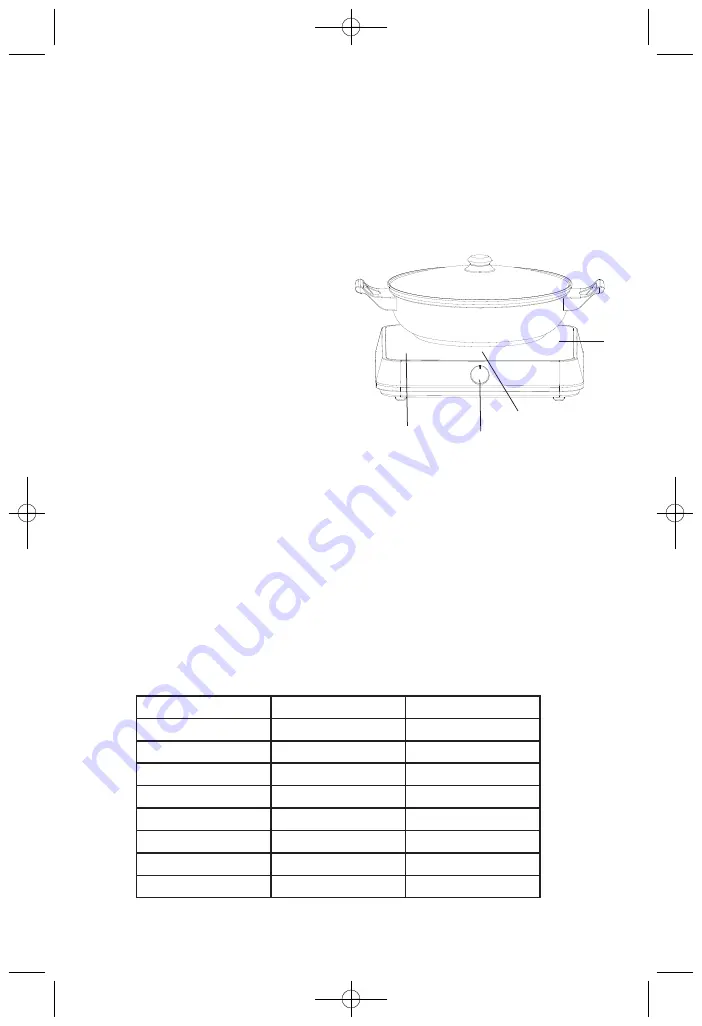
DESCRIPTION OF PARTS

1. Induction Cooktop 
2. Timer Buttons
3. LED Display 
4. On/Off Button with Cooking 

Level Adjustment (Power)

HOW TO USE

1. Place the cookware within the white circle on the Induction Cooktop. 

NOTE:  Ensure that the bottom of the cookware is clean as dirt may cause 
the bottom to stick to the Induction Cooktop. 

2. Plug into a 120 volt wall outlet. The Induction Cooker will beep once and 

display ‘-‘.

3. Turn the On/Off Button clockwise to turn the unit on. To set the 

temperature, turn the Cooking Level Adjustment Button clockwise.  There 
are 6 cooking levels between ‘Keep Warm’ and ‘High’ to choose from.  Refer
to the table below.

1

4

3

2

Power Setting

Temperature

Wattage

-

Off

-

0

Standby

-

1

Keep Warm

120

2

Low

500

3

Low-High

800

4

Medium

1000

5

Medium-High

1300

6

High

1500

Booklet_ID-1172_ENG.qxd:Salton Booklet  7/15/09  10:28 AM  Page 3

Summary of Contents for ID-1172

Page 1: ...Induction Cooker Instruction Booklet Model ID 1172 Booklet_ID 1172_ENG qxd Salton Booklet 7 15 09 10 28 AM Page 1...

Page 2: ...t working as described in this instruction booklet discontinue use and contact Salton Canada See Warranty 8 The use of accessories or attachments not recommended by Salton may cause hazards 9 Do not u...

Page 3: ...ware within the white circle on the Induction Cooktop NOTE Ensure that the bottom of the cookware is clean as dirt may cause the bottom to stick to the Induction Cooktop 2 Plug into a 120 volt wall ou...

Page 4: ...mply Restart the Induction Cooker after it has shut off IMPORTANT NOTES 1 This Induction Cooktop will only operate with compatible Cookware The most common types are cast iron enameled and stainless s...

Page 5: ...ion E3 E6 Overheating or dry Ensure that the air inlet or the exhaust outlet are not blocked Ensure that the fan is running Check to see if the pot has boiled dry If so turn off the cooker and let it...

Page 6: ...occasionally 4 Drain excess liquid and serve Stuffed Tomatoes 4 to 6 medium tomatoes 3 4 cup 180 ml white rice cooked 1 2 cup 125 ml parsley chopped 1 2 yellow onion small dice 1 lb 450 g ground beef...

Page 7: ...an Follow the directions above in the How To section and heat oil on power level 2 2 Increase power level to 5 and add carrots onion garlic cumin and pepper Cook until onion is softened Add rice and s...

Page 8: ...tomatoes 1 4 cup 50 ml fresh parsley chopped 1 1 2 tsp 7 ml each salt and pepper 1 tbsp 15 ml olive oil 1 Sprinkle chicken with 1 2 tsp 2 ml salt and pepper 2 Place 1 tbsp 15 ml olive oil in pan on po...

Page 9: ...beef with salt and pepper 2 Heat oil in skillet on power level 2 When oil is hot add beef and fry until browned Transfer beef to bowl 3 Reduce power to 5 and add carrots celery and onions to skillet...

Page 10: ...h occurs in shipment or failure which results from alteration accident misuse abuse glass breakage neglect commercial use or improper maintenance A defective product should be returned to the original...

Reviews: