background image

14.  Press the Rotation Button and choose between ‘ON’, ‘Intermittent’ 

or ‘OFF’.  The indicator light will change between the 3 settings as 
you press the Rotation Button.  Rotation should only be used when 
you are using the Rotating Drum or the Rotisserie. 

15.  Press the Start/Cancel Button. 

16.  NOTE:  When the Cooker reaches the preset temperature the 

Infrared Light will cycle on and off.  The Infrared light will cycle on 
and off throughout the cooking process maintaining the selected 
temperature. 

17.  When the preset time has elapsed the cooking process is complete. 

Pre-programmed Settings 

 1.  

Place the Cooker on a fl at level heat resistant surface. 

 2.  

  Ensure that the power cord is not touching any hot surface. 

 3.  

Always place the appliance so that you have enough room to open 
the Cover when cooking is complete. 

 4.  

Always have oven mitts ready to remove the open the Cover and 
remove cooked food. 

 5.  

You may use any of your own oven safe pans, plates, aluminum foil, 
etc. that can be used in a conventional oven. 

 6.  

Assemble the Cooker.  See the How to Assemble/Disassemble  
section. 

 7.  

Open the Transparent Cover and choose the required accessory, 
with food. 

 8.  

Always make sure to leave suffi cient space between the food and 
the Cover. 

 9.  

Close the Transparent Cover. 

10.  Insert the plug into the wall outlet. 

11.  If using the preset functions press the Function Button until the 

Indicator Light is lit for the function you require.  Each of the 
programmed settings have a preset time and temperature. 

12.  Press the Start/Cancel Button.

13.  NOTE:  When the Cooker reaches the preset temperature the 

Infrared Light will go out and cycle on when the cooker drops below 
the preset temperature.  The Infrared light will cycle on and off 
throughout the cooking process maintaining the preset temperature 
you have selected. 

14.  When the preset time has elapsed the cooking process is complete. 

10

Salton_HC1351_InstructionBooklet_E.indd   10

Salton_HC1351_InstructionBooklet_E.indd   10

13-05-15   12:27 PM

13-05-15   12:27 PM

Summary of Contents for multipot HC1351

Page 1: ...Instruction Booklet Model HC1351 air wave health cooker ...

Page 2: ......

Page 3: ...d or plug or after the appliance malfunctions or has been damaged in any manner Return appliance to Salton for examination repair or adjustment All servicing other than cleaning should be performed by an authorized service representative See Warranty section 8 The use of accessories or attachments not recommended by Salton may cause fire electric shock or injury 9 DO NOT use outdoors 10 DO NOT let...

Page 4: ...ed by or touches flammable material including curtains draperies walls etc when in operation DO NOT store any item on top of the appliance when in operation 22 The oven can be turned off while using any of the functions by pressing the Start Cancel button SAVE THESE INSTRUCTIONS HOUSEHOLD USE ONLY GROUNDED PLUG To reduce the risk of electric shock this appliance has a grounded plug 2 blades and 1 ...

Page 5: ... Lights e Manual f Preprogrammed Settings g Rotation Indicator Lights h Temperature Control Button i Rotation Button j Function Button k Start Cancel Button 6 Element with Infrared and Convection Fan 7 Safety On Off Micro Switch under Base Bowl 8 High Cooking Rack 9 Low Cooking Rack 10 Sauté Baking Pan 11 Rotating Drum 12 Rotisserie Kit 13 Rotisserie Tongs 5 1 12 11 8 9 10 13 2 3 4 e a b c k d 5 j...

Page 6: ...gular use 6 Set the Cooker to a cooking time of 10 minutes by pressing the Function Button once then press the button until 10 minutes is displayed in the LED readout 7 Set the temperature by pressing the Temperature Button to 400 F 205 C 8 Press the Start Cancel Button 9 The Cooker may release a slight burning smell or light smoke This will disappear quickly and will only happen the first time th...

Page 7: ...ppliance 2 Remove the Transparent Cover from the main housing by turning the Cover counterclockwise until it stops Gently pull the Cover towards you 3 Lift the Base Bowl and remove How to Assemble the Rotisserie 1 Place one of the Rotisserie Forks onto the Rotisserie Shaft and screw down Tighten the fixing screw until the Fork is held in position on the shaft 2 Push the Rotisserie Shaft through th...

Page 8: ...ON Always check that there is sufficient space at the top and bottom for the food to rotate freely without causing an obstruction How to Assemble the Rotating Drum 1 Insert the shaft through the Rotating Drum 2 Place the Rotating Drum in the center of the Shaft and tighten the fixing screws 3 Place the assembled Rotating Drum in the oven ensuring that the square end of the shaft is placed in the d...

Page 9: ...ower cord is not touching any hot surface 3 Always place the appliance so that you have enough room to open the Cover when cooking is complete 4 Always have oven mitts ready to open the Cover and remove cooked food 5 You may use any of your own oven safe pans plates aluminum foil etc that can be used in a conventional oven 6 Assemble the Cooker See How to Assemble Disassemble section 7 Open the Tr...

Page 10: ...ready to remove the open the Cover and remove cooked food 5 You may use any of your own oven safe pans plates aluminum foil etc that can be used in a conventional oven 6 Assemble the Cooker See the How to Assemble Disassemble section 7 Open the Transparent Cover and choose the required accessory with food 8 Always make sure to leave sufficient space between the food and the Cover 9 Close the Trans...

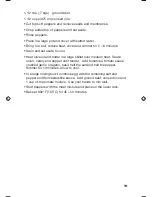
Page 11: ...ception is turkey which you do not need to turn e Browning The distance from the heat source is important The Air Wave Health Cooker browns quickly so foods that need more than 18 20 minutes cooking time should be placed on the lower rack so they are further from the heat source to prevent over browning Thin steaks and chops will be cooked before the surface goes a deep brown so these foods need t...

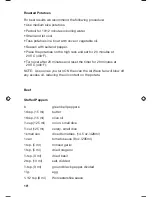
Page 12: ...ow Manual 45 rare 50 med 60 well 180 355 Beef Roast 3 lb 1 4kgs frozen Low Roast 70 med well 180 355 Beef steak 1 2 5cm Turn after 7 min High Manual 10 rare 15 med 205 400 Hamburgers 1 4 lb turn once High Manual 10 rare 12 med 15 well 205 400 Hamburgers 1 4 lb frozen turn once High Manual 12 rare 15 med 18 well 205 400 Lamb Chops 1 5 3 8cm High Chop Meat 20 195 385 Lamb Chops 1 5 2 8cm frozen High...

Page 13: ... 8 kgs Low Chicken 60 180 205 330 400 Chicken Breast boneless thick High Manual 13 15 205 400 Chicken Breast boneless frozen High Manual 17 19 205 400 Chicken Breast bone in High Manual 20 22 205 400 Chicken Legs Low Manual 23 26 205 400 Chicken Wings Rotating drum Fries 35 205 400 Miscellaneous French Fries frozen Rotating Drum Fries 35 205 400 Roasted Potatoes see recipe section for cooking meth...

Page 14: ... Poultry Roast Turkey Breast 5 lb 2 2kgs turkey breast 2 tbsp 30 ml butter 1 tbsp 15 ml olive oil Kosher salt to taste freshly ground black pepper to taste 1 tbsp 15 ml poultry seasoning Spread butter underneath the turkey skin Brush the outside of the turkey breast with oil Sprinkle with salt pepper and poultry seasoning Follow the directions in the HOW TO USE Pre programmed settings Use preprogr...

Page 15: ...ing of the Recipe section Add more cooking time if the temperature is below the chart reading Barbecue Chicken 1 2 cup 125 ml oil 2 tbsp 30 ml lemon juice 1 2 tsp 3 ml salt freshly ground black pepper sprigs of fresh rosemary 6 boneless chicken breasts Mix first 5 ingredients together Add chicken breasts and marinade for at least two hours turning frequently Remove chicken from the marinade and co...

Page 16: ...nade for up to 30 minutes in the refrigerator Place salmon on the high rack Follow the directions in the HOW TO USE Manual Setting Set to 330 F 165 C for 5 8 minutes depending on the thickness of the salmon Stuffed Sole 6 sole filets 1 tbsp 15 ml butter cup 125 ml onion small dice 1 cup 250 ml mushrooms chopped 2 tbsp 30 ml fresh parsley 1 tbsp 15ml fresh dill tsp 5ml each salt and pepper 2 tbsp 3...

Page 17: ...ions in the HOW TO USE Manual Setting Set to 355 F 180 C and cook for 15 20 minutes Vegetables Grilled Vegetables thick slices of zucchini onions large mushrooms squash eggplant etc 1 tsp 5 ml olive oil optional 1 tsp 5 ml balsamic vinegar 1 4 tsp 1 5 ml soya sauce Mix olive oil balsamic vinegar and soya sauce Toss vegetables in oil mixture Spray the crisscross racks with a non stick cooking spray...

Page 18: ...e timer for 20 minutes at 205 C 400 F NOTE As soon as you turn ON the oven the Air Wave fan will blow off any excess oil reducing the oil content on the potato Beef Stuffed Peppers 6 green bell peppers 1 tbsp 15 ml butter 1 tbsp 15 ml olive oil cup 125 ml onion small dice cut 125 ml celery small dice 1 small can diced tomatoes 14 5 oz 428ml 1 can tomato sauce 8 oz 235ml 1 tsp 5 ml minced garlic 1 ...

Page 19: ...live oil and butter in a large skillet over medium heat Sauté onion celery and pepper until tender Add tomatoes tomato sauce crushed garlic oregano basil half the salt and half the pepper Simmer for 10 minutes Allow to cool In a large mixing bowl combine egg with the remaining salt and pepper and Worcestershire sauce Add ground beef cooked rice and 1 cup of the tomato mixture Use your hands to mix...

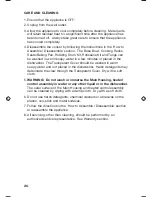
Page 20: ...dishwasher The Transparent Cover should be washed in warm soapy water and not placed in the dishwasher Harsh detergents may deteriorate the view through the Transparent Cover Dry with a soft cloth 5 WARNING Do not wash or immerse the Main Housing heater control assembly in water or any other liquid or in the dishwasher The outer surface of the Main Housing and heater control assembly can be cleane...

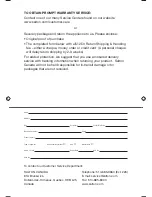
Page 21: ...mer LIMITED WARRANTY The original sales receipt is the only acceptable proof of purchase Salton Canada warrants that this appliance shall be free from defects in material and workmanship for a period of five 5 years from the date of original purchase Salton Canada at its sole discretion during this warranty period will repair or replace a defective product or issue a refund Any refund to the purch...

Page 22: ... protection we suggest that you use an insured delivery service with tracking information when returning your product Salton Canada will not be held responsible for in transit damage or for packages that are not received Name Address City Prov State Postal Zip Code Daytime Phone No Email Product defect Type of payment Cheque Money Order Visa MasterCard Name on card Expiry Date CSV No Card No To co...

Reviews: