Tel: 886.2.2175 2930 Email: sales@salukitec.com
www.salukitec.com
26
Check and clean the connector before measurement connection. Ensure that the connector is clean and intact. Wea
the anti-static wristband in connection. The correct connection method and steps are as follows.
Step 1:
as shown in Fig. 3.4, align the axes of two connectors to be interconnected, and ensure that the pin of the male connector can
concentrically slide into the jack of the female connector.
Fig. 3.4 Alignment of Axes of Interconnected Connectors
Step 2
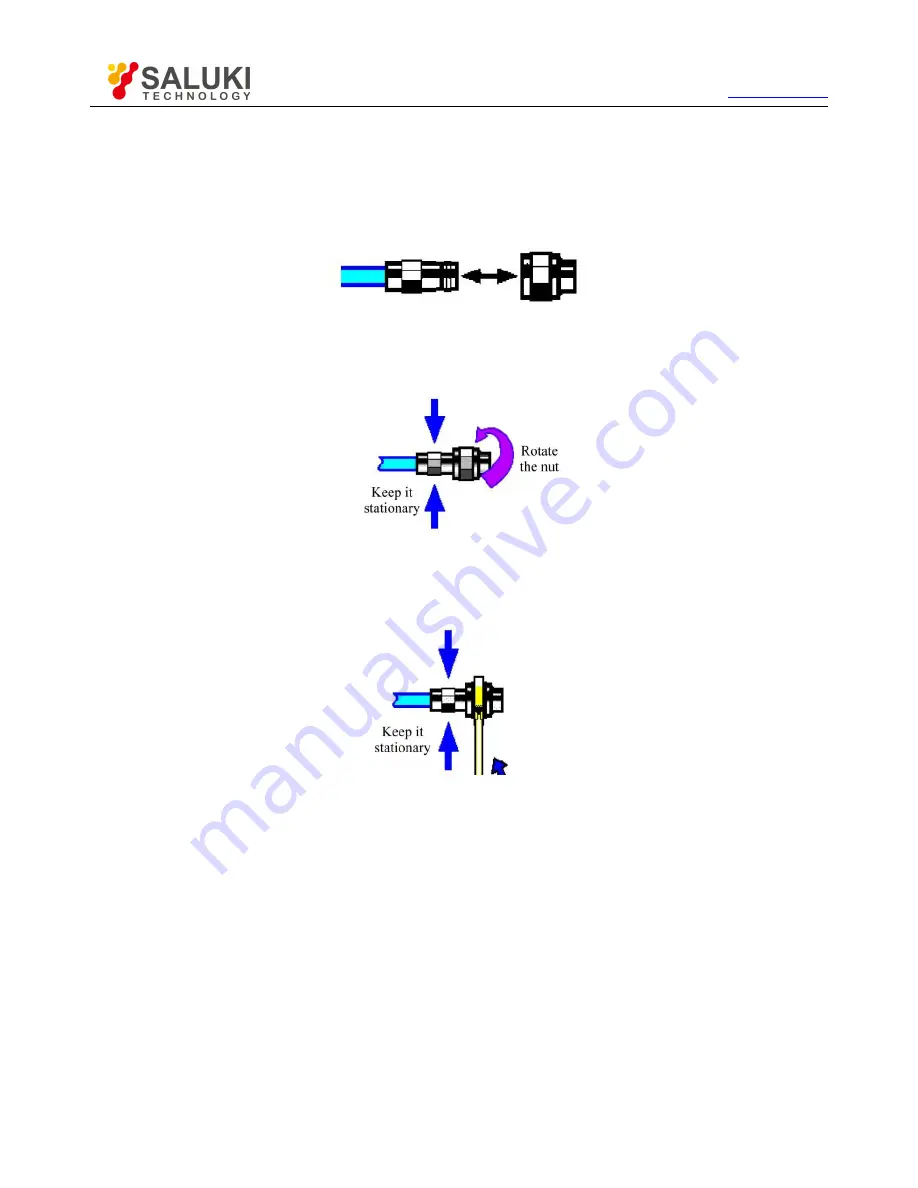
: as shown in Fig. 3.5, horizontally move two connectors to make them connected smoothly. Tighten the connector nut by means
of rotation (do not rotate the connector). Avoid relative rotation of connectors during connection.
Fig. 3.5 Connection Method
Step 3
: as shown in Fig. 3.6, complete the final connection by tightening with the torque wrench. Note that the torque wrench must not be
beyond the initial break point. Use the auxiliary wrench to prevent the connectors from rotation.
Fig. 3.6 Final Connection with Torque Wrench
4
.
Disconnection method
Step 1
: support the connectors to prevent any kind of force which may result in distortion, shaking or bending.
Step 2:
use the open-end wrench to prevent the connector body from rotation.
Step 3
: use another wrench to loosen the connector nut.
Step 4
: rotate the connector nut by hand to complete final disconnection.
Step 5
: horizontally separate two connectors.
5
.
Use of torque wrench
The use of the torque wrench is shown in Fig. 3.7. Pay attention to the following items.
Check whether the torque of the torque wrench is set properly before use.


