background image

Setting time and date

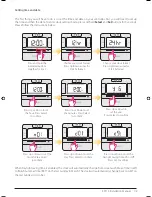
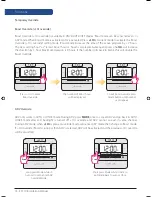
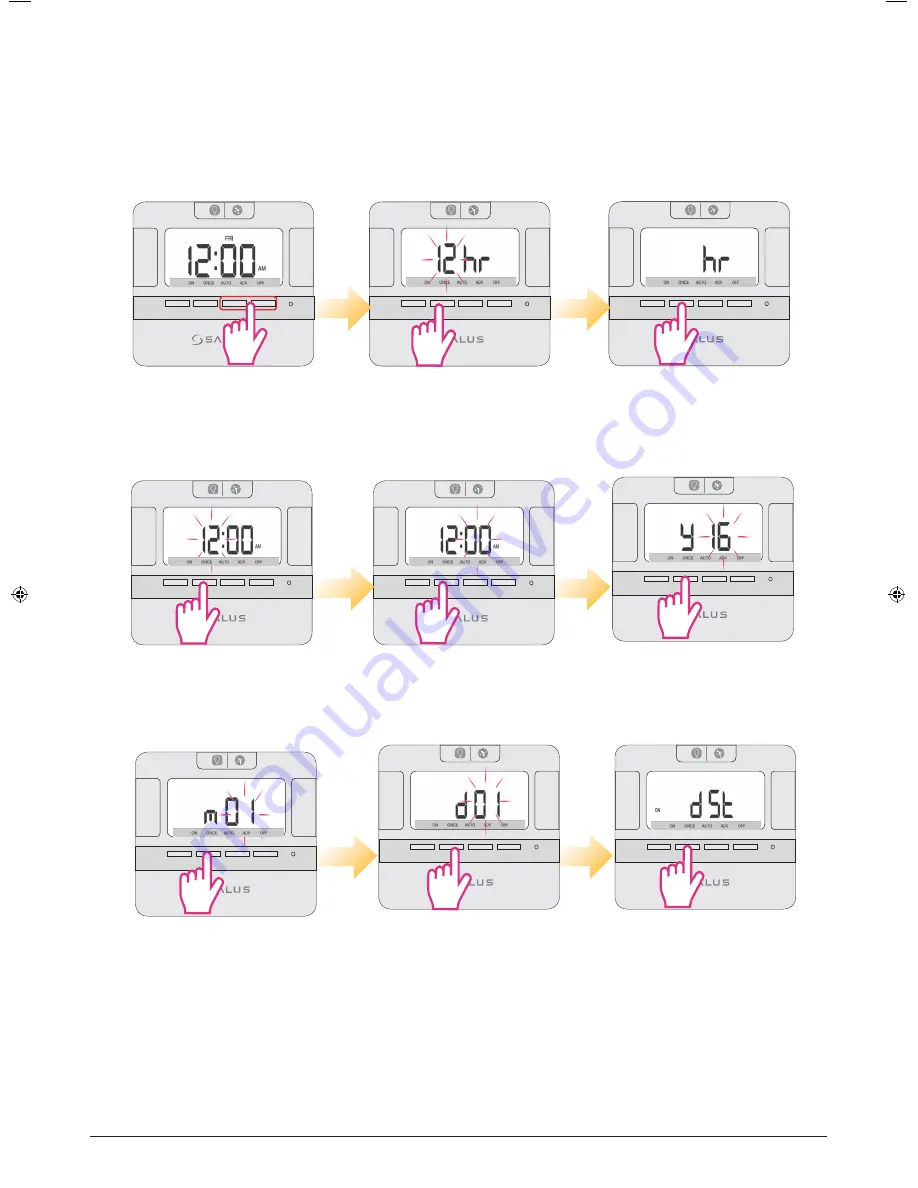
The first thing you will have to do is to set the time and date on your controller. First you will need to set up 
the time and then the date. To enter clock setting mode, press and hold 

Select

 and 

Set

 buttons for 3 seconds. 

Please follow the instructions below. 

Choose your clock format 

Press Up/Down arrow for 

12/24 hr format.

MODE

+Hr

SELECT

SET

<

<

24

MODE

+Hr

SELECT

SET

<

<

Press Up or Down to

set the year.

Press Select to confirm.

MODE

+Hr

SELECT

SET

<

<

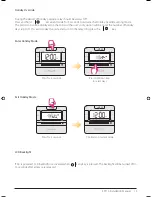
Press Up or Down to set the 

Daylight Saving Time On or Off.

Press Set to confirm.

When Daylight saving time is enabled, the clock will automatically change from Greenwich Mean Time (GMT) 
to British Summer Time (BST) on the last Sunday in March. The clock will automatically change back to GMT on 
the last Sunday in October.

MODE

+Hr

SELECT

SET

<

<

Choose your clock format 

Press Up/Down arrow for 

12/24 hr format.

MODE

+Hr

SELECT

SET

<

<

3 sec

Press and hold the 

indicated buttons 

together for 3 sec.

MODE

+Hr

SELECT

SET

<

<

MODE

+Hr

SELECT

SET

<

<

Press Up or Down to set the 

month. Press Select

to confirm.

Press Up or Down to set the 

day. Press Select to confirm.

MODE

+Hr

SELECT

SET

<

<

Press Up or Down to set

the minutes. Press Select

to confirm.

MODE

+Hr

SELECT

SET

<

<

Press Up or Down to set 

the hour. Press Select

to confirm.

EP110 Installation Manual      09

Summary of Contents for EP110

Page 1: ...Installation Manual Model EP110 Single channel programmable controller...

Page 2: ...Safety Information 3 Box content 3 Introduction 4 Features 4 Installation 5 Button functions and LCD icons 7 Operations 8 Functions 14 Factory Reset 16 Technical Info 17 Warranty 18 Contents 02 EP110...

Page 3: ...4 35 EU and 2011 65 EU Please check www saluslegal com for the full information Safety Information Use in accordance with the EU and national regulations Installation Jumper Settings First Power Up Mo...

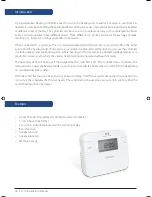
Page 4: ...in a fully pumped and controlled system where heating and hot water can be operated independently or in gravity fed water system where the central heating cannot be operated without hot water The heat...

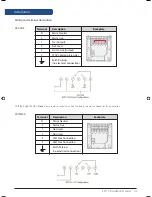
Page 5: ...1 2 3 4 5 6 Wiring and terminal description Terminal Description Backplate N Mains Neutral L Mains Live 1 Not Used 2 Not Used 3 Volt Free Connection 4 Volt Free Connection Earth Parking no electrical...

Page 6: ...ngineer carrying out the installation or another qualified person The installer should select the jumper positions required if changes need to be made to the factory default settings These jumpers are...

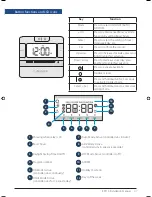
Page 7: ...ter fast advance Press to activate backlight Hardware reset Press and hold button for 3 seconds to activate Holiday mode Select Set Press and hold buttons to enter clock setting mode Showing when rela...

Page 8: ...he software version is shown and after that the typical reset display is shown The time should be 12 00am Default settings Function Status after Reset Operation Mode Normal mode Clock 12 00 AM AM PM i...

Page 9: ...rm When Daylight saving time is enabled the clock will automatically change from Greenwich Mean Time GMT to British Summer Time BST on the last Sunday in March The clock will automatically change back...

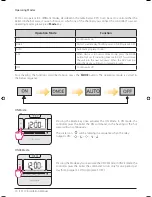
Page 10: ...ram When the ADV function ends the device will return to normal program OFF Continuously off Operating Modes MODE Hr SELECT SET For activating the functions described above press the MODE button The o...

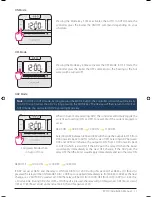
Page 11: ...as 08 00 ON 09 00 OFF 10 00 ON 11 00 OFF Selecting ADV between 8 00 and 8 59 will change the output to OFF from 9 00 onwards back to AUTO which is also OFF Selecting ADV between 9 00 and 09 59 will ch...

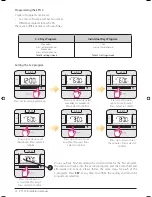
Page 12: ...SELECT SET Press Set to start programming MODE Hr SELECT SET Press Up or Down to set the minutes Press Select to confirm MODE Hr SELECT SET Press Up or Down to set end time for prog 1 Press Select to...

Page 13: ...Down to set the minutes Press Select to confirm MODE Hr SELECT SET Press Up or Down to set end time for prog 1 Press Select to confirm MODE Hr SELECT SET Press Up or Down to set the minutes Press Sele...

Page 14: ...ivated even in ADV mode When boost mode is activated ADV is canceled Press 1Hr at current mode to activate the Boost Override 1Hr override setting mode Boost mode increases the time of the active prog...

Page 15: ...p to 31 To exit Holiday Override and turn On the relay long press the key MODE Hr SELECT SET MODE Hr SELECT SET Press Up Down keys to select days Enter Holiday Mode Exit Holiday Mode MODE Hr SELECT SE...

Page 16: ...ess the Reset button once use a pin for this action MODE Hr SELECT SET MODE Hr SELECT SET MODE Hr SELECT SET Press reset button LCD will turn OFF All icons will be displayed Software version Normal Mo...

Page 17: ...0 non condensing Storage Temperature Humidity 20 C 60 C 10 90 non condensing Programs Program 5 2 or 24hr individual program selectable by jumper 3 settings day with holiday override Boost Override Ye...

Page 18: ...cification for a period of two years from the date of installation SALUS Controls sole liability for breach of this warranty will be at its option to repair or replace the defective product Customer N...

Page 19: ...tech salus tech com www salus controls com SALUS Controls is a member of the Computime Group Maintaining a policy of continuous product development SALUS Controls plc reserves the right to change spec...

Reviews: