background image

SETTING UP RF COMMUNICATION WITH
YOUR RECEIVER

RXRT505

(ONLY)

After you have switched the above receiver on,
the thermostat will automatically pair. When
the red LED stops flashing, the unit has
successfully paired.

If you have difficulty in pairing the thermostat,
we recommend changing the address codes in
the thermostat and the receiver. 

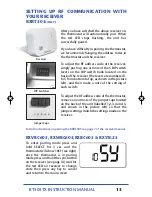
To adjust the RF address code of the receiver,
simply push up one or more of the 5 DIP switch
levers on the DIP switch bank located on the
back of the receiver (the levers are numbered 1
to 5 from bottom to top, as shown in the picture
left), and then make a note of the setting of
each switch:

To adjust the RF address code of the thermostat,
remove one or more of the jumper caps located
on the back of the unit (labelled 1,2,3,4 and 5,
and shown in the picture left) so that the
jumper settings match the settings made on the
receiver:

RXVBC605, RXWBC605,RXBC605 & RXST625

To enter pairing mode press and
hold SELECT for 3 sec and the
thermostat will show 10SY (see right)
once the thermostat is in pairing
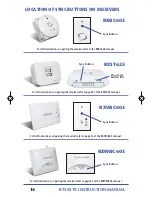
mode press and hold the sync button
on the receiver (see page 14) wait for
the red LED on receiver to change
state then press any key to cancel
and return to the main screen.

RT505TX INSTRUCTION MANUAL

13

DIP Switches

Receiver

Jumper Caps

For full instructions on pairing the RXRT505 see page 7 of the receiver manual.

Salus RT505TX Manual Blue_89  12/03/2014  10:42  Page 13

Summary of Contents for rt505tx

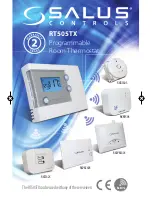
Page 1: ...TheRT505TXcanbeusedwithanyof thesereceivers RXRT505 RXRT505 RXWBC605 RXVBC605 RXST625 RXBC605 868MHz RT505TX Programmable Room Thermostat...

Page 2: ...RT505TX INSTRUCTION MANUAL 2 RT505TX RT505TX RT505TX RT505TX RT505TX RT505TX RT505TX INSTRUCTION MANUAL 2...

Page 3: ...s Controls model stated on the front cover of this manual only and must not be used with any other make or model These instructions are intended to apply in the United Kingdom only and should be follo...

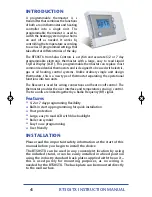
Page 4: ...hermostat separating the operational functions into two units The Receiver is used for wiring connections and heat on off control The thermostat provides the user interface and temperature sensing con...

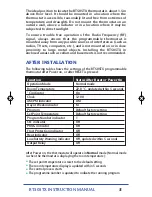
Page 5: ...following table shows the settings of the RT505TX programmable thermostat after Power on or after RESET is pressed Function Status After Reset or Power On Operation Mode Normal mode Room Temperature...

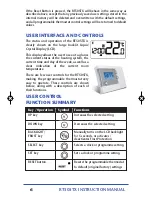
Page 6: ...current time and day of the week as well as a clear indication of the current room temperature There are few user controls for the RT505TX making the programmable thermostat very easy to operate Thes...

Page 7: ...me is flashing to indicate that it is the currently selected item and is ready to be adjusted Press the UP or DOWN keys to increase or decrease the hour setting the selected item will stop flashing wh...

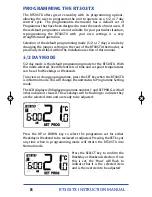
Page 8: ...ramming mode for the RT505TX With this mode selected five different sets of time and set point temperatures can be set for Weekdays or Weekends To review or change a programme press the SET key when t...

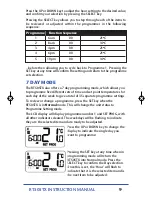
Page 9: ...of time and set point temperatures for each day of the week to give a total of 35 separate programme settings To review or change a programme press the SET key when the RT505TX is in Normal mode This...

Page 10: ...want to programme Regardless of which programming mode the RT505TX is set for 5 2 or 7 day not pressing any keys for 15 seconds will automatically save any programming changes and exit to Normal mode...

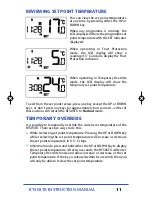
Page 11: ...ress any keys for approximately four seconds either of these actions will return the RT505TX to Normal mode TEMPORARY OVERRIDE It is possible to temporarily override the current set temperature of the...

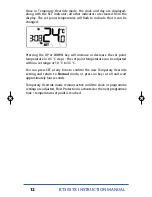
Page 12: ...int temperature in 0 5 C steps the set point temperature can be adjusted within a set range or 10 C to 35 C You can press SET at any time to confirm the new Temporary Override setting and return to No...

Page 13: ...and then make a note of the setting of each switch To adjust the RF address code of the thermostat remove one or more of the jumper caps located on the back of the unit labelled 1 2 3 4 and 5 and sho...

Page 14: ...r to the RXBC605 manual Sync Button For full instructions on pairing the receiver refer to page 9 of the RXST625 manual For full instructions on pairing the receiver refer to page 16 of the RXVBC605 m...

Page 15: ...fter the last key press except if you are changing settings within the Clock Programme or Temporary Override modes in this case the backlight will remain illuminated throughout the setting change proc...

Page 16: ...l to 3 of your heating costs MAINTENANCE The RT505TX programmable thermostat requires no special maintenance Periodically the outer casing can be wiped clean using a dry cloth please DO NOT use solven...

Page 17: ...21 C 21 C 2 ON 8 00 AM 8 00 AM TEMP 14 C 14 C 3 ON 4 00 PM 4 00 PM TEMP 21 C 21 C 4 ON 6 00 PM 6 00 PM TEMP 21 C 21 C 5 ON 10 00 PM 10 00 PM TEMP 14 C 14 C Temperature Scale Celsius Range 5 C to 35 C...

Page 18: ...Clock Accuracy 1 minute per month Display 12 hour Frost Protection Setting 5 C Environment Operating Temperature 0 C to 40 C Storage Temperature 20 C to 60 C RT505TX INSTRUCTION MANUAL 18...

Page 19: ...r a period of two years from the date of purchase Salus Controls sole liability for breach of this warranty will be at its option to repair or replace the defective product RT505TX Warranty Customer N...

Page 20: ...les salus tech com Tel 01226 323961 Email tech salus tech com Tel 01226 323961 Sales Technical SALUS Controls plc SALUS House Dodworth Business Park South Whinby Road Dodworth Barnsley S75 3SP salus c...

Reviews: