background image

HEAT OR COOL

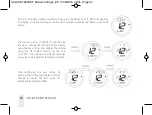
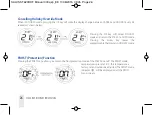
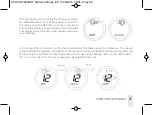
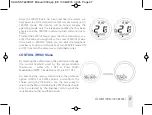
The unit is default HEAT, if you are happy with HEAT press
OK . If you wish to configure the ST620 for a cooling
application, select COOL and press OK 

NOTE: Changing the HEAT or COOL function should only be done by your engineer or a competent
person. Changing this setting will have a serious effect on your system operation.

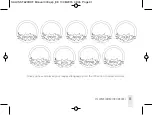
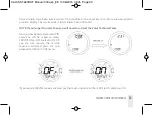
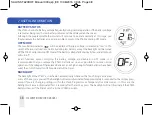
If you have selected service as OFF press to save and return to the AUTO Display. 

If you have selected service as ON then follow the instructions on the next pages.

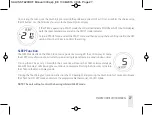
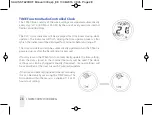
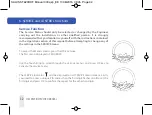
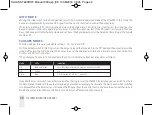
The next menu screen allows
you to set the next service
date for the system. Set the
date in the order of; day,
month and year:

34

ST620ROF INSTRUCTION MANUAL

SALUS ST620ROF Manual 003.qxp_89  11/08/2015  09:45  Page 34

Summary of Contents for ST620ROF

Page 1: ...ogrammable RF Room Thermostat with One Touch Energy Saving Override Control C O N T R O L S INSTRUCTION MANUAL Instruction Manual Model ST620ROF SALUS ST620ROF Manual 003 qxp_89 11 08 2015 09 44 Page...

Page 2: ...h any other statutory obligations This accessory must be fitted by a Competent person and installation must comply with the guidance provided in the current editions of BS7671 IEEWiring Regulations an...

Page 3: ...Crystal Display LCD This programmable thermostat has been specifically designed to be used Volt Free Unlike ordinary single unit design programmable thermostats this is a new type of unit that separat...

Page 4: ...ervice Function ST620ROF Features One Touch Energy Saver Override Control RF Volt free switching option 5 2 or 7 day programming flexibility Built in start up programming for quick installation Frost...

Page 5: ...tion where it may be subjected to direct sunlight The ST620 should be mounted in a location where it will not come into contact with moisture or condensation as this can affect the Touch Ring operatio...

Page 6: ...eds a 230V AC mains supply to operate and this should be fused appropriately 16A max The Receiver should be mounted in a location where it will not come into contact with water moisture or condensatio...

Page 7: ...apart Please note These screws DO NOT need to be fully removed Once the cover is fully removed the terminals will become exposed ready for installation ST620ROF INSTRUCTION MANUAL 07 230V 230V BOILER...

Page 8: ...ll the screw down until it stops then carefully separate the two halves of the case by gently pulling out an upwards direction You will now see the battery compartments on the rear of the front fascia...

Page 9: ...ault settings will be explained in sections 4 5 You will also notice that the time at the top of the LCD is flashing This will continue to flash until the unit picks up the RCC Radio Controlled Clock...

Page 10: ...rence such as radios TV sets computers etc and is not mounted on or in close proximity to large metal objects Installing the ST620 in enclosed areas such as cellars and basements is not recommended NO...

Page 11: ...y exit of the property 1 To begin installation remove the front cover by sliding it up from the back plate 2 Mark and drill two holes at points A Fix the OTO back plate to the wall using the screws an...

Page 12: ...rt the two AAA batteries supplied into the bottom rear of the front cover 4 Position the front cover abovethe back plate and slide down until the cover is in line with back plate SALUS ST620ROF Manual...

Page 13: ...ST620 into pairing mode To access the Menu screens on the ST620RF press the OK key twice The first menu displayed is the PROGRAM menu 3 Use the Touch Ring to scroll through the Menus to locate the pa...

Page 14: ...utton Note Once paired the bottom switch will turn green SETTING UP RF COMUNICATION BETWEEN ST620ROF 14 ST620ROF INSTRUCTION MANUAL 2 Press the SYNC button for 3 seconds then release the bottom switch...

Page 15: ...rride temperature that will operate when the OTO is activated If you select 2 C 4 C or 6 C then the active temperature selected on the RT500 programmable room thermostat will be reduced by either 2 C...

Page 16: ...CC indicator Indicates unit is searching for radio controlled clock signal Service indicator Indicates Service function is active Frost Mode indicator Indicates frost setting is turned on Touch Lock i...

Page 17: ...through the menu selection OK Key Enters Menu or confirms a menu selection Arrow Back Key Single touch sets the unit back 1 step Hold for 2 seconds sets unit back to normal mode Reset Button Resets th...

Page 18: ...his will display the current set temperature The set temperature will be displayed for two seconds before the LCD changes to display the room temperature again The ST620 will go back to AUTO mode with...

Page 19: ...nfirm the selection NOTE The ST620 will go back to AUTO mode without changing the set temperature after 10 seconds of inactivity or after pressing the Arrow key When the ST620 is operating in Manual O...

Page 20: ...nd the Touch Ring The menus are displayed in the order shown in the picture above Pressing the Arrow key will return the ST620 to AUTO MANUAL mode The programmable thermostat will also return to AUTO...

Page 21: ...ess the PROGRAM menu To access the menu screens press the OK key twice The first menu displayed is the PROGRAM menu Press the OK button to select Initially the numbers for the Weekdays will be selecte...

Page 22: ...ing with the OK key Finally set the desired temperature setting by scrolling with theTouch Ring and again confirm with the OK key Following this sequence you will have set up Programme 1 the ST620 dis...

Page 23: ...earlier than Programme 2 If this situation occurs then the ST6 20 may operate in an unpredictable way The programmable thermostat will return to NORMAL mode after 10 seconds if no Key is pressed or i...

Page 24: ...e this setting in the same way using the Touch Ring and confirm the setting using the OK button Finally set the year S_YEAR this is done in exactly the same way as previously described for the date an...

Page 25: ...Y mode is active Use the Touch Ring to set the preferred temperature and confirm the choice using the OK button Once the temperature setting is confirmed the HOLIDAY mode will be activated While in th...

Page 26: ...ing the Arrow key leaves the programmable thermostat in HOLIDAY mode FROST Protection Function Entering the FROST menu allows you to turn the frost protection mode of the ST620 on or off The FROST mod...

Page 27: ...620 to conserve power by turning off the LCD display Entering the SLEEP menu allows you to activate this power saving feature from a 5 second run down timer Pressing the OK Key at any time within the...

Page 28: ...will also be automatically updated when the ST620 is powered up or after the Reset Button is pressed If for any reason the ST620 fails to automatically update the time setting then the data stored in...

Page 29: ...the time Use the Touch Ring to scroll to set the hour and confirm the choice using the OK button The minute setting will then be selected change this setting in the same way using theTouch Ring and c...

Page 30: ...omatically adjust the time when local time changes from Greenwich Mean Time GMT to British Summer Time BST on the last Sunday in March and then back to GMT on the last Sunday in October each year LANG...

Page 31: ...Once you have displayed your required language press the OK button to select and save ST620ROF INSTRUCTION MANUAL 31 SALUS ST620ROF Manual 003 qxp_89 11 08 2015 09 45 Page 31...

Page 32: ...he settings in the SERVICE menu To access the Menu screens press the OK key twice The first menu displayed is PROGRAM Use the Touch Ring to scroll through the various menus and press OK key to activat...

Page 33: ...to contact the Salus Technical Team Now you have entered your own PIN code you will be asked to select SERVICE ON or OFF Default is OFF if you do not require the service function activated press OK a...

Page 34: ...rson Changing this setting will have a serious effect on your system operation If you have selected service as OFF press to save and return to the AUTO Display If you have selected service as ON then...

Page 35: ...an contact you when the next service is due The number is entered in the same way as the code scroll with the Touch Ring until you reach the required number then confirm by pressing the OK key Repeat...

Page 36: ...36 ST620ROF INSTRUCTION MANUAL SALUS ST620ROF Manual 003 qxp_89 11 08 2015 09 45 Page 36...

Page 37: ...w servicing date or turn SERVICE mode ON or OFF in exactly the same way as described earlier CONTROL PWM Menu By selecting the Control menu the installer can change the control method used by the prog...

Page 38: ...cept sampling the battery voltage are disabled in OFF mode it is recommended that you replace the ST620 batteries as soon as possible to restore normal operation If the voltage of the replaced batteri...

Page 39: ...ings After pressing the Reset Button the ST620 will revert to the following default settings Mode Auto Programme 6 Time 12 00am DST On Control method On Off Holiday Off Frost Off Sleep Off RF address...

Page 40: ...in the Off position the output relay will be turned off and in the Cycle position the output relay will be operated according to a preset time sequence on for 4 minutes and off for 11 minutes When cha...

Page 41: ...polishes detergents or abrasive cleaners as these can damage the thermostat There are no user serviceable parts within the unit any servicing or repairs should only be carried out by Salus Controls o...

Page 42: ...C Display Resolution 0 5 C Set Temperature Range 5 0 C to 35 C Resolution 0 5 C Control Control Method 1 ON OFF control 2 PWM control Memory Backup Type Electrically Erasable Programmable Read Only Me...

Page 43: ...date of installation Salus Controls sole liability for breach of this warranty will be at its option to repair or replace the defective product Customer Name Customer Address Post Code Tel No Email E...

Page 44: ...salus tech com TECHNICAL T 44 0 1226 323961 E tech salus tech com Maintaining a policy of continuous product development SALUS Controls plc reserve the right to changespecification designandmaterials...

Reviews: